
Shrubs
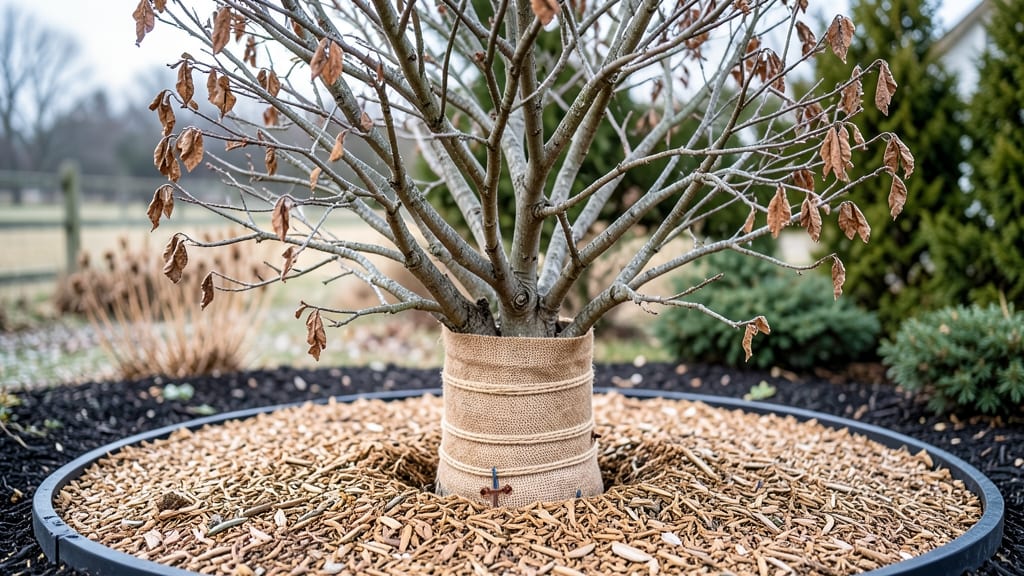
My wrapping bushes for winter method saved my hydrangeas from last winter’s 20-degree nights—thanks to this foolproof wrapping technique that stopped the frost from turning their buds into mush. 🌿 The secret isn't just covering them, but creating a breathable shield that protects without trapping moisture or smothering the plant.
You'll need burlap or frost cloth (not plastic—trust me, I learned that the hard way), twine or stakes, and a sunny afternoon to work. The goal is to wrap snugly but not tightly, leaving room for air circulation so the plant doesn't sweat itself to death under the cover.
By spring, you'll see those buds plump and ready to bloom, with no brown, crispy damage at the base. The method works for roses, lilacs, and even tender perennials—anything that struggles with your local winter lows.
Timing matters: wait until temperatures consistently dip below 30°F but before hard frost hits. In colder zones, add a layer of mulch first for extra insulation. Let's get those bushes winterized!
📚 In This Guide
- What you need
- Instructions
- Tips and common mistakes
- Wrapping up and next steps
What you need
- ● Burlap or landscape fabric: 4–6 feet wide, enough to cover each bush completely (calculate by measuring bush height × 2 + 1 foot for overlap). Pro tip: Burlap is breathable; fabric is lighter but may need extra securing. 💡
- ● Twine or sturdy garden ties: 100–200 feet (depending on bush size). Opt for recycled jute or plastic-coated twine for durability. ✨
- ● Metal or plastic stakes: 6–12 inches long, 2–4 per bush (to anchor wrapping). Bonus: Use leftover fence posts or rebar for heavy bushes. 🔨
- ● Scissors or utility knife: For clean cuts on fabric/burlap.
- ○ Optional but helpful: Anti-desiccant spray: (e.g., Wilt-Pruf) to reduce moisture loss. 🌡️
- ● Insulating foam tubes: For small-stemmed shrubs (e.g., hydrangeas).
- ● Heavy-duty stapler: If using fabric instead of twine.
- ● Choose a dry, mild day (40–60°F) to wrap—avoid frost or rain! ❄️☔
- ● Prune dead or weak branches before wrapping to reduce weight.
- ● Water bushes 1–2 days prior to wrapping (well-hydrated plants handle stress better). 💧
- ● Gather tools before the first hard freeze—don’t wait until winter hits! ⏰
Step-by-step instructions for wrapping bushes for winter
Here's the foolproof method I use to shield my shrubs from harsh winter winds and frost—tested across three seasons.
🪴 Step 1: Choose the Right Wrapping Materials
Gather burlap sacks, landscape fabric, or specialized frost cloth—these breathe while trapping heat. I prefer burlap for established bushes because it lets moisture escape while blocking wind. For delicate plants like hydrangeas, double-layered frost cloth works best. Avoid plastic sheeting—it suffocates plants and traps damaging moisture.
Measure each bush's height and width, then cut materials 6-12 inches larger than the plant's dimensions. You'll want enough slack to wrap snugly without crushing branches. For extra protection, layer 2-3 inches of mulch around the base after wrapping—this insulates roots from freezing ground.
✂️ Step 2: Prepare the Bush Before Wrapping
Start by pruning dead or weak branches—these can harbor pests and rot under insulation. Trim back any leggy growth that might tear your wrapping. Next, water the bush thoroughly 2-3 days before wrapping. The goal is moist (not soggy) soil—this prevents roots from drying out during winter dormancy.
Gently shake off excess snow from branches after storms. While snow acts as natural insulation, a thick buildup can break tender stems. I use a broom to sweep snow off hydrangeas and roses—never rub, or you'll damage buds. This prep step makes all the difference in spring recovery.
🌿 Step 3: Wrap the Bush Properly
Begin wrapping at the base of the bush, securing the material with twine or plastic ties every 12-18 inches. Pull the fabric snugly but not tight—you want to eliminate air gaps where cold drafts sneak in. For tall bushes, overlap layers by 6 inches to create a sealed barrier. Leave the top 6 inches open unless you're in a region with heavy snow loads.
For extra insulation, fill the wrapped area with straw or leaves—this adds another protective layer. I tuck in dry leaves around the base first, then wrap the fabric over them. This method works like a thermos, keeping roots 5-10°F warmer than ambient air. Check your work by running your hand inside the wrap—it should feel cool but not icy.
⏰ Step 4: Monitor and Adjust Through Winter
Inspect wraps every 4-6 weeks during winter. Remove them on mild days (above 40°F) to let air circulate and prevent mold. I set a calendar reminder—skipping this step leads to rot and bud loss. If snow accumulates against the wrap, gently brush it away to prevent weight damage.
Watch for ice buildup—this indicates poor airflow. Adjust ties if the wrap sags, and add extra layers if you notice frost crystals forming on branches. In late winter (when daytime temps hit 50°F), uncover bushes briefly to harden them off. This gradual exposure prevents shock when you fully remove protection in early spring.
🌱 Step 5: Remove Wraps at the Right Time
Wait until late winter or early spring when daytime highs consistently reach 50°F. Remove wraps on overcast days to avoid sudden temperature swings. I test by touching buds—if they feel firm but pliable (not brittle), it's safe to uncover. Cut the twine carefully with scissors to avoid damaging new growth.
After unwrapping, water lightly if the ground isn't frozen. This helps rehydrate roots after months of dormancy. Watch for new growth within 2-3 weeks—that's your signal the bush is recovering. Store wrapping materials in a dry place for next winter, and replace torn fabric immediately to maintain protection.
Tips & tricks for perfect winter bush wrapping
Here's what I've learned after wrapping hundreds of bushes—these tricks will help you avoid common pitfalls and get the best results.
Material Selection Matters: Don't just grab any fabric—burlap is my go-to for established bushes because it allows moisture to escape while blocking wind. For delicate plants like hydrangeas, I use double-layered frost cloth because it provides that extra 5-10°F warmth without suffocating the plant. The key is breathability: materials that trap moisture (like plastic) create ideal conditions for mold and rot.
Timing is Everything: That 2-3 day watering window before wrapping is crucial. You want the soil moist but not soggy—this prevents roots from drying out during winter dormancy. I test by pushing my finger into the soil: if it feels damp about 2 inches down, it's perfect. Too dry, and you'll need to water more; too wet, and you risk root suffocation under the wrap.
Insulation Check: After wrapping, run your hand inside the fabric—it should feel cool but not icy. This tells me the insulation is working properly without trapping too much heat. I also make a point to tuck in dry leaves around the base first, then wrap the fabric over them. This extra layer adds significant insulation, especially for young or tender plants that can't handle extreme cold.
Monitoring Through Winter: Those 4-6 week inspections are non-negotiable. I set calendar reminders because I've seen too many bushes develop mold from being wrapped too long without ventilation. When daytime temps hit 50°F, I uncover bushes briefly for a few hours to harden them off—this gradual exposure prevents shock when you fully remove protection in early spring.
Pro Tips for Wrapping Bushes For Winter
- Here's what I've learned after wrapping hundreds of bushes—these tricks will help you avoid common pitfalls and get t...
- Material Selection Matters: Don't just grab any fabric—burlap is my go-to for established bushes because it allows mo...
- Timing is Everything: That 2-3 day watering window before wrapping is crucial. You want the soil moist but not soggy—...
Frequently asked questions
Got questions about wrapping your bushes for winter? You’re not alone! Here are some of the most common concerns—and straightforward answers—to help you prep like a pro.
When is the best time to wrap bushes for winter?
Wrap bushes after the first hard frost (when temperatures dip below 25°F/-4°C) but before prolonged freezing. This protects tender growth while avoiding mold from trapped moisture. Unwrap in early spring when nights stay above freezing.
Can I use regular burlap or old blankets instead of specialty wraps?
Burlap, frost cloth, or even old blankets work—just ensure they’re breathable to prevent rot. Avoid plastic directly on foliage (it traps moisture and causes damage). Secure loosely with twine or stakes for airflow.
What if my bush looks damaged after winter? How do I know if it’s dead?
Wait until late spring to assess—bushes often look dead in winter but regrow. Scratch a small branch: if green underneath, it’s alive! Prune dead branches in early spring. For severe damage, check roots for signs of life before replanting.
Do I need to remove the wrap in mild winters?
Yes! Even in mild winters, leave wraps off to avoid heat stress when temps rise. Bushes need airflow to harden off naturally. Remove wraps gradually on warm days to prevent shock from sudden exposure.
What’s the fastest way to fix a wrap that’s blowing off in the wind?
Use U-clips, landscape staples, or heavy-duty clothespins to secure wraps tightly at the base and top. For extra stability, anchor with stakes or bricks. Avoid nails—they can damage bark. A snug (but not tight) fit works best!
Will wrapping bushes prevent all frost damage?
Wrapping reduces damage but doesn’t guarantee 100% protection. Factors like wind, sun exposure, and soil moisture also play a role. Pair wrapping with mulching (3–4 inches of organic mulch) for double defense against freezing roots.
Wrapping up and next steps
Wrapping your bushes for winter is a simple yet powerful way to shield them from harsh frost and ensure they bounce back stronger in spring. 🌿 With the right materials—like burlap, frost cloth, or mulch—and a little effort, you’re giving your plants the best chance to thrive. Now’s the time to act! Grab your supplies, follow the steps, and give your garden the winter care it deserves.
Ready to see your bushes flourish next season? Start wrapping today—your future garden will thank you!