
Pruning
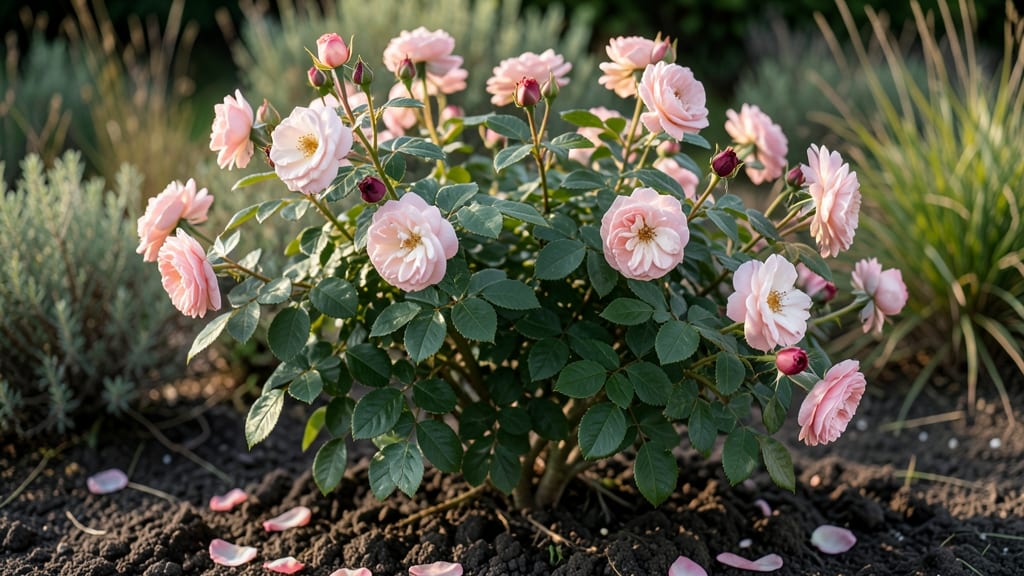
Your wedding day deserves a floral arch that feels like stepping into a fairytale. ✨ Rose bushes transformed into wedding-day arches create a breathtaking backdrop that guests will remember forever—romantic, fragrant, and completely unique to your special day.
The secret lies in choosing the right varieties that bloom reliably in your wedding season, then shaping them into an elegant structure that becomes the centerpiece of your ceremony space.
Start with climbing roses like 'New Dawn' or 'Blaze' for their long, lush canes that drape beautifully, or opt for sturdy shrub roses like 'Knock Out' for a fuller, bushier look. These varieties bloom repeatedly, so you can time your wedding for peak color.
Pair them with complementary plants like sweet peas, clematis, or ivy to fill gaps and add texture—think soft green leaves contrasting against the roses' vibrant blooms. The key is to begin shaping your rose arches 6-8 months before the wedding so the vines grow into their perfect arch form naturally.
Imagine this: your guests walking down the aisle beneath cascading rose petals, the air filled with their intoxicating scent. With the right support structure (think sturdy wooden or metal arches), your roses will create a living floral tunnel that photographs like a dream.
The best part? These arches aren't just beautiful—they're long-lasting, too. With proper care, your rose arches can remain part of your garden for years, becoming a cherished feature long after the wedding day.
For seasonal weddings, time your blooms by choosing early-spring varieties like 'Iceberg' for May ceremonies, or heat-tolerant types like 'Double Delight' for summer weddings. Add string lights or lanterns for evening ceremonies, and you've got a magical setting that feels personal and unforgettable.
The investment in rose arches pays off in show-stopping photos and a ceremony space that feels truly special—no temporary rentals required.
📚 In This Guide
- What you need
- Instructions
- Tips and common mistakes
- Wrapping up and next steps
What you need
- ● Rose bushes: 10–15 mature, healthy bushes (choose a mix of climbing roses like ‘New Dawn’ or ‘Blaze’ for volume and fragrance). Aim for 3–4 feet tall, with long, flexible canes.
- ● Floral wire: 20–30 feet of 18–20-gauge wire (for securing canes and adding structure).
- ● Bamboo stakes or wooden dowels: 8–10 stakes (4–6 feet tall) to support the arch frame.
- ● Twine or floral tape: 50+ feet (for tying canes to stakes and creating a base).
- ● Pruning shears: Sharp, clean pair (for trimming canes to 12–18 inches long).
- ○ Floral foam (optional): 1–2 blocks (to hydrate roses if using cut stems).
- ● Watering can or spray bottle: For keeping roses fresh pre-wedding.
- ● Greenery fillers: Eucalyptus, ivy, or ferns (for texture and gaps between roses).
- ● Ribbon or lace: 1–2 yards (to drape for a romantic touch).
- ● LED string lights (battery-operated): For an enchanting evening glow.
- ● Spray adhesive (floral-friendly): To secure lightweight additions like petals or confetti.
- ● Choose a location with partial shade (roses wilt in direct sun on wedding day!).
- ● Ensure bushes are pruned 2–3 weeks before the wedding for fresh growth.
- ● Check local weather forecasts—roses need dry conditions to last!
Step-by-Step instructions for creating a stunning rose bush wedding arch
Here's how to transform a simple rose bush into a breathtaking wedding arch that steals the show.
🌿 Step 1: Select and Prepare the Perfect Rose Bushes
Choose climbing or rambling rose varieties like 'New Dawn' or 'Blaze' for their vigorous growth and abundant blooms. You'll need 4-6 healthy bushes per arch, spaced 6-8 feet apart to create the arch shape. Prune each bush back by one-third in early spring to encourage bushier growth and more flowers.
Inspect each bush for signs of disease or pests before selecting. Remove any yellowing leaves or blackened canes immediately. The goal is a lush, disease-free base that will support the floral weight. Water the bushes deeply 2-3 days before the wedding to ensure they're hydrated but not waterlogged.
✂️ Step 2: Train the Roses to Form the Arch Structure
Use flexible canes (about ½-inch thick) to create the arch framework. Bend the canes into a U-shape, securing them at the base and 8-10 feet high at the apex. Tie the canes to the framework with soft garden twine, leaving 12-18 inches of space between each tie to avoid damaging the stems.
Weave the rose canes through the framework, spacing them 6-8 inches apart along the arch. Secure each cane with twine, ensuring they're evenly distributed. This creates a natural, organic look while providing structural support. Avoid over-tightening the twine—just enough to hold the canes in place without constricting growth.
🌹 Step 3: Layer Flowers for a Lush, Romantic Look
Start with the outer layer of blooms, spacing them 4-6 inches apart along each cane. Use a mix of fully open roses and budding blooms to create depth and texture. For a cascading effect, allow some flowers to hang freely at the arch's base. Secure each bloom with a small floral wire, twisting it gently around the cane.
Fill in gaps with greenery like eucalyptus or ivy, weaving it between the roses to soften the structure. Add small clusters of baby's breath or spray roses in the spaces between larger blooms. This creates a full, romantic effect without overwhelming the arch. Step back frequently to check for even coverage—you want a lush, balanced look from every angle.
☀️ Step 4: Maintain and Protect the Arch Until the Big Day
Water the arch deeply every morning for 7-10 days before the wedding to keep the roses hydrated. Mist the blooms lightly 2 hours before the ceremony to make them look fresh and vibrant. Avoid watering the day of the wedding—excess moisture can cause petals to droop or bloom too quickly.
Cover the arch with lightweight shade cloth during the day if temperatures exceed 85°F to prevent wilting. Secure the cloth loosely so it doesn’t crush the flowers. Check the twine ties daily to ensure they’re still secure. If any blooms begin to wilt, replace them with fresh ones 24 hours before the wedding to allow them time to adjust.
💍 Step 5: Final Touches for the Wedding Day
Arrive 2 hours before the ceremony to make final adjustments. Trim any spent blooms or overgrown foliage with sharp floral shears. Add a few extra spray roses or greenery to fill any gaps that may have opened up overnight. Lightly spray the blooms with water in a fine mist to refresh them.
Position the arch at least 10 feet away from any direct sunlight to prevent overheating. If possible, place it near a light breeze to keep the flowers moving naturally. Take a few test photos in the lighting conditions of the ceremony to ensure the arch looks its best. With these final touches, your rose bush wedding arch will be the star of the day.
Tips & tricks for perfect rose bush wedding arches
Between us, these little details make all the difference between a charming arch and a show-stopping centerpiece.
Selection Tip: When choosing your climbing or rambling rose varieties, prioritize bushes with at least 50% open blooms already on the canes. This ensures you'll have immediate floral impact without waiting for new flowers to open. Look for canes with multiple buds along their length—these will provide continuous blooms throughout your 7-10 day preparation period. The 'Blaze' variety is particularly reliable for this, as it produces abundant flowers that hold their color beautifully.
Structural Stability: For the arch framework, consider using willow branches instead of just canes—they're naturally flexible and provide additional support. When bending your framework into the U-shape, start at the apex and work your way down to the base. This prevents the structure from sagging in the middle. I've found that securing the framework with three anchor points (base, midpoint, apex) creates the most stable foundation. The 12-18 inch spacing between twine ties is crucial—any tighter and you risk damaging the canes' vascular system.
Floral Layering Secret: The key to that lush, romantic look in Step 3 is working from the inside out. Start by placing your largest blooms in the center of the arch, then build outward with medium-sized flowers, and finally fill gaps with smaller blooms and greenery. This creates a natural gradient that draws the eye. For the cascading effect at the base, use long-stemmed roses that can drape elegantly. I like to weave in ivy tendrils along the bottom to create a soft, flowing transition to the ground.
Heat Management: When temperatures exceed 85°F as mentioned in Step 4, don't just cover the arch—create a breathable environment. Use shade cloth with at least 50% openness to allow airflow while protecting from direct sun. I've had success with white shade cloth as it reflects heat rather than absorbing it. During the day, check the cloth every 2 hours to ensure no condensation is forming on the underside, which can encourage fungal growth. The 24-hour rule for replacing wilted blooms is golden—it gives new flowers time to hydrate and open properly before the big day.
Pro Tips for Rose Bush Wedding Day
- Between us, these little details make all the difference between a charming arch and a show-stopping centerpiece.
- Selection Tip: When choosing your climbing or rambling rose varieties, prioritize bushes with at least 50% open bloom...
- Structural Stability: For the arch framework, consider using willow branches instead of just canes—they're naturally ...
Frequently asked questions
When’s the best time to prune rose bushes for a wedding arch?
For a blooming rose bush arch, prune in late winter or early spring (just before new growth starts). If your wedding is in summer, opt for repeat-blooming roses (like ‘Knock Out’ or ‘Earth Kind’) and prune lightly in spring, then again in early summer to encourage fresh flowers. Avoid heavy pruning 6–8 weeks before the big day!
How long does it take for a rose bush to recover after pruning?
Most roses bounce back in 4–6 weeks, but recovery time depends on the variety and climate. For a wedding arch, start pruning 8–12 weeks ahead to ensure lush growth. If you’re short on time, consider potted roses (they recover faster) or a mix of roses and greenery for a fuller look.
Can I use a single rose bush as a wedding arch, or do I need multiple?
A single rose bush can work for a small, intimate arch (like 3–4 feet wide), but for a grand entrance, 3–5 bushes (spaced 12–18 inches apart) create a denser, more dramatic effect. Mix varieties for color and texture—think deep reds, soft pinks, and creamy whites for a romantic palette.
What if my rose bush doesn’t bloom on my wedding day?
Don’t panic! First, check if your roses are repeat-bloomers (they’ll rebloom after deadheading). If not, try these fixes:
- Add potted roses or filler flowers (like hydrangeas or baby’s breath) for instant color.
- Use rose hips (the seed pods) or greenery (eucalyptus, ivy) to mask sparse spots.
- Consider a partial arch—even a single bush with draping vines looks stunning!
How do I keep my rose arch looking fresh on the big day?
Here’s your last-minute care checklist:
- Deadhead spent blooms weekly to encourage new flowers.
- Water deeply 2–3 times a week (more in heatwaves).
- Provide shade cloth if your wedding is in peak summer.
- Add mulch to retain moisture and deter weeds.
Wrapping up and next steps
A rose bush wedding day isn’t just about beauty—it’s about creating a timeless, romantic backdrop that leaves guests in awe. With the right pruning, placement, and care, your floral arches will thrive and steal the show on your big day.
Whether you’re a DIY enthusiast or working with a pro, the key is confidence and creativity!
Now that you’re armed with tips and tricks, take the next step: sketch your dream arch layout, gather your supplies, and start pruning! 🌹✨ Your wedding day deserves floral magic—go make it happen!