
Planting
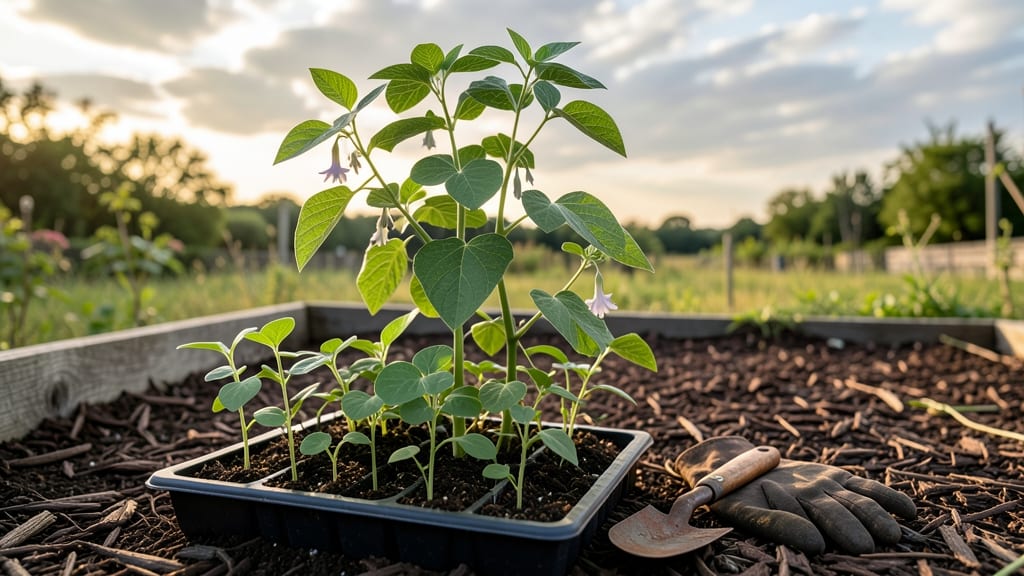
Roma II bush beans shoot up in just 4-7 days—the fastest I’ve ever grown. 🌱 That speed means you’ll have your first harvest in 50 days, and the plants keep producing for weeks after.
The secret lies in warm soil, consistent moisture, and the right spacing to prevent crowding. Start with loose, well-drained soil rich in compost—these beans hate soggy roots. Plant seeds 1 inch deep and 3-4 inches apart in rows 18 inches apart.
They thrive in full sun (6+ hours daily) and warm temperatures, so wait until the soil is at least 60°F before planting. Water gently to keep soil moist but not waterlogged—dry spells slow germination. Once sprouted, mulch with straw to retain moisture and suppress weeds.
You’ll see those first true leaves in a week, signaling it’s time to thin if needed. Perfect for small gardens, containers (5-gallon pots work), or even balcony planters. Just avoid planting where beans grew last year to prevent soil-borne diseases. Ready to grow your own steady supply?
📚 In This Guide
- What you need
- Instructions
- Tips and common mistakes
- Wrapping up and next steps
What you need
- ● Roma II Bush Bean Seeds: 1–2 lbs (or ~200–400 seeds, depending on spacing goals). Look for certified organic or non-GMO seeds for best results.
- ● Well-draining potting mix or garden soil: 5–10 gallons (for containers) or amended in-situ soil (for in-ground planting). Aim for a pH of 6.0–7.0.
- ● Compost or aged manure: 2–3 cups per planting hole or mixed into soil (rich in nitrogen and phosphorus for bush bean growth).
- ○ Slow-release fertilizer (optional but recommended): 10–20-10 NPK ratio, 1 tbsp per plant at planting time.
- ● Garden trowel or hand shovel: For digging planting holes (6" deep, 3–4" wide).
- ● Ruler or measuring tape: To maintain proper spacing (4–6" apart in rows, 18–24" between rows).
- ● Watering can or hose with a gentle spray nozzle: For consistent moisture (avoid soaking seeds).
- ○ Row markers or stakes (optional): To label rows and track planting dates.
- ● Mulch (straw, grass clippings, or shredded leaves): 2–3 inches thick to retain moisture and suppress weeds.
- ● Sunlight: Full sun (6–8+ hours daily). Roma II thrives in warm climates (plant after last frost when soil is at least 60°F).
- ● Water source: Consistent access to water (beans need 1–1.5 inches per week, especially during flowering).
- ○ Pest control plan (optional):
- ● Neem oil or insecticidal soap for aphids/beetles.
- ● Row covers to deter pests early in the season.
Step-by-step instructions for planting Roma II bush beans
Here’s how to get your fast-germinating Roma II beans in the ground for a bounty of tender pods.
🌱 Step 1: Prepare the Soil for Optimal Germination
Roma II beans thrive in loose, well-draining soil with a pH between 6.0 and 7.0. Work in 2-3 inches of compost into the top 6 inches of soil to improve fertility and moisture retention. If your soil is heavy clay, mix in 1 part perlite per 3 parts soil to prevent compaction—beans hate soggy roots.
Test the soil moisture a day before planting by squeezing a handful. It should hold together lightly but not drip water. If it’s bone-dry, water deeply the night before to give roots a head start. Avoid planting in cold, wet soil—wait until temperatures consistently stay above 60°F for best germination.
☀️ Step 2: Choose the Right Location and Planting Time
Roma II beans need full sun (6-8 hours daily) and warm soil to germinate quickly. Plant after the last frost when soil reaches at least 60°F, typically 2-3 weeks after your average last frost date. In cooler climates, use black plastic mulch to warm the soil 1-2 weeks before planting—this speeds germination by 3-5 days.
Space rows 18-24 inches apart and plant seeds 1-2 inches deep, 3-4 inches apart in rows. I like to plant in mounds or hills (3-4 seeds per mound) for better drainage and airflow. This also makes harvesting easier—no more bending over crowded rows.
💧 Step 3: Water and Monitor for Fast Germination
Water the soil to 1 inch deep immediately after planting to settle seeds and encourage quick germination. Roma II beans typically sprout in 5-10 days when conditions are ideal. Keep the soil evenly moist (not soggy)—dry spells slow germination, while overwatering can cause seed rot.
Once seedlings emerge, reduce watering slightly but maintain 1 inch of moisture per week. You’ll know you’re on track when the first true leaves (not the initial seed leaves) appear in 10-14 days. If seedlings look leggy or pale, they need more light—thin out crowded plants to 3-4 inches apart to prevent competition.
🌿 Step 4: Support Growth and Encourage Heavy Harvests
After 3-4 weeks, when plants reach 6-8 inches tall, add a light mulch (straw or grass clippings) to retain moisture and suppress weeds. Roma II beans are bush varieties, so they don’t need trellises, but a low cage or hoop can help keep plants upright if winds are strong. This also makes harvesting pods easier—no more reaching into tangled vines.
Fertilize lightly with a low-nitrogen, high-phosphorus fertilizer (like 5-10-10) when flowers appear. Too much nitrogen boosts foliage at the expense of pods. Watch for white flowers—they’ll turn into pods in 7-10 days. Harvest when pods are 4-5 inches long and firm for the best flavor.
Tips & tricks for fast-germinating Roma II bush beans
Here's what I've learned after growing these beans year after year—the little details that make all the difference between a decent harvest and an abundant one.
Soil Temperature is Non-Negotiable: The 60°F minimum isn't just a suggestion—it's the absolute floor for germination. I've tried planting earlier in cooler climates, and the seeds either rot or take three times longer to sprout. Use a soil thermometer to confirm before planting. If your soil runs cool, those 1-2 weeks with black plastic mulch can shave critical days off your growing season.
Planting in Mounds Saves Your Back: The instructions mention mounds as an option, but I've planted thousands of feet of rows—and my knees still thank me for switching. Those 3-4 seeds per mound create natural drainage while keeping plants upright. Plus, you'll harvest from waist height instead of bending over crowded rows. Just be sure to space mounds 18-24 inches apart to prevent competition.
Germination Timing is Your First Test: When those Roma II seeds sprout in 5-10 days (not the 14 days some varieties take), you'll know you've got ideal conditions. If germination stretches beyond 10 days, check for three things: soil temperature below 60°F, inconsistent moisture, or seeds planted too deep. I've found that planting just 1 inch deep—rather than the maximum 2 inches—often speeds things up by a day or two.
Harvesting Cues Are Subtle: The 4-5 inch pod size is a good guideline, but the real indicator is when the pods start to bulge between the seeds. That's when they're sweetest and most tender. I harvest every other day during peak production to encourage more flowers—and thus more pods. The key is to pick before the pods get fibrous, which happens fast once they hit 5 inches.
Pro Tips for Roma Ii Bush Bean Planting
- Here's what I've learned after growing these beans year after year—the little details that make all the difference be...
- Soil Temperature is Non-Negotiable: The 60°F minimum isn't just a suggestion—it's the absolute floor for germination....
- Planting in Mounds Saves Your Back: The instructions mention mounds as an option, but I've planted thousands of feet ...
Frequently asked questions
Got questions about growing Roma II bush beans? You’re not alone!
Here are some of the most common concerns—and their answers—to help you plant with confidence and troubleshoot like a pro.
When is the best time to plant Roma II bush beans?
For warm climates, plant Roma II beans after the last frost when soil temperatures reach at least 60°F (15°C). In cooler regions, start seeds indoors 4–6 weeks before the last frost or sow directly after the soil warms. These beans thrive in full sun (6–8 hours/day) and germinate in just 5–7 days—so don’t wait too long!
How far apart should I space Roma II bush bean plants?
Roma II bush beans are compact but need room to breathe. Space plants 4–6 inches apart in rows that are 18–24 inches apart. If growing in containers, use 1–2 plants per 5-gallon pot with well-draining soil. Overcrowding leads to poor airflow, increasing disease risk (like powdery mildew).
What’s the fastest way to germinate Roma II bush bean seeds?
Soak seeds in warm water for 4–6 hours before planting to kickstart germination. Use warm soil (70–80°F or 21–27°C) and plant seeds 1 inch deep. Keep soil moist but not soggy—germination happens fastest in consistently warm conditions. A clear plastic dome or row cover can help retain heat for speedier sprouts!
Can I grow Roma II beans in containers, or do they need a garden?
Roma II bush beans are perfect for containers if you choose the right setup. Use pots at least 12 inches deep with drainage holes and a lightweight potting mix. Add a trellis or cage if growing in small spaces to support vines. Just ensure containers get full sun and stay consistently moist—no garden required!
Why aren’t my Roma II bush bean seeds sprouting?
Slow or no germination usually stems from cold soil, dry seeds, or poor seed quality. Double-check soil temperature (use a seedling mat if needed), ensure seeds are planted 1 inch deep, and test moisture with your finger—soil should feel like a damp sponge. If seeds are old (over 2 years), try fresh ones or soak them overnight in warm water.
Do Roma II bush beans need trellising, or can they grow freely?
Roma II beans are bush-type, meaning they don’t need trellising—but you can add one if you want! Without support, vines sprawl 2–3 feet wide. A low cage or stakes can keep them organized and reduce disease risk by improving airflow. However, they’re just as happy growing freely in rows or containers!
Wrapping up and next steps
Growing Roma II bush beans is a rewarding journey that yields delicious, fast-returning harvests with minimal effort! Whether you're a seasoned gardener or a beginner, these beans thrive in diverse conditions—just give them sunlight, well-draining soil, and patience.
With proper spacing, consistent watering, and a little love, you’ll soon be feasting on fresh, flavorful beans straight from your garden. 🌱
Ready to elevate your harvest? Start by saving seeds from this season’s best pods or explore other high-yield varieties to diversify your garden. Happy planting—your taste buds (and dinner plate) will thank you! 🍽️