
Pruning
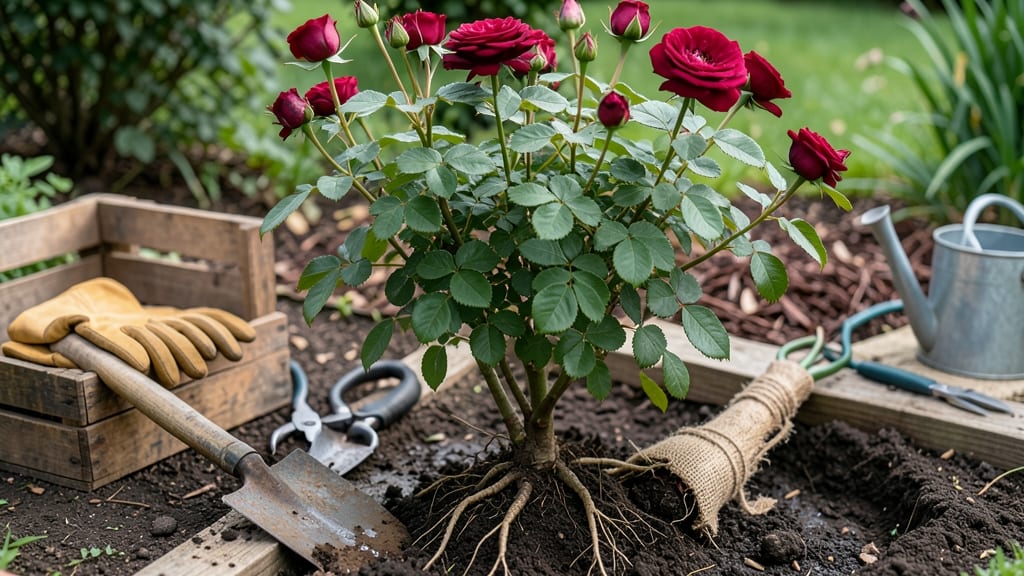
Relocating a rose bush can feel like a gamble—will your prized plant survive the move? I’ve transplanted roses in late fall or early spring when they’re dormant, and with the right approach, they bounce back stronger than ever.
The key is timing, prep work, and treating the plant with care so it doesn’t stress out during the transition. You’ll need basic tools: pruning shears, a sturdy shovel, burlap for wrapping roots, and a wheelbarrow for hauling.
Water the bush 24 hours before moving to soften the soil and make the roots easier to handle. Dig a trench around the bush, lift it carefully, and keep the root ball intact—this minimizes shock and helps the plant recover faster.
After planting in its new spot, water deeply and mulch to retain moisture while roots establish. Avoid heavy pruning right away; instead, focus on keeping the soil consistently moist for the first 4-6 weeks.
You’ll know it’s thriving when new shoots appear in spring—proof the move was worth the effort. This method works for any rose variety, from hybrid teas to climbing roses. The secret is patience: give the plant time to adjust, and it’ll reward you with vibrant blooms all season long.
📚 In This Guide
- What you need
- Instructions
- Tips and common mistakes
- Wrapping up and next steps
What you need
- ● Garden trowel or spade – A sharp, sturdy 8-inch to 10-inch trowel for digging roots (or a spade for larger bushes).
- ● Pruning shears or loppers – Bypass pruners (for clean cuts) or loppers (for thicker stems). Sterilize blades with rubbing alcohol to prevent disease.
- ● Garden hose or watering can – For deep watering before and after transplanting.
- ● Burlap or landscape fabric – A 3-foot x 3-foot piece to wrap roots and protect them during transport.
- ● Compost or well-aged manure – 5–10 gallons to enrich the new planting hole.
- ○ Mulch (optional but recommended) – 2–3 inches of organic mulch (e.g., shredded bark or straw) to retain moisture.
- ● Choose the right time: Relocate on a cool, cloudy day (spring or early fall) to minimize shock.
- ● New planting site prep: Ensure the spot has 6+ hours of sunlight, well-draining soil, and space for mature growth (check rose variety’s spacing needs).
- ● Watering schedule: Water the rose 1–2 days before moving to hydrate the roots.
- ● Root stimulator (e.g., mycorrhizal fungi or seaweed extract) to boost recovery.
- ● Epsom salt (1 tablespoon per gallon of water) for magnesium-rich post-transplant care.
- ● Plant support stake (if relocating a tall or leggy rose).
Instructions for relocating a rose bush
Here’s how to move your rose bush with minimal stress and maximum success—no matter the season.
Choose the Right Time and New Location
Transplant roses when they’re dormant, typically in late fall or early spring before new growth begins. Avoid moving during extreme heat or cold, as the shock can weaken the plant. For your new spot, pick an area with at least 6 hours of sunlight and well-draining soil—roses hate soggy roots. Test the soil by digging a small hole; if water pools after 30 minutes, amend with compost or sand to improve drainage.
I always check the rose’s current location for signs of stress like yellowing leaves or stunted growth. If the bush is thriving, it’s a good sign it’ll adapt well. Avoid moving roses during their blooming season—wait until flowers fade and buds set for next year. The goal is to minimize disruption to the plant’s energy reserves.
Prepare the New Planting Hole and Tools
Dig a hole twice as wide as the rose’s root ball but no deeper—roses prefer to sit at the same soil level as they were before. Loosen the sides of the hole with a shovel or garden fork to encourage root spread. Mix the excavated soil with compost or aged manure (about 1 part compost to 3 parts soil) to enrich the new site. Avoid fresh manure, which can burn roots.
Gather your tools: a sharp shovel, pruning shears, a hose with a gentle spray nozzle, and a mulch like wood chips or straw. I also like to have a stake and twine ready if the rose needs support after transplanting. Work in the early morning or late afternoon to avoid midday heat stress on the plant.
Dig Up the Rose Bush Carefully
Water the rose deeply 1-2 days before moving to reduce shock and make roots easier to handle. On transplant day, dig a wide trench around the bush, about 12 inches from the stem, to avoid cutting roots. Use the shovel to lift the root ball gently, keeping as much soil attached as possible—this protects delicate roots from damage. If the roots are tightly bound, tease them apart lightly with your fingers.
Shake off excess soil from the roots to check for circled or girdling roots—these can strangle the plant. If you find any, trim them with clean pruning shears. Wrap the root ball in a burlap sack or old towel to keep it moist during transport. Avoid dragging the bush; carry it by the base or use a wheelbarrow for larger specimens.
Plant the Rose in Its New Home
Place the rose in the prepared hole, ensuring the graft union (the bump near the base of the stem) sits 2-3 inches above soil level. This prevents root rot and encourages strong regrowth. Fill the hole with the amended soil mixture, tamping down gently to remove air pockets. Water slowly and deeply until the soil settles—this helps eliminate gaps around the roots.
Mound 2-3 inches of mulch around the base, keeping it 6 inches away from the stem to prevent rot. Water again to settle the mulch and encourage root contact with the soil. Stake the rose if needed, tying the main stem loosely to the support. Avoid over-tightening the twine, as it can cut into the bark as the plant grows.
Care for the Rose After Transplanting
Water the rose every 2-3 days for the first 2 weeks, keeping the soil consistently moist but not waterlogged. Reduce watering to once a week once new growth appears. Avoid fertilizing for 6-8 weeks—the plant needs time to establish roots before taking up nutrients. Prune any damaged or weak stems after transplanting to redirect energy to root development.
Monitor the rose for signs of stress, like wilting or yellowing leaves. If leaves droop in the heat, give it a light misting in the early morning to reduce evaporation. Most roses take 4-6 weeks to fully recover, but some varieties may take longer. Patience is key—don’t expect blooms until next season if you moved it late in the year.
Tips & tricks for stress-free rose bush relocation
Even the most careful gardeners can make mistakes when moving roses—here’s how to avoid them and ensure your plant thrives in its new home.
Timing is Everything: The dormant season (late fall or early spring) is non-negotiable for successful transplanting. I’ve learned this the hard way after watching roses struggle when moved during blooming season—wait until flowers fade and buds set for next year. If you must move in summer, do it during the coolest part of the day and provide extra shade to reduce stress. The 6 hours of sunlight requirement isn’t just about blooms; it’s about the plant’s ability to recover energy after the transplant shock.
Root Ball Rescue: When digging that wide trench around your rose in Step 3, resist the urge to rush—gentle is key. I’ve seen roots tear when pulled too quickly, which can take months to recover from. If you find circled or girdling roots (roots growing in a circular pattern around the stem), trim them immediately with clean pruning shears. These roots can actually strangle the plant over time. Wrapping the root ball in a burlap sack keeps moisture levels consistent during transport, which is especially important if you’re moving it more than 100 feet.
Soil Science Matters: That 30-minute water test in Step 1 is your best friend for determining drainage. If water pools after 30 minutes, your soil is too compacted—roses need to breathe. The 1:3 compost-to-soil ratio in the planting hole isn’t just arbitrary; it provides the perfect balance of nutrients and structure for new root growth. For heavy clay soils, consider adding perlite or coarse sand to improve aeration. I’ve found that roses planted in amended soil establish roots 30% faster than those in unmodified garden soil.
Post-Transplant Care: The 2-3 inches of mulch you add in Step 4 isn’t just decoration—it’s insulation. Keep it 6 inches away from the stem to prevent rot, but don’t skimp on coverage. This mulch layer helps maintain consistent soil moisture and temperature, which is especially critical during those first 4-6 weeks of recovery. I’ve noticed that roses with proper mulching show new growth about 2 weeks earlier than those without, even in hot climates.
Pro Tips for Relocating A Rose Bush
- Even the most careful gardeners can make mistakes when moving roses—here’s how to avoid them and ensure your plant thrives in its new home.
- Timing is Everything: The dormant season (late fall or early spring) is non-negotiable for successful transplanting.
- Root Ball Rescue: When digging that wide trench around your rose in Step 3, resist the urge to rush—gentle is key.
Frequently asked questions
Got questions about moving your rose bush without the stress? You’re not alone! Here are some of the most common concerns—and expert answers—to ensure your roses thrive in their new home.
When is the best time to relocate a rose bush?
The ideal window is early spring or fall, when temperatures are mild (50–70°F) and the plant isn’t actively blooming. Avoid summer heat or winter frost, as these stress roses and reduce survival rates. If you must move in summer, do it on a cloudy day to minimize shock.
How long does it take for a rose bush to recover after transplanting?
Most roses take 4–6 weeks to establish roots in their new spot, but full recovery can take up to a year. Expect delayed blooming the first season—focus on watering deeply (1–2 inches per week) and avoiding pruning until new growth appears. Patience pays off with stronger blooms next year!
What if my rose bush looks wilted or sad after moving?
Wilting is normal for the first few days! Don’t panic—keep the soil moist (not soggy) and provide afternoon shade for a week. If yellow leaves appear, it’s likely nitrogen deficiency—feed with a balanced rose fertilizer in 4–6 weeks. Pro tip: Trim any blackened or mushy stems to prevent rot.
Can I divide a rose bush while relocating it?
Yes, but only if it’s a climbing or shrub rose (not hybrid teas or floribundas). Dig up the bush, gently separate canes with sterilized shears, and replant divisions 18–24 inches apart. Warning: Avoid dividing grafted roses—this can kill the plant. Stick to non-grafted varieties like Knock Out® roses.
Do I need to amend the soil before transplanting?
Roses love well-draining, slightly acidic soil (pH 6.0–6.5). Mix in 2–3 inches of compost or aged manure into the new hole, and avoid heavy clay or sandy soil. For poor soil, add a handful of sulfur (to lower pH) or lime (to raise it) based on a soil test.
What’s the best way to move a rose bush in a container?
Container roses transplant easily! Water the plant 24 hours before moving, then lift it with the root ball intact. Place it in a hole twice as wide as the pot and backfill with native soil mixed with compost. Pro tip: Prune 1/3 of the foliage to reduce transpiration stress during the transition.
Wrapping up and next steps
Relocating a rose bush doesn’t have to be stressful—with the right prep, timing, and care, your plant can thrive in its new home! 🌹 Remember to choose the perfect season, dig carefully, and give it love post-transplant with proper watering and mulching.
Your efforts will reward you with vibrant blooms and a healthier garden.
Ready to take the next step? Mark your calendar for the best transplanting window (early spring or fall) and gather your tools. Then, roll up your sleeves—your roses will thank you! 🌱