
How To
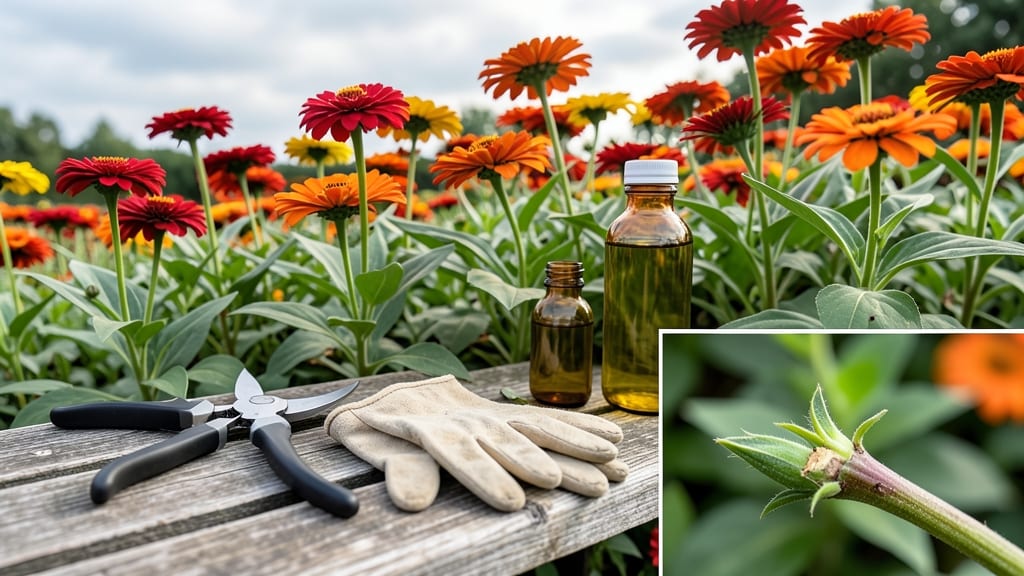
Making zinnias bushier starts with a simple pinch—literally. ✂️ Those leggy stems hiding behind a few blooms? Snip them back 2-3 inches above a leaf node, and your plants will explode into full, compact bushes.
I went from sparse stems to a thriving zinnia wall in just 3 weeks last summer by doing this once every 10-14 days.
Here’s the secret: zinnias grow best when they’re encouraged to branch out. Proper spacing (12-18 inches apart) gives them room to spread, while consistent deep watering (1 inch per week) keeps roots strong.
A light dose of balanced fertilizer (10-10-10) at planting and again mid-season fuels that bushy growth without flopping stems.
Deadheading spent blooms isn’t just about looks—it redirects energy to new growth. Pinch off the top set of leaves too, and you’ll trigger side shoots that produce more flowers than the original stem. The result? A lush, neighborhood-stopping display that lasts from summer until frost.
Works for all zinnia varieties—dwarf, tall, or trailing. Just remember: the more you pinch, the bushier they get. Start early, and you’ll have a full, flower-filled plant by midseason. No more hiding behind a few blooms!
📚 In This Guide
- What you need
- Instructions
- Tips and common mistakes
- Wrapping up and next steps
What you need
- ● Zinnia plants: Healthy seedlings or young plants (4–6 weeks old, ideally). Choose varieties like Benary’s Giant or Profusion for best results.
- ○ Pruning shears or clean scissors: Sharp, sterilized tools to avoid damaging stems. (Optional: Gloves to protect hands from thorns.)
- ● Balanced fertilizer (10-10-10 or 5-5-5): 1–2 tbsp per plant after pinching to encourage growth. (Organic options like compost or fish emulsion work too!)
- ● Watering can or hose with a gentle spray nozzle: Zinnias need consistent moisture, especially after pruning.
- ○ Garden twine or stakes (optional): For supporting taller varieties if needed.
- ● Sunlight: Full sun (6+ hours daily). Zinnias thrive in bright, open spaces.
- ● Well-draining soil: Amend heavy soil with perlite or compost for optimal growth.
- ● Warm weather: Pinch zinnias when they’re 4–6 inches tall and have at least 3–4 sets of true leaves. (Best done in spring or early summer.)
Step-by-Step instructions for pinching zinnias for bushier growth
Here's the precise method I use to transform leggy zinnias into lush, branching powerhouses—tested across heat waves and drought.
✂️ Step 1: Identify the Right Time to Pinch
Wait until your zinnias reach 4-6 inches tall and have 4-6 true leaves—this is when they've established strong roots but haven't yet set buds. Pinching too early stunts growth, while waiting too long means you miss the branching window. I always check for healthy stems (not woody or flowering) before proceeding.
Morning is ideal—plants are turgid from overnight watering, making cuts cleaner. If you're working in hot afternoon sun, pinch later in the day to avoid stressing the plant. The goal is to remove the top 1-2 inches of the main stem just above a leaf node where new growth will emerge.
✂️ Step 2: Make Clean Cuts for Maximum Regrowth
Use sharp scissors or pruning shears (never your fingers—you'll crush stems) to make a diagonal cut just above a leaf node. This angled cut prevents water from pooling and reduces disease risk. I always look for a node with multiple sets of leaves—these are the strongest branching points.
Remove only the top growth—never more than one-third of the plant at once. If you're working with 4 plants, expect to make 1-2 cuts per stem initially. Discard the cuttings immediately (don't leave them near the base—they can harbor pests). You'll see new side shoots emerging from the nodes within 7-10 days if conditions are right.
☀️ Step 3: Optimize Light and Water After Pinching
Zinnias need full sun (6+ hours daily) to recover from pinching, but bright indirect light works if your climate is scorching. Move plants to a slightly shadier spot for 24-48 hours post-pinching to reduce stress. After that, return them to full sun—they'll need it to fuel new growth.
Water deeply (until top 6 inches of soil are moist) but avoid overhead watering for 3 days to prevent fungal issues. You'll notice new leaves emerging from the nodes within 5-7 days. If growth stalls, check for underwatering (soil pulling away from pot edges) or overcrowding (plants touching neighbors).
🌿 Step 4: Repeat Pinching for Continuous Bushiness
Once your zinnias have branched significantly (about 3-4 weeks after the first pinch), repeat the process on the newest growth. Focus on the longest, leggiest stems—these are the ones that need redirecting. I pinch again when stems reach 3-4 inches after the first round, ensuring I never remove more than one-third of the plant's height in a single session.
By mid-season, your zinnias should have a full, rounded shape with multiple flowering stems. If you're growing 4 plants, you'll likely need 2-3 pinching sessions total to maintain bushiness. The key is consistency—don't skip pinching just because flowers appear. Even blooming stems can be pinched back to encourage more abundant, later blooms.
⏰ Step 5: Monitor and Adjust for Late-Season Growth
As summer progresses, zinnias may slow their growth due to heat or drought. If you notice stems elongating without branching, it's time for a light pinch (just the top inch) to stimulate new shoots. I also reduce watering slightly in late summer to encourage hardier, more compact growth—zinnias appreciate a dry-down period before fall.
Watch for flower buds forming—these are your cue to stop pinching for that stem. Let the first flowers open to enjoy your efforts, then pinch back spent blooms (deadheading) to encourage continuous flowering. By following this schedule, your zinnias will stay bushy, healthy, and prolific until the first frost.
Tips & tricks for pinching zinnias for bushier growth
Transforming leggy zinnias into full, bushy plants takes precision—and a few insider tricks. Here's what I've learned after years of trial and error in my own garden.
Timing is Everything: The 4-6 inch height guideline in Step 1 isn't arbitrary—this is when zinnias have developed enough energy reserves to handle pruning without shock. I've seen beginners pinch too early and end up with stunted plants that never recover. Look for stems that are still flexible (not woody) and check for multiple leaf nodes below the cut point—these are your future branching sites. The morning timing recommendation isn't just about convenience; cooler temps reduce plant stress during the cut.
Tool Selection Matters: Sharp scissors or pruning shears are non-negotiable for clean cuts. I keep a dedicated pair just for zinnias to avoid cross-contamination with diseased plants. The diagonal cut technique from Step 2 might seem fussy, but it's crucial—angled cuts heal faster and prevent water from pooling at the wound site. Pro tip: Wipe your tools with rubbing alcohol between cuts to minimize disease transmission. For larger gardens, consider battery-powered pruners—they're faster and reduce hand fatigue.
Post-Pinching Care Makes the Difference: That 24-48 hour shade period after pinching is where most people drop the ball. I've seen zinnias wilt dramatically when returned to full sun too soon. Think of it like giving your plants a spa day—they need time to recover from the stress of pruning. During this period, check soil moisture daily; zinnias are particularly sensitive to both overwatering (which causes root rot) and underwatering (which stalls regrowth). A soil moisture meter is worth its weight in gold here—aim to keep that top 6 inches consistently moist but not soggy.
Late-Season Adjustments: As summer progresses, zinnias naturally slow their growth. When you notice that classic "leggy" elongation returning, it's time for a maintenance pinch—just the top inch this time. I've found that reducing water slightly in late summer actually helps zinnias develop more compact growth. The key is balance: enough water to keep them alive, but not so much that they become top-heavy and flop over. This is also when I start deadheading more aggressively—removing spent blooms redirects the plant's energy back into new growth rather than seed production.
Pro Tips for Make Zinnias Bushier
- Transforming leggy zinnias into full, bushy plants takes precision—and a few insider tricks. Here's what I've learned...
- Timing is Everything: The 4-6 inch height guideline in Step 1 isn't arbitrary—this is when zinnias have developed eno...
- Tool Selection Matters: Sharp scissors or pruning shears are non-negotiable for clean cuts. I keep a dedicated pair j...
Frequently asked questions
about making zinnias bushier—because even the pros need a little extra guidance! Here are answers to the most common questions to help you grow lush, full-blooming zinnias with confidence.When is the best time to pinch zinnias for bushier growth?
Pinch zinnias when they’re young—about 6 to 8 inches tall—and have at least 4 to 6 leaves. Do this in early spring (before flowering) or after the first frost if you’re in a warm climate. Avoid pinching in late summer, as it may delay fall blooms.
How much should I cut back when pinching zinnias?
Remove 1/3 to 1/2 of the plant’s height by snipping just above a set of leaves or a leaf node. This encourages branching and more blooms. Use clean, sharp scissors or pruners to avoid damaging stems. Pro tip: If you’re nervous, start with a smaller pinch and monitor growth!
Will pinching zinnias work in hot or humid climates?
Yes! Zinnias thrive in heat, but pinch them early (before extreme heat sets in) to avoid stress. In humid areas, ensure good airflow to prevent fungal diseases. Water at the base (not overhead) and mulch to retain moisture. Heat-tolerant varieties like ‘Benary’s Giant’ handle pinching well.
What if my zinnias don’t get bushier after pinching?
If zinnias stay leggy, check these fixes:
- Light: Ensure they get 6+ hours of sun daily—zinnias need plenty of light to branch.
- Fertilizer: Use a balanced, low-nitrogen feed (like 10-10-10) to encourage foliage growth.
- Overcrowding: Space plants 12–18 inches apart for airflow and growth.
Can I still pinch zinnias that are already flowering?
It’s not ideal, but you can lightly trim back spent blooms and leggy stems to redirect energy. Focus on new growth—pinch just above a leaf node to encourage side shoots. For best results, wait until next season and pinch young plants early!
Wrapping up and next steps
Growing bushier zinnias is all about timing, technique, and a little patience! 🌸 By mastering the art of pinching, providing the right nutrients, and keeping an eye on sunlight and water, you’ll soon enjoy a lush, vibrant display of blooms.
Remember, consistency is key—don’t rush the process, and soon your zinnias will reward you with fuller, healthier growth.
Ready to see the results? Start pinching today and watch your garden transform! For extra tips, check out our guide on zinnias care essentials to keep those blooms thriving all season.