
How To
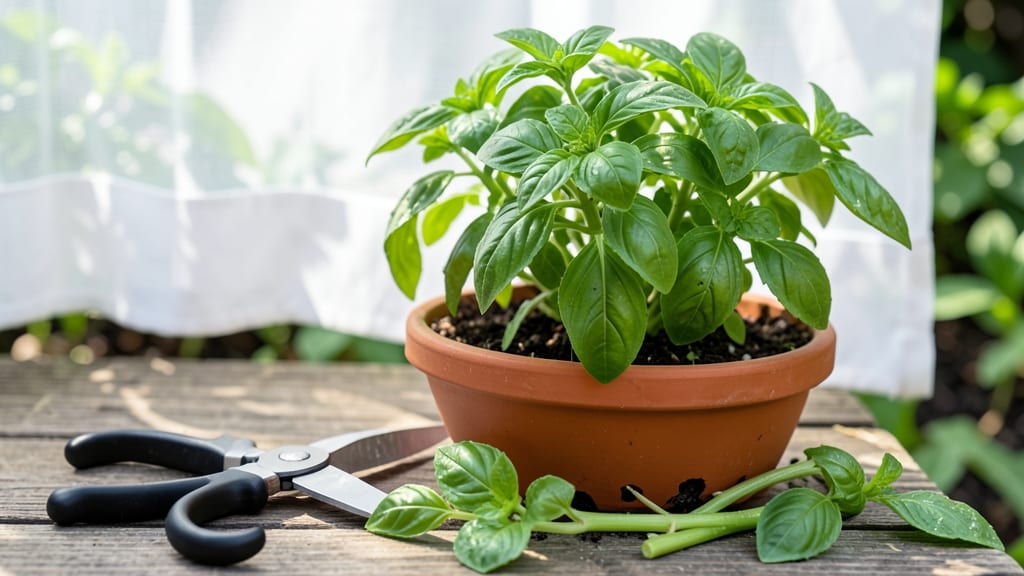
How to make basil bushier—pinching stems at the right time turns leggy plants into dense, leafy bushes—no fancy tools or secret fertilizers needed. 🌱 I’ve gone from sad, sparse basil to lush plants that keep producing all season, and the trick is simpler than you’d think. Most gardeners wait too long to prune, but the earlier you start, the bushier your plant becomes.
The magic happens when you pinch off the top set of leaves (about ¼ inch above a leaf node) when the plant has 6-8 true leaves. This encourages side shoots to grow instead of letting the plant stretch upward.
Do this every 2-3 weeks during the growing season, and your basil will fill out like a green cloud. Avoid cutting into woody stems—focus on soft, new growth.
Pair this with bright morning light (6+ hours daily) and watering when the top inch of soil feels dry. Overwatering causes root rot, which kills bushiness faster than any pruning mistake.
The result? A plant that stays compact, produces more leaves for cooking, and keeps flowering (and tasting) better longer.
This method works for potted basil on windowsills or garden beds, and it’s foolproof even for beginners. The only real mistake is waiting too long—so grab those shears and get pinching! Your kitchen (and pesto) will thank you.
📚 In This Guide
- What you need
- Instructions
- Tips and common mistakes
- Wrapping up and next steps
What you need
- ● Healthy basil plant(s) – Choose a thriving plant with at least 6–8 inches of growth (younger plants may need extra TLC).
- ● Clean, sharp pruning shears – Must be sterilized (rubbing alcohol or a 10% bleach solution works) to prevent disease. Avoid dull scissors—they crush stems!
- ○ Gloves (optional but recommended) – Protects hands from sap (which can irritate skin) and keeps stems clean.
- ● Watering can or spray bottle – For post-pruning hydration (avoid overwatering—basil hates soggy roots!).
- ● Well-draining potting mix or garden soil – If repotting, use a mix rich in organic matter (like compost) for faster recovery.
- ● Balanced liquid fertilizer (5-5-5 or 10-10-10) – Dilute to half-strength and apply 1–2 weeks after pruning for a growth boost.
- ● Rooting hormone (gel or powder) – Speeds up propagation if you’re harvesting cuttings for new plants.
- ● Small pots or trays – For propagating cuttings (4–6 inches deep with drainage holes).
- ● Plastic wrap or humidity dome – Creates a mini greenhouse to encourage root growth in cuttings.
- ● Pruning log or notebook – Track pruning dates and plant responses for future reference!
Step-by-Step instructions for pinching and pruning basil
Here's the simple method I use to turn leggy basil into thick, bushy plants bursting with flavor.
✂️ Step 1: Identify the Right Time to Prune
Wait until your basil has at least 4-6 sets of true leaves—these are the small leaves that appear after the initial seed leaves. You'll know it's ready when the plant is 4-6 inches tall and has a sturdy stem. Pruning too early stunts growth, while waiting too long means you're cutting back established stems that won't regrow as vigorously.
Check the weather too—avoid pruning in extreme heat (above 90°F) or cold (below 50°F). Morning is the best time to prune because the plant has moisture from the night and won't wilt as quickly.
✂️ Step 2: Pinch the Top Growth for Bushiness
Use clean, sharp pruning shears or your fingers to pinch off the top set of leaves just above a pair of lower leaves. This encourages the plant to branch out from those lower leaf nodes. I always make the cut at a 45-degree angle to prevent water from pooling on the stem.
Don't worry if it looks uneven—basil recovers fast. After pinching, place the plant in bright, indirect light (like a south-facing window with sheer curtains) for 3-5 days to recover. You'll see new side shoots emerging within 7-10 days—that's your signal it's working.
✂️ Step 3: Prune Lower Leaves for Airflow and Health
Once your basil has bushy out, remove any yellow or damaged leaves from the bottom of the plant. These leaves block airflow and can trap moisture, leading to fungal issues. Use your fingers to gently twist off leaves or snip with shears just above where the leaf meets the stem.
If your basil grows too tall and leggy, cut back the main stems by one-third to encourage even growth. Avoid cutting into woody stems—basil won't regrow from them. After pruning, water at the base (not overhead) to keep the foliage dry and prevent disease.
🌿 Step 4: Harvest Regularly to Encourage Growth
Harvest leaves from the outer edges of the plant to promote bushiness. Pinch off individual leaves or small stems in the morning when oils are most concentrated. Avoid taking more than one-third of the plant at once—this keeps the plant strong and encourages new growth.
If your basil starts flowering (those tiny white blooms), remove the flowers immediately. Basil puts all its energy into flowering, not leaf production. Snip off flower stems at the base to redirect energy back to leaf growth. With consistent pruning, your basil will stay lush and productive for weeks.
☀️ Step 5: Adjust Light and Water for Optimal Growth
After pruning, move your basil to a spot with 6-8 hours of sunlight daily. If indoors, supplement with a grow light (keep it 4-6 inches above the plant). Too little light makes stems stretch, while too much can scorch leaves—watch for yellowing edges as a sign of stress.
Water when the top inch of soil feels dry. Basil hates soggy roots, so ensure the pot has drainage holes. After watering, wait until the soil is slightly dry before watering again. Overwatering causes root rot, which kills the plant quickly.
Tips & tricks for perfect basil pruning
These simple tricks will help you transform your leggy basil into a thriving, leafy powerhouse without the guesswork.
Timing is Everything: The 4-6 inches height guideline in Step 1 is your golden rule—waiting until this stage ensures the plant has enough energy to regrow vigorously. I learned this the hard way after pruning too early and watching my basil struggle to recover. Also, that 90°F upper limit isn't just about comfort; extreme heat stresses plants, causing them to wilt or even die back. Morning pruning gives the plant a full day to recover before nightfall cooling.
The 45-Degree Angle Secret: When you make that pinch cut in Step 2, the 45-degree angle isn't just for looks—it prevents water from pooling on the stem, which could lead to rot or fungal issues. Think of it like creating a tiny roof that sheds water away from the cut. And don't stress about perfect symmetry; basil is forgiving. The key is making the cut just above a pair of leaves, not in the middle of a stem.
Recovery Period Matters: Those 3-5 days of recovery time in bright, indirect light after pinching are crucial. This gives the plant time to heal and redirect energy to new growth. I've seen basil plants that looked like they'd given up completely bounce back beautifully after this recovery period. Pro tip: Place your basil near a window with sheer curtains—direct sunlight during recovery can scorch the fresh cuts.
Flower Removal Strategy: When those tiny white blooms appear in Step 4, remove them immediately. Basil's energy goes into flowering, not leaf production, so those flowers are basically stealing from your harvest. Snip them at the base where they meet the stem—this redirects all that energy back to leaf growth. You'll notice within days that your basil starts putting out new leaves instead of flowers.
Pro Tips for Make Basil Bushier
- These simple tricks will help you transform your leggy basil into a thriving, leafy powerhouse without the guesswork.
- Timing is Everything: The 4-6 inches height guideline in Step 1 is your golden rule—waiting until this stage ensures ...
- The 45-Degree Angle Secret: When you make that pinch cut in Step 2, the 45-degree angle isn't just for looks—it preve...
Frequently asked questions
Got questions about growing a bushier basil plant? You’re not alone! Here are some of the most common concerns—and straightforward answers—to help you master the art of pruning and pinching for a lush, leafy basil bush.
How often should I pinch basil to encourage bushiness?
Pinch basil regularly—about every 2–3 weeks—to promote bushier growth. Start when the plant has 4–6 true leaves, then trim just above a leaf node (where leaves meet the stem). Consistency is key! Over-pruning can stress the plant, while under-pruning may lead to leggy growth. Aim for a balance.
When is the best time of day to prune basil?
Prune basil in the morning when the plant is hydrated and temperatures are cooler. This reduces stress and allows the plant to recover faster. Avoid pruning in the heat of the day or after sunset, as the wounds may take longer to heal, increasing the risk of disease.
What if my basil keeps growing tall and skinny instead of bushy?
Leggy basil usually means it’s not getting enough light or isn’t being pruned enough. Move it to a sunny spot (6+ hours of direct sunlight daily) and pinch the top growth regularly. If it’s already too tall, trim back by ⅓ to encourage branching. Yellow leaves? It might also need more water or nutrients.
Can I use basil prunings for anything besides cooking?
Use pruned basil stems in homemade remedies (like soothing insect bites or DIY facial toners), propagate new plants in water, or compost the clippings. Avoid overusing the same basil plant for propagation—let it recover between harvests to stay healthy and bushy.
Does cold weather affect how I should prune basil?
If you’re growing basil in cooler climates, reduce pruning as the plant slows growth in fall. Focus on harvesting leaves instead of aggressive pinching. In frost-prone areas, bring potted basil indoors before temperatures drop below 40°F (4°C) to extend its life. Prune lightly in early spring to encourage new growth.
| Quick Tip | Do This |
|---|---|
| Light Check | Rotate your basil pot weekly to ensure even sunlight exposure. |
| Watering | Water at the base (not leaves) to prevent fungal issues post-pruning. |
| Tool Prep | Sterilize scissors with rubbing alcohol between plants to avoid spreading disease. |
Wrapping up and next steps
Growing a lush, bushy basil plant is totally within your reach—just a little pinching, pruning, and patience go a long way! 🌿 By following these steps, you’ll encourage dense foliage, prevent legginess, and enjoy a bountiful harvest for all your favorite dishes.
Remember, consistency is key, so keep an eye on your plant and adjust your care as needed.
Now that you’re armed with the know-how, why not take the next step? Try experimenting with different basil varieties or even share your newfound skills with fellow gardeners. Happy growing—your kitchen (and taste buds) will thank you! 😊