
Propagation
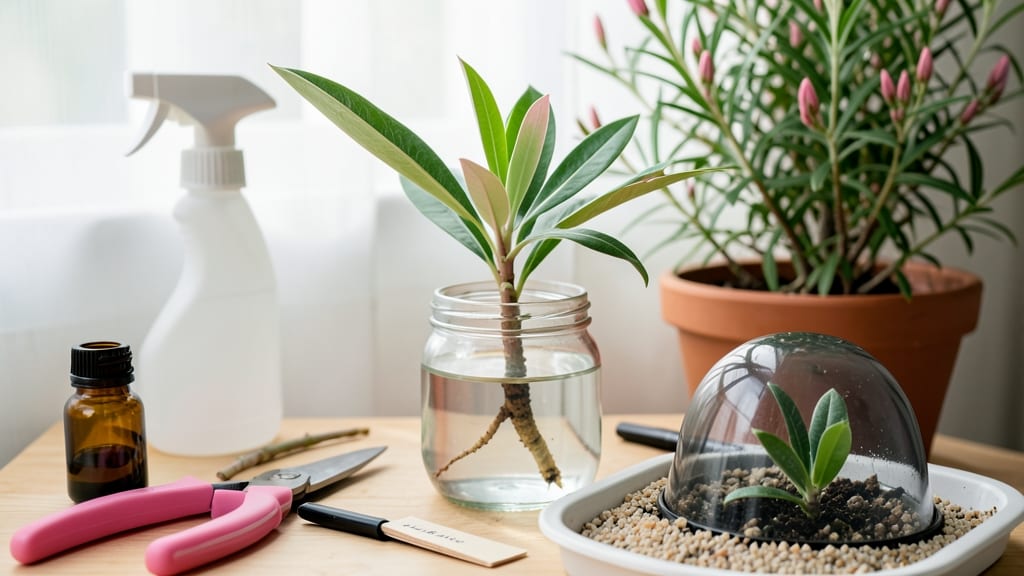
Growing a bush from a cutting is simpler than you think—no fancy equipment or green thumb required. 🌿 I’ve turned scraps into lush hydrangeas and oleander bushes using just a pair of shears, a jar of water, and a little patience.
The key is choosing the right cutting, giving it the perfect start, and avoiding these three rookie mistakes that kill root growth before it begins.
Start with 4-6 inch cuttings from healthy, non-flowering stems—just below a leaf node where roots naturally form. Strip the lower leaves (but leave a few at the top) to reduce moisture loss, then dip the cut end in rooting hormone powder (optional but helpful for tricky plants like bougainvillea).
Water or soil? Water’s foolproof for beginners, but soil keeps roots stronger for transplanting. My first oleander cutting rooted in water, but the hydrangea thrived better in moist perlite mix.
Within 2-4 weeks, you’ll see tiny roots forming—proof your cutting is working. Keep it in bright, indirect light and maintain 60-70% humidity (a plastic bag over the jar works).
Transplant when roots hit 1-2 inches long, and your new bush will be ready for the garden in 6-8 weeks. The best part? You’ll have free plants to share with neighbors or fill gaps in your landscape.
Timing matters: Spring and early summer are ideal, but many bushes (like oleander) root year-round in warm climates. Avoid cutting in extreme heat or cold—stick to mild days when the plant’s sap flows easily.
And here’s the secret weapon: patience. Even "difficult" plants like gardenias will root if you give them consistent moisture and light. Ready to try?
📚 In This Guide
- What you need
- Instructions
- Tips and common mistakes
- Wrapping up and next steps
What you need
- ● Healthy cuttings: 4–6-inch-long, semi-hardwood stems (from a mature, disease-free plant). Tip: Use sharp, clean pruners for the best results!
- ● Rooting hormone: A powder, gel, or liquid (like Clonex or Dynamite—pick one based on your plant type).
- ● Well-draining potting mix: A blend of 50% perlite/vermiculite and 50% peat moss or coconut coir (avoid garden soil!).
- ● Small pots or trays: 3–4 inch diameter containers with drainage holes (or a propagation tray with cells).
- ● Spray bottle: For misting cuttings (a 16–32 oz. spray bottle with water works perfectly).
- ● Clear plastic bag or propagation dome: To create humidity (a ziplock bag or humidity tent works for DIY setups).
- ● Pruning shears or sharp knife: Sterilized with rubbing alcohol to prevent infections.
- ● Watering can or cup: For hydrating the potting mix (avoid overwatering!).
- ● Heat mat: A bottom-heat mat (70–75°F) speeds up rooting for picky plants like oleander or gardenia.
- ● Grow lights: If natural light is weak, a LED grow bulb provides consistent light (12–16 hours/day).
- ● Fungicide: A natural fungicide (like neem oil) prevents mold if humidity runs high.
- ● Labels & markers: To track plant types (especially useful for large batches!).
- ● Garden twine or rubber bands: For securing plastic bags around cuttings.
Step-by-Step instructions for growing a bush from a cutting
Here's the straightforward method I use to grow healthy, thriving plants from cuttings—no fancy tools or guesswork.
🌱 Step 1: Take the Cutting at the Right Time
Choose a healthy stem that's about 4-6 inches long with at least 2-3 sets of leaves. The best time to take cuttings is in the morning when the plant is fully hydrated. Use clean, sharp scissors or pruning shears to make a clean cut just below a leaf node—this is where roots will form.
Remove the lower leaves, leaving only the top 2-3 leaves intact. This reduces moisture loss and focuses the plant's energy on root development. Dip the cut end in rooting hormone (optional but helpful for faster results). Here's the thing—if your cutting feels soft or mushy, it's not ready. You want firm, green stems that snap cleanly when bent.
💧 Step 2: Prepare the Rooting Medium and Plant
Fill a small pot or container with a well-draining mix—perlite or vermiculite works perfectly for rooting cuttings. Moisten the mix until it feels damp but not soggy. Insert the cutting about 2 inches deep into the medium, pressing gently to secure it without compacting the mix.
Place the pot in a clear plastic bag or cover it with a plastic dome to create a humid environment. This mimics the tropical conditions that encourage root growth. Keep the cutting in bright, indirect light—direct sun can scorch the leaves before roots form. You'll know the humidity is right when tiny water droplets form on the inside of the plastic.
⏰ Step 3: Monitor and Encourage Root Growth
Check the cutting every 3-5 days to ensure the medium stays moist but not waterlogged. Mist the leaves lightly if they look dry, but avoid soaking the cutting. Roots typically form in 4-6 weeks, though some cuttings may take longer. You'll see new growth at the top as a sign that roots are developing below.
Once you notice new leaves emerging and the cutting feels sturdy when gently tugged, it's time to transplant. Gradually remove the plastic cover over 5-7 days to acclimate the cutting to normal humidity. Plant it in a pot with regular potting soil, and keep it in bright, indirect light for another week before moving it to full sun.
Real talk: If a cutting yellows or wilts, don't panic—it might just need more humidity or less light. Adjust and watch closely. With patience, you'll have a thriving bush ready to fill your garden or home.
Tips & tricks for growing a bush from a cutting
These simple tricks will help you avoid common pitfalls and boost your success rate with plant propagation.
Selection Tip: When choosing your 4-6 inch stem in Step 1, look for vibrant green leaves and firm texture—these are signs of a healthy cutting. Avoid stems that feel woody or have brown spots, as they won't root well. I've found that semi-hardwood cuttings (new growth that's slightly matured) work best for most bush varieties. The key is finding stems that snap cleanly when bent—they should bend but not break easily.
Rooting Medium Secret: For Step 2, while perlite or vermiculite work perfectly, you can also create a budget-friendly mix using equal parts peat moss and coarse sand. The critical factor is drainage—water should flow through easily but not drain so quickly that the cutting dries out. After moistening your medium, let it sit for 10 minutes before planting to ensure it's evenly damp without being soggy. This prevents root rot while keeping the cutting hydrated.
Humidity Hack: Creating that humid environment in Step 2 is crucial, but you don't need to buy a special propagation dome. A clear plastic bag with a few small holes punched in it works perfectly—just make sure it's not airtight. I like to place my setups in the bathroom during summer months where humidity naturally runs higher. The goal is to maintain 70-80% humidity around the cutting without letting it sit in stagnant air.
Transplant Timing: In Step 3, when you notice new leaves emerging and the cutting feels sturdy when gently tugged, that's your cue—but don't rush the 5-7 day acclimation period. I've seen many beginners skip this step and end up with shocked plants that wilt dramatically. Gradually increase the time the plastic is off each day, starting with just 30 minutes on day one. This gradual transition helps the plant adjust to normal humidity levels without stress.
Pro Tips for Grow A Bush From A Cutting
- These simple tricks will help you avoid common pitfalls and boost your success rate with plant propagation.
- Selection Tip: When choosing your 4-6 inch stem in Step 1, look for vibrant green leaves and firm texture—these are s...
- Rooting Medium Secret: For Step 2, while perlite or vermiculite work perfectly, you can also create a budget-friendly...
Frequently asked questions
Got questions about propagating your dream bush from a cutting? You’re not alone! Here are some of the most common concerns—and their straightforward answers—to help you grow with confidence.
Can I take cuttings from any bush, or are some plants easier than others?
Not all plants are created equal when it comes to propagation. Easy-to-root plants like coleus, mint, or bougainvillea thrive from cuttings, while others (like roses or fruit trees) need special techniques, like grafting or hormone rooting powder. Always research your specific plant—some even prefer semi-hardwood (partially mature) cuttings over softwood!
How long does it take for a cutting to root, and how will I know when it’s ready?
Rooting time varies by plant: 2–4 weeks for fast growers (like herbs) and up to 8 weeks for slower ones (like olive trees). To check, gently tug the cutting—if there’s slight resistance, roots are forming! For a foolproof test, place the cutting in water before planting; roots should appear in 1–2 weeks if successful.
Should I use water or soil to root my cutting?
Both work, but it depends on the plant. Water is great for monitoring root growth (like with pothos or African violets) and keeps cuttings hydrated. Soil (or a soilless mix) is better for plants prone to rot (e.g., succulents) or those that root faster in humidity (like ferns). Pro tip: Use a clear container with water to track progress!
My cutting is turning yellow or mushy—what went wrong?
Yellowing or mushiness usually means overwatering, rot, or poor airflow. If the base of the cutting feels soft or smells foul, trim it back to healthy tissue and replant in fresh, well-draining soil. Boost humidity with a plastic bag (remove it once roots form!) and avoid letting the cutting sit in standing water. Prevention tip: Use a fungicide spray if your plant is prone to disease.
Can I root a cutting in winter, or do I need to wait for spring?
Many plants root year-round with the right conditions! However, tropical plants (like jasmine) thrive in warm weather, while woody shrubs (like hydrangeas) root best in early spring or late summer. If your space is chilly, use a heat mat or grow light to mimic ideal temps. Just avoid freezing temps—most cuttings need 60–75°F to root successfully.
What if my cutting doesn’t root—can I try again?
Many factors (light, humidity, plant health) affect success. If your first attempt fails, sterilize your tools, try a different cutting method (e.g., soil vs. water), or adjust environmental conditions. Some plants, like lavender, are notoriously tricky—don’t give up after one try! Keep experimenting, and soon you’ll have a thriving bush.
Wrapping up and next steps
Growing a bush from a cutting is a rewarding journey that combines patience, care, and a little green thumb magic! 🌱 With the right tools, timing, and techniques—like choosing healthy cuttings, mastering rooting hormone, and providing the perfect environment—you’ll soon be watching new roots sprout and leaves flourish.
Whether you’re a beginner or a seasoned gardener, this method opens doors to expanding your garden for free.
Now that you’re armed with the know-how, roll up your sleeves and give it a try! Start with one cutting today, and before you know it, you’ll have a thriving bush to share with friends or admire in your yard. Happy propagating! 🌿