
Picking
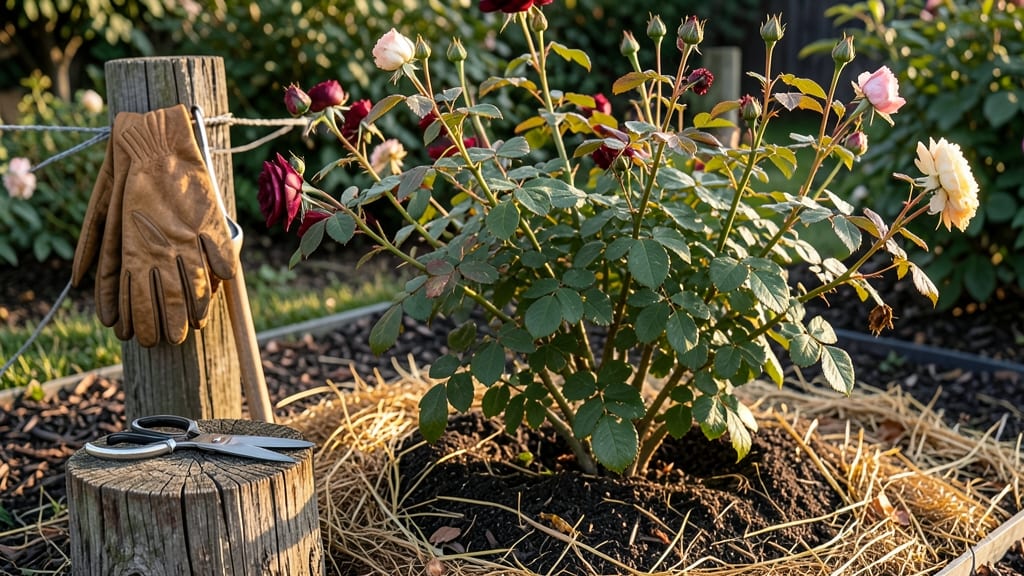
How to get the rose bushes ready for winter means the difference between next summer's blooms and a sad pile of dead canes. 🌿 I've learned that skipping this step is like leaving your car parked outside during a blizzard—it's asking for trouble. The key is protecting those delicate canes from freezing temperatures while still letting them breathe. Start with a light pruning to remove any dead or diseased wood, then add a thick layer of mulch around the base. I use 4-6 inches of straw or shredded leaves, piled up like a cozy blanket. For extra protection in harsh climates, wrap the canes in burlap or frost cloth—just don’t suffocate them. By spring, you’ll see fresh green shoots pushing through the mulch, ready to burst into blooms. The roses stay healthier, recover faster, and bloom earlier than neighbors who skip winter prep. It’s that simple. Works for all rose types—hybrids, climbers, even shrub roses. Here’s how to do it right, step by step.
📚 In This Guide
- What you need
- Instructions
- Tips and common mistakes
- Wrapping up and next steps
What you need
- ● Mulch: 2–4 inches of organic mulch (straw, shredded leaves, or pine needles). Avoid fresh wood chips—they can compact and trap moisture.
- ● Pruners: Sharp, clean bypass pruners (sterilized with rubbing alcohol to prevent disease).
- ● Garden gloves: Heavy-duty gloves to protect hands from thorns and debris.
- ● Watering can or hose: For a final deep watering before winter.
- ● Rose ties or twine: Soft, flexible ties (10–15 feet per bush) to loosely bundle canes.
- ● Burlap or frost cloth: Enough to wrap around the bush (1–2 yards per medium-sized rose).
- ○ Stakes or wire mesh: (Optional but helpful) To support heavy mulch or wrap.
- ● Anti-desiccant spray: (e.g., Wilt-Pruf) to coat canes and prevent moisture loss.
- ● Compost or aged manure: A light top-dressing (1–2 inches) before mulching for extra nutrients.
- ● Reflective mulch: (e.g., black plastic) to absorb heat in colder climates.
- ● Garden kneeler: For comfort while working close to the ground.
Step-by-Step instructions for preparing rose bushes for winter
Here’s the foolproof method I use every fall to protect my roses—no fancy tools, just smart prep.
🌿 Step 1: Prune Dead or Diseased Canes First
Start by inspecting each cane for signs of black spots, mold, or dead wood. Grab your pruners and cut back any affected branches at least 6 inches below the damage. You’re not shaping the bush yet—just removing anything that could harbor pests or rot over winter. I like to sterilize my pruners with rubbing alcohol between cuts to prevent spreading disease.
Watch for canes that look hollow or crumbly when you gently squeeze them—these are dead and should come out completely. Healthy canes feel firm and green underneath the bark. If you’re unsure, wait until spring to decide; pruning too aggressively now can stress the plant.
✂️ Step 2: Thin Out Overcrowded Canes
Now’s the time to thin the bush to improve airflow and sunlight penetration next season. Aim to leave 3-5 of the strongest, healthiest canes per bush. Cut the thinnest or weakest canes at the base, making clean cuts at a 45-degree angle just above an outward-facing bud. This encourages new growth in the right direction.
If your roses are still blooming, wait until after the final frost to do this step. You’ll know you’ve done it right when you can see light and air moving through the center of the bush. Overcrowded canes trap moisture and invite fungal problems, so don’t skip this.
🪴 Step 3: Apply a Layer of Mulch Around the Base
Spread 3-4 inches of organic mulch (like shredded bark or straw) around the base of the bush, keeping it 6 inches away from the stem to prevent rot. This acts like a blanket, insulating roots from freezing temperatures. I like to mound the mulch slightly higher around the south or west side of the bush, where cold winds typically hit hardest.
Water the bush deeply before mulching—this helps settle the soil and ensures the mulch stays in place. Avoid using fresh wood chips, as they can draw nitrogen from the soil as they decompose. Instead, opt for aged mulch or composted leaves for the best results.
🧥 Step 4: Wrap Canes for Extra Frost Protection
Take your rose cone or burlap wrap and secure it around the canes, starting from the base and working upward. Leave the top open to allow some airflow and prevent trapped moisture. Tie the wrap loosely with twine or clips—you want it snug enough to protect but not so tight it restricts growth. This shield keeps canes from cracking in freezing temps.
If you’re in a region with harsh winters, consider adding a layer of straw or pine needles over the wrapped canes for extra insulation. Check the wrap a few times during winter to ensure it hasn’t shifted or torn. A well-wrapped bush can handle temps down to 10°F without issues.
⏰ Step 5: Final Check Before Frost Hits
Do a quick walkthrough of your roses before the first hard frost. Ensure all cuts are sealed, mulch is evenly distributed, and wraps are secure. If you notice any gaps where cold air could sneak in, add a bit more mulch or adjust the wrap. This is the moment that matters—your prep now determines how well your roses bounce back in spring.
Real talk: Don’t wait until the ground is frozen to do this. Cold soil makes it harder for roots to absorb moisture, and frozen ground can damage canes when you try to adjust wraps later. Aim to finish by mid-to-late November in most climates, or when nighttime temps consistently drop below 32°F.
Tips & tricks for preparing rose bushes for winter
These small tweaks will make all the difference in keeping your roses healthy through freezing temperatures.
Pruning Precision: When you're cutting back diseased canes in Step 1, make sure to sterilize your pruners with rubbing alcohol between each cut. This prevents spreading any hidden pathogens to healthy parts of the bush. I also recommend using sharp pruners—they create cleaner cuts that heal faster, reducing the risk of infection during winter dormancy.
Thinning Strategy: In Step 2, when you're aiming to leave 3-5 of the strongest canes, focus on those with the most vibrant green bark and firm structure. These are the canes that will bounce back strongest in spring. If you're unsure which to keep, look for canes that have produced the most blooms this season—they're clearly thriving!
Mulch Placement: For Step 3, the 3-4 inches of mulch should be spread in a gentle mound around the base, but don't pile it directly against the stem. This creates a natural insulation barrier while preventing moisture buildup that could cause rot. I like to use straw because it breaks down slowly and adds organic matter to the soil as it decomposes.
Wrap Technique: When securing your rose cone or burlap wrap in Step 4, leave about 6 inches of space at the top—this allows for airflow and prevents trapped moisture that could lead to mold. For extra protection in harsh winters (below 10°F), add a layer of straw or pine needles over the wrapped canes. This creates an additional insulating layer without suffocating the plant.
Pro Tips for Get Rose Bushes Ready For Winter
- These small tweaks will make all the difference in keeping your roses healthy through freezing temperatures.
- Pruning Precision: When you're cutting back diseased canes in Step 1, make sure to sterilize your pruners with rubbin...
- Thinning Strategy: In Step 2, when you're aiming to leave 3-5 of the strongest canes, focus on those with the most vi...
Frequently asked questions
about preparing rose bushes for winter—because even the toughest gardeners have questions! Here are the most common ones, answered clearly and concisely.When is the best time to winterize rose bushes?
Start preparing your roses about 4-6 weeks before the first hard frost in your area (usually late fall). This gives them time to harden off naturally. If you’re in a mild climate, you can wait until temperatures consistently drop below 30°F (-1°C). Monitor your local frost dates to time it right!
Do I need to cut back my roses before winter?
Not necessarily! For most roses (especially hybrid teas and floribundas), wait until spring to prune—after the last frost. However, if your roses are diseased or overgrown, trim back one-third of the canes in late fall to reduce stress. Never prune in winter—it can invite pests and diseases.
What if I don’t have rose cones or burlap for wrapping?
No problem! Use what you have:
- Cardboard or newspaper: Wrap loosely around canes (avoid plastic—it traps moisture).
- Straw or leaves: Pile 4–6 inches around the base as mulch.
- Old blankets or towels: Secure with twine or clothespins.
How do I know if my roses are properly protected?
Your roses are winter-ready if:
- The canes are wrapped snugly (but not crushed) with breathable material.
- The base is mulched 4–6 inches deep with organic matter.
- There’s no standing water near the roots (drainage is key!).
- The soil is moist but not soggy—water lightly if the ground is dry.
Will wrapping my roses attract pests or mold?
If done correctly, wrapping won’t attract pests or mold! Use loose, breathable materials (like burlap or cardboard) and avoid sealing them completely. Plastic or tightly wrapped materials can trap moisture, leading to rot or fungal issues. Always leave the top open or slightly ajar for airflow.
Can I still plant new roses in the fall?
Yes! Fall is a great time to plant bare-root roses—they’ll establish roots before winter. Just:
- Soak roots in water for 1–2 hours before planting.
- Plant at the same depth as the graft union (or slightly deeper).
- Water thoroughly and mulch heavily.
- Avoid fertilizing—wait until spring.
Wrapping up and next steps
Getting your rose bushes ready for winter is all about protection, patience, and a little love—and you’ve got this! 🌹 By mulching, wrapping canes, and pruning strategically, you’re setting them up for a strong comeback in spring.
Think of it like tucking them into a cozy blanket before the cold sets in.
Now that you’re armed with the know-how, roll up your sleeves and give your roses the winter care they deserve. Next, take a moment to admire your hard work—your future blooms will thank you! 🌿