
Vegetables
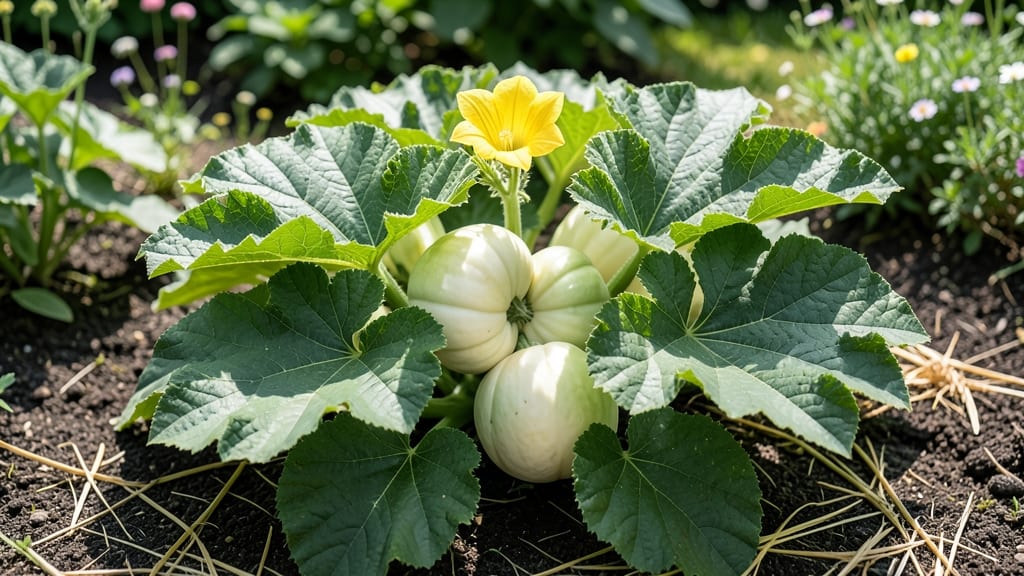
Growing white bush marrow squash in just 90 days feels like a gardening magic trick. 🌱 This compact, bushy variety packs serious flavor into a tiny footprint—perfect for small spaces or containers where sprawling vines won’t work.
The secret lies in its self-contained growth habit: no trellis needed, just a sunny spot and consistent care. Start seeds indoors 4-6 weeks before last frost or plant directly after soil warms to 60°F.
The bush form stays under 3 feet tall, making it ideal for patios or raised beds. Water deeply once a week (more in heatwaves) and watch those glossy white fruits swell—harvest when they’re 6-8 inches long and firm to the touch.
📚 In This Guide
- What you need
- Instructions
- Tips and common mistakes
- Wrapping up and next steps
What you need
- ● White Bush Marrow Seeds: 5–10 seeds (or 3–5 plants if starting with transplants). Opt for heirloom or organic varieties for best flavor.
- ● Well-draining soil: A mix of 60% topsoil, 30% compost, and 10% perlite/sand (pH 6.0–7.0). Test soil fertility beforehand!
- ● Fertilizer: Balanced organic fertilizer (e.g., 5-5-5 or 10-10-10) for planting.
- ● Compost or worm castings (1 cup per plant) for ongoing nutrition.
- ● Watering can or hose with a gentle spray nozzle (or soaker hose for efficiency).
- ● Mulch: Straw, shredded leaves, or grass clippings (2–3 inches thick) to retain moisture.
- ● Garden trowel or transplant spade for digging holes.
- ○ Gloves (optional but recommended for handling soil/seeds).
- ● Pruning shears (for trimming vines or dead leaves).
- ● Row cover or frost cloth (if planting in cooler climates).
- ○ Trellis or stakes (optional): Bush varieties don’t need support, but a small cage can help with airflow.
- ● Sunlight: Full sun (6–8 hours daily).
- ● Space: 3–4 feet between plants (or 4–5 feet in rows).
- ● Warmth: Soil temperature of at least 60°F (15°C) for germination.
- ● Patience: 90 days to harvest (but worth every wait!).
Step-by-Step instructions for growing white bush marrow squash
Here's the straightforward method I use to grow bushy, productive marrow plants every season.
🌱 Step 1: Start Seeds Indoors 3-4 Weeks Before Last Frost
Fill small seedling trays with sterile seed-starting mix and plant 2-3 seeds per cell at a depth of 1 inch. Marrow seeds germinate best in warm soil—keep the tray on a seedling heat mat set to 80-85°F until sprouts appear in 7-14 days. The outer seed coat is tough, so soaking seeds overnight in lukewarm water softens it and speeds germination.
Once seedlings emerge, move them to a sunny windowsill or under grow lights for 12-14 hours daily. Thin to the strongest seedling per cell after first true leaves appear. Harden off seedlings by gradually exposing them to outdoor conditions for 10-14 days before transplanting.
☀️ Step 2: Transplant After All Frost Risk Has Passed
Choose a location with full sun exposure (6-8 hours daily) and well-draining soil. Marrow plants thrive in warm, fertile soil with a pH of 6.0-7.0. Space plants 3-4 feet apart in rows 5-6 feet apart to allow for proper air circulation and prevent disease.
Dig holes slightly deeper than the root ball and place each seedling in, firming the soil gently around the base. Water deeply right after transplanting to settle the soil and reduce transplant shock. Avoid wetting the foliage to prevent fungal diseases.
💧 Step 3: Maintain Consistent Watering and Fertilization
Keep the soil evenly moist but not soggy—1 inch of water per week is ideal. Marrow plants are sensitive to drought, so water deeply at the base of the plant during dry spells. Mulch around the base with 2-3 inches of organic mulch to retain moisture and regulate soil temperature.
Fertilize lightly with a balanced 10-10-10 fertilizer every 3-4 weeks once the plants start flowering. Too much nitrogen will encourage leafy growth at the expense of fruit production. Watch for yellowing leaves—a sign of over-fertilization or nutrient imbalance.
✂️ Step 4: Prune and Monitor for Pests and Diseases
Remove any yellow or diseased leaves immediately to prevent the spread of disease. Prune excess foliage to improve air circulation, but avoid over-pruning, as marrow plants rely on their leaves for energy. Pinch off the first few flowers to encourage stronger vine growth and larger fruit later in the season.
Keep an eye out for common pests like squash bugs and cucumber beetles. Handpick pests early in the morning when they're sluggish, or use row covers to protect young plants. Rotate crops annually to prevent soil-borne diseases from taking hold.
🍎 Step 5: Harvest at Peak Ripeness for Best Flavor
White bush marrow squash is ready to harvest when the fruit reaches 8-12 inches in length and the skin is firm but not hard. Use a sharp knife or pruners to cut the fruit from the vine, leaving a small stem attached. Harvest regularly to encourage more production—overripe fruit can become woody and lose flavor.
Store harvested squash in a cool, dry place with good air circulation. They'll keep for 1-2 weeks at room temperature or up to 2 months in the refrigerator. Enjoy your homegrown marrow in soups, stews, or roasted dishes—it's a versatile and delicious addition to any meal!
Tips & tricks for growing white bush marrow squash
Took me years of trial and error to perfect these tricks—here's how to avoid the common pitfalls and grow the most productive marrow plants.
Germination Hack: That overnight soak in lukewarm water isn't just optional—it's the difference between waiting 14 days and seeing sprouts in 7. I like to use a fine-mesh strainer to hold seeds while soaking, making the process mess-free. The tough outer coat needs this softening to let moisture penetrate, which is why germination can take so long otherwise.
Lighting Strategy: In Step 1, when you're moving seedlings to grow lights, position them just 2-3 inches above the plants. This intense light mimics summer conditions and prevents leggy growth. I've found that using full-spectrum LED grow lights for those 12-14 hours gives me stronger seedlings than regular household bulbs. The key is maintaining that distance as they grow—too far and they'll stretch, too close and they'll burn.
Transplant Timing: The "all frost risk has passed" guideline is critical, but I've learned to add one more check: wait until soil temperatures reach at least 60°F at 4 inches deep. Cold soil slows root establishment, and marrow plants are particularly sensitive to transplant shock. I use a soil thermometer for this check—it's worth the small investment to prevent stunted growth. The deeper planting (slightly deeper than the root ball) also helps establish stronger roots in cooler conditions.
Fertilizer Timing: That 10-10-10 fertilizer recommendation is spot-on, but here's the nuance: I hold off on fertilizing until I see the first true flowers appear. Before that, the plants are focusing on leaf and vine growth, and extra nitrogen would just create lush foliage at the expense of fruit production. Once flowering begins, I apply that fertilizer every 3-4 weeks, but I cut back to every 6 weeks once the fruits start forming—too much nitrogen later in the season can make the squash more prone to cracking.
Pro Tips for White Bush Marrow Squash
- Took me years of trial and error to perfect these tricks—here's how to avoid the common pitfalls and grow the most pr...
- Germination Hack: That overnight soak in lukewarm water isn't just optional—it's the difference between waiting 14 da...
- Lighting Strategy: In Step 1, when you're moving seedlings to grow lights, position them just 2-3 inches above the pl...
Frequently asked questions
Got questions about growing white bush marrow squash? You’re not alone! Here are answers to the most common queries to help you cultivate a bountiful harvest with ease.
How long does it take for white bush marrow squash to mature?
White bush marrow typically reaches maturity in 75–90 days from seed, depending on your climate and growing conditions. If you’re in a shorter growing season, opt for faster-maturing varieties or start seeds indoors 2–3 weeks before the last frost for a head start.
Can I grow white bush marrow in containers or small spaces?
This variety thrives in containers as small as 5 gallons or raised beds, making it perfect for balconies or patios. Just ensure it gets 6–8 hours of sunlight daily and well-draining soil. A trellis can also help save space by encouraging vertical growth.
What pests should I watch out for when growing white bush marrow?
Common pests include squash bugs, cucumber beetles, and aphids. Use row covers early in the season to deter them, and handpick pests if spotted. Neem oil or insecticidal soap can also help protect your plants without harsh chemicals.
What can I do if my white bush marrow flowers but doesn’t produce fruit?
This usually happens due to poor pollination, heat stress, or lack of water. Hand-pollinate flowers with a small brush if bees are scarce, ensure consistent watering (1–2 inches per week), and avoid over-fertilizing with nitrogen. Shade cloth can also help protect blooms from extreme heat.
Are there any good substitutes for white bush marrow if I can’t grow it?
If you’re looking for similar textures and flavors, try yellow crookneck squash, zucchini, or pattypan squash. All three are versatile in cooking and adapt well to similar growing conditions. For a milder taste, butternut squash is another great alternative!
Wrapping up and next steps
Growing white bush marrow squash is a rewarding journey that brings vibrant, flavorful harvests to your table in just 90 days! 🌱 With the right soil, sunlight, and care, you’ll enjoy a bountiful yield of these versatile squashes—perfect for soups, roasting, or even spiralizing into noodles.
Whether you’re a beginner or seasoned gardener, this guide makes it simple to cultivate a thriving patch.
Now that you’re equipped with all the tips and tricks, it’s time to roll up your sleeves and get planting! Start with healthy seeds, monitor your plants closely, and soon you’ll be savoring the fruits of your labor. Happy growing—and enjoy your homegrown harvest! 🍆✨