
Fertilization
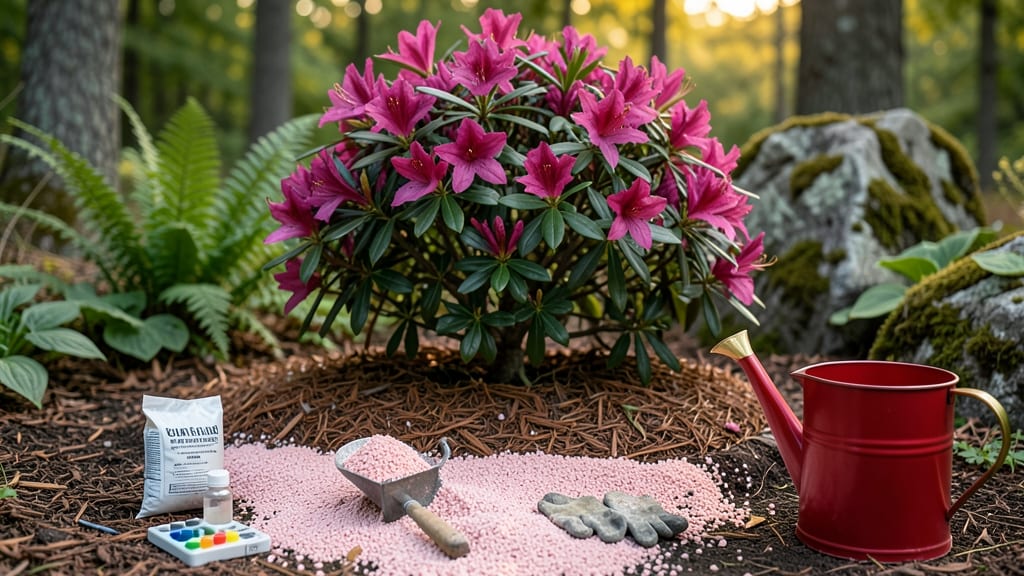
To fertilize azalea bushes at the right time means catching them in their two most responsive seasons—early spring and late fall—when they’re primed for growth 🌸.
Struggling to keep your azaleas blooming year after year? Timing your fertilization correctly is the secret weapon most gardeners overlook—and it can make the difference between lackluster growth and show-stopping spring displays.
In USDA Zone 6, where azaleas thrive, the first fertilization should happen right after buds form in early spring, while the second—if needed—goes in late fall to support root development before dormancy. Skipping these windows often means missing out on vibrant blooms and healthy foliage.
Below, I’ll walk you through the exact timing, the best fertilizers for acid-loving azaleas, and how to avoid common mistakes like over-fertilizing that can actually harm your plants.

Optimal azalea fertilization schedule: spring vs fall timing explained
Azaleas thrive on precision timing when it comes to fertilization—two key windows separate the difference between vibrant blooms and struggling shrubs. Most gardeners focus on spring feeding, but fall preparation is equally critical, especially in colder climates where winter stress weakens roots.
Understanding these seasonal cues helps azaleas store nutrients for next year's growth while avoiding common mistakes like over-fertilizing during dormancy.
In USDA Zone 6 (and similar temperate regions), the last frost date around April 15 signals the start of active growth—your first fertilization window. Meanwhile, late fall (October) is when azaleas prepare for dormancy, making it the perfect time to amend soil rather than apply heavy fertilizers.
Warmer zones (like Zone 7+) may extend their growing season, requiring slight adjustments to this schedule.
Why this timing matters: Azaleas are acid-loving plants that need consistent nutrients, but their root systems are sensitive to salt buildup from over-fertilizing. Spring feeding jumpstarts blooms, while fall prep ensures roots have the energy reserves needed to survive winter. Skipping either step often leads to poor flowering or weakened plants.
| Season | Key Task | Climate Adjustments | Signs of Success |
|---|---|---|---|
| Early Spring (April) | Apply balanced acid fertilizer (10-10-10) after buds form | Zone 6+: Wait until after last frost. Zone 7+: Start by mid-March | New green growth within 3 weeks |
| Mid-Summer (June) | Light feed if growth slows (optional) | Skip in drought-prone areas—focus on watering | Healthy foliage without leaf burn |
| Late Fall (October) | Add organic matter (compost/pine bark) NO fertilizer | Zone 5-6: Before first frost. Zone 7+: November | Soil stays moist but not soggy |
| Winter (Dec-Feb) | No fertilization—plant is dormant | Mulch 2-3 inches in cold zones | No leaf drop or brown tips |
For spring fertilization, I recommend a slow-release acid fertilizer like 10-10-10 granules, applied 2-3 inches away from the base to avoid root burn. Water thoroughly before and after to prevent salt buildup.
In my Zone 6 garden, I’ve seen azaleas double their bloom quantity when fertilized this way—just don’t exceed 1 tablespoon per plant.
Fall is where many gardeners go wrong. While you shouldn’t fertilize in fall, amending the soil with pine bark fines or peat moss helps maintain acidic pH levels (4.5–6.0).
I once skipped this step in a newly planted azalea, and it struggled through winter—now I always mulch with shredded leaves instead.
In warmer climates (Zone 7+), azaleas may stay active later into fall, so I adjust by lightly fertilizing in November only if new growth appears. However, never fertilize after October 15 in colder zones, as it encourages tender growth that won’t survive frost.
Always check your local frost dates to time it perfectly.
One common mistake is over-fertilizing in spring, which can burn roots or cause excessive foliage at the expense of blooms. I learned this the hard way when my azaleas produced leggy stems with few flowers after a heavy dose of nitrogen.
Since then, I’ve stuck to half the recommended dose for established plants and quarter-dose for young azaleas.
To test if your azaleas need fertilizer, look for yellowing leaves (especially older ones) or sparse blooms. Healthy azaleas should have dark green foliage and plentiful flowers. If you’re unsure, do a soil pH test—azaleas hate alkaline soil and may show deficiency signs even with proper fertilization.
Pro tip: Pair your spring fertilization with a deep watering to help nutrients reach the roots. In my experience, azaleas absorb nutrients best when the soil is consistently moist but not waterlogged. A drip irrigation system set to run for
Signs your azaleas need fertilizer (and when to skip it)
Azaleas are finicky about nutrients, and their leaves, blooms, and growth patterns send clear signals when they need a boost. Yellowing leaves, especially on new growth, is the most common sign your azaleas are hungry.
This often means a nitrogen deficiency, but it could also signal iron or magnesium shortages—common in alkaline soils. Sparse or small blooms another red flag, as azaleas need consistent nutrients to produce their vibrant spring displays.
Slow growth is another telltale sign, particularly if your azalea hasn’t gained more than 6 inches in a year.
Even if the plant looks healthy, pale green foliage or thin, leggy stems indicate it’s struggling to access the nutrients it needs. Brown leaf tips can also appear, especially in hot weather, but this might be due to over-fertilizing or poor watering practices rather than a nutrient deficiency.
⚠️ callout-warning
- Fall or winter: Azaleas enter dormancy by October—fertilizing now can encourage new growth that won’t survive frost.
- After heavy pruning: Wait 4-6 weeks to let wounds heal before fertilizing.
- If leaves are brown or crispy: This could signal over-fertilization or root burn—skip fertilizer and focus on water and mulch instead.
Timing matters just as much as what you fertilize with. Early spring (March-April), right after last frost and when buds begin to swell, is the best time to fertilize.
This gives your azaleas a nutrient kickstart for the growing season. Mid-summer (June-July) is the second window, but only if your azalea shows signs of slow growth or weak foliage—never fertilize after mid-August, as new growth won’t harden off before winter.
Over-fertilizing is a common mistake that leads to burned roots, leaf scorch, and fewer blooms the following year.
If you notice dark green leaves with brown edges or white crust on the soil surface, you’ve likely overdone it. Azaleas thrive on balance: too much nitrogen = lush leaves but no flowers; too little = weak growth and pale blooms.
Before reaching for the fertilizer, check your soil pH. Azaleas love acidic soil (pH 4.5–6.0).
If your soil is too alkaline, nutrients like iron and manganese become unavailable, even if you’re fertilizing. Test your soil in early spring—if the pH is above 6.0, amend it with sulfur or pine fines before fertilizing.
For container-grown azaleas, fertilize every 4-6 weeks during the growing season, but halve the recommended dose.
Potted plants dry out faster and are more prone to root burn from concentrated fertilizers. Water thoroughly after each feeding to flush out excess salts, and mulch with pine bark to maintain acidity and moisture levels.