
Shrubs
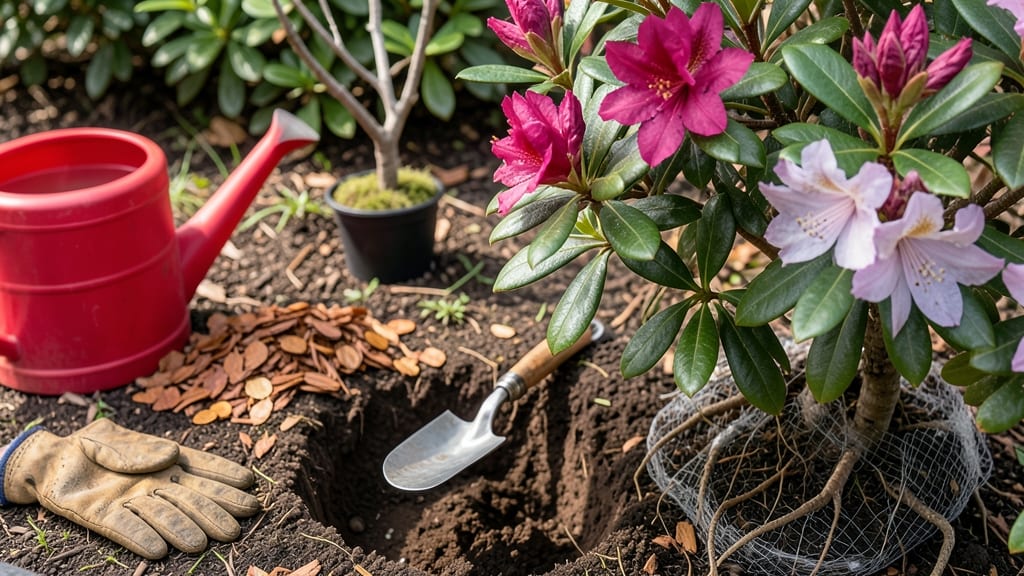
Replanting the azalea bushes at the right time makes all the difference—dormant season is your best shot. 🌿 I’ve moved azaleas twice now, and the ones replanted in late fall or early spring always bounce back stronger than those transplanted in summer heat.
The secret? Timing, soil prep, and handling the roots like they’re delicate glass. You’ll need acidic soil (pH 5.0–6.0), well-draining soil mix, and either root-bare or balled-and-burlapped bushes. Root-bare plants are cheaper but need extra care, while balled bushes transplant easier but cost more.
Both thrive with afternoon shade and morning sun—just like their wild cousins in the forest understory. After planting, keep the soil moist (not soggy) for the first 6 weeks and mulch heavily to protect roots.
You’ll see new growth within 4–6 weeks, and by next season, your azaleas will look like they’ve been there forever. The key is patience—rushed replanting leads to wilting, while careful timing leads to vibrant blooms for years.
Here’s where most gardeners mess up: digging too deep, skipping the root pruning, or ignoring soil acidity. Azaleas hate alkaline soil—test it first! Also, never let the roots dry out during transplanting.
I’ve seen azaleas recover from rough handling, but they’ll always struggle if the soil’s wrong or they’re planted too deep.
Once established, your azaleas will reward you with season-after-season blooms if you stick to their needs. The first year after replanting is critical—water deeply once a week if rain is scarce, and avoid fertilizing until spring.
With the right care, your azaleas will outlive you (and probably look better doing it).
📚 In This Guide
- What you need
- Instructions
- Tips and common mistakes
- Wrapping up and next steps
What you need
- ● Root-bare or balled-and-burlapped azaleas: 1–2 plants (or more, depending on your vision!)
- ● Shovel or spade: A heavy-duty garden shovel (18–24 inches) for digging holes.
- ● Garden trowel: For delicate soil adjustments and root trimming.
- ● Pruning shears: Sterilized shears to trim damaged roots or stems.
- ● Compost or peat moss: 2–3 gallons to improve soil drainage and fertility.
- ● Mulch (pine bark or pine needles): 2–3 inches to retain moisture and acidify soil.
- ● Garden hose or watering can: With a fine spray nozzle for gentle watering.
- ● Gloves: Garden or work gloves to protect your hands from thorns and soil.
- ● pH test kit: To check soil acidity (ideal: 4.5–6.0 for azaleas).
- ● Slow-release acid-loving plant fertilizer: 10–20 lbs (e.g., azalea/camellia blend).
- ● Root stimulator: A mycorrhizal fungus or seaweed-based product to boost root growth.
- ● Soil amendment: Sulfur or pine fines to lower pH if needed.
- ● Plant support: Stakes or cages for young/large azaleas.
- ● Drip irrigation system: For consistent moisture post-planting.
- ● Knee pad: Because comfort matters when you’re on your hands and knees!
Step-by-step instructions for replanting azalea bushes
Here’s how to replant azaleas—whether root-bare or balled—so they thrive in their new home.
🪴 Step 1: Prepare the New Planting Site
Azaleas love acidic, well-draining soil. Dig a hole twice as wide as the root ball (or root system for root-bare plants) but no deeper. This gives roots room to spread without settling too low. Mix the native soil with 3 inches of peat moss or pine fines—this keeps the pH between 5.0 and 6.0, which azaleas crave.
Test the drainage by filling the hole with water. If it drains in under 30 minutes, the site is ready. If not, add a 2-inch layer of coarse sand or gravel at the bottom to prevent waterlogging. Azaleas hate soggy roots, so proper drainage is non-negotiable.
🌱 Step 2: Handle Root-Bare or Balled Plants Differently
For root-bare azaleas, soak the roots in lukewarm water for 1-2 hours before planting. This revives them and prevents shock. Gently spread the roots outward in the hole—don’t bend them sharply, or they’ll break. For balled-and-burlapped plants, remove the burlap if it’s natural fiber (it’ll decompose and strangle roots). If it’s synthetic, cut it away.
Place the plant so the top of the root ball sits 1 inch above ground level. Azaleas hate having their trunks buried too deep. If you’re unsure, check the plant’s base—it should sit slightly higher than the surrounding soil after settling.
💧 Step 3: Backfill and Water Thoroughly
Fill the hole with the amended soil mix, tamping lightly as you go to remove air pockets. Avoid compacting too hard—you want roots to push through easily. Once planted, water deeply until moisture seeps 6 inches down. This helps roots establish quickly.
Mulch the base with 2-3 inches of pine straw or wood chips, keeping it 6 inches away from the trunk. Mulch too close causes rot, and azaleas are sensitive to moisture at their base. Water again in 3-5 days to encourage root growth.
☀️ Step 4: Provide Care for the First Critical Months
Azaleas need morning sun and afternoon shade—too much direct sun scorches their leaves. If replanting in summer, temporarily shade the plant with 50% shade cloth for the first 2 weeks. In cooler months, they tolerate more sun.
Water once a week (or more in hot weather) until new growth appears. You’ll know it’s working when you see bright green leaves within 4-6 weeks. Avoid fertilizing for the first 3 months—new roots need to establish before taking in nutrients.
Tips & tricks for perfect azalea replanting
Between us, replanting azaleas can make or break their long-term health. Here’s what nobody tells you—these details separate thriving bushes from struggling ones.
Soil Mix Matters: That 3 inches of peat moss or pine fines isn’t just a suggestion—it’s non-negotiable for azaleas. I learned this the hard way after replanting with regular garden soil and watching my azaleas struggle for years. Test your soil pH first (aim for 5.0-6.0) and adjust with sulfur if needed. The drainage test with water is your best friend—if it doesn’t drain in 30 minutes, you’re looking at root rot before you even see new leaves.
Root Handling is Critical: For root-bare azaleas, that 1-2 hour soak in lukewarm water is your secret weapon. Cold water shocks the roots, while hot water burns them. I use a bucket of water with a few drops of seaweed extract to give them a gentle nutrient boost during this time. When spreading roots, think "spider legs"—they should fan out naturally, not be forced into sharp bends.
Planting Depth Secret: That 1-inch rule above ground level is harder to judge than it sounds. Here’s my trick: After placing the plant, use a level to check the height of the root ball compared to surrounding soil. The top of the root ball should be level with your level’s bubble—this ensures proper settling without burying the trunk. I’ve seen too many azaleas develop trunk rot from being planted too deep.
Mulching Wisdom: The 2-3 inches of pine straw or wood chips is perfect, but placement is everything. Keep that mulch 6 inches away from the trunk—closer and you’ll smother the base. I use a ruler to measure from the trunk edge to ensure consistency. Also, avoid piling mulch against the stem during those first 3-5 days after planting—let the roots settle first.
Pro Tips for Replanting Azalea Bushes
- Between us, replanting azaleas can make or break their long-term health. Here’s what nobody tells you—these details s...
- Soil Mix Matters: That 3 inches of peat moss or pine fines isn’t just a suggestion—it’s non-negotiable for azaleas. I...
- Root Handling is Critical: For root-bare azaleas, that 1-2 hour soak in lukewarm water is your secret weapon. Cold wa...
Frequently asked questions
Got questions about replanting azaleas?
You’re not alone! Here are answers to the most common concerns—whether you’re dealing with timing, root health, or post-planting care.
When is the best time to replant azalea bushes?
Spring (after last frost) or early fall (before hard frosts) are ideal. Avoid replanting in summer heat or winter cold, as roots struggle to establish. Root-bare azaleas can even be planted in dormant seasons (late fall/winter) for better survival.
Can I replant azaleas in full sun?
Azaleas thrive in partial shade (4–6 hours of morning sun). Full sun can scorch leaves and stress roots. If your yard has no shade, choose a spot with afternoon shade or plant near trees with dappled light. Mulch helps retain moisture!
What if my azalea’s roots look dry or damaged?
Soak root-bare azaleas in water for 1–2 hours before planting to rehydrate roots. Trim any mushy or blackened roots with clean shears. For balled-and-burlapped plants, gently loosen the burlap and check for root rot—remove affected areas and replant promptly.
Should I fertilize right after replanting?
Wait 6–8 weeks before fertilizing to avoid shocking new roots. Use an acid-loving plant fertilizer (like 8-3-9 with sulfur) in early spring. Over-fertilizing can burn roots—stick to light applications until the bush recovers.
What if my azalea doesn’t bloom after replanting?
Patience! New roots take 1–2 years to establish. Ensure proper watering, shade, and soil acidity (pH 4.5–6.0). If it’s been 3+ years with no blooms, check for pests (like lace bugs) or nutrient deficiencies. Prune spent blooms in late spring to encourage next year’s flowers.
Pro Tip:
Mulch heavily (2–3 inches) with pine bark or pine needles after replanting to mimic natural forest conditions. This keeps roots cool, moist, and mimics their native habitat—boosting survival rates!
Wrapping up and next steps
Replanting azalea bushes—whether root-bare or balled—can transform your garden into a vibrant, fragrant haven with the right care. 🌸 Remember, patience and attention to soil, spacing, and watering are key to helping your azaleas thrive.
Once you’ve planted them, monitor their progress and adjust care as needed to ensure long-term beauty.
Now that you’re ready to replant, grab your gloves and get started! Your future blooms will thank you—and your garden will be the talk of the neighborhood. Happy planting! 🌱