
Landscaping
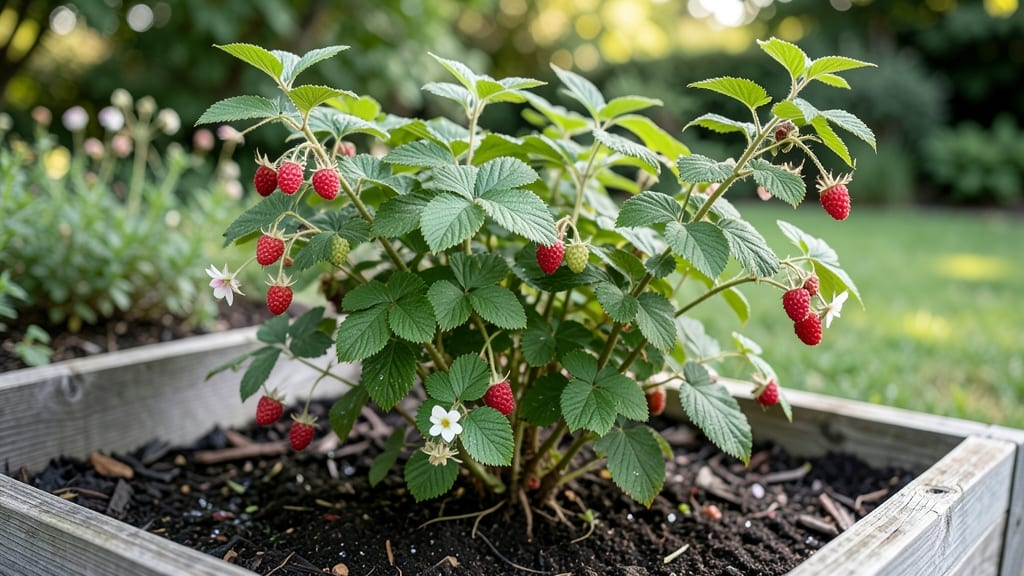
Raspberry bushes aren’t just for berries—they’re the secret weapon of low-maintenance, high-impact landscaping. 🌿 I’ve turned mine into a year-round privacy screen that blooms in spring, feeds pollinators in summer, and adds winter structure with its arching canes. The best part? They produce fruit while looking intentional.
These thorny beauties thrive in zones 3-9, making them versatile for borders, hedges, or mixed beds. Pair them with lavender (for fragrance and pest control) or salvia (for late-season color) to create a pollinator magnet.
Their glossy leaves add texture, while the canes provide natural trellising for climbing roses or clematis. By late summer, you’ll harvest sweet berries while admiring the deep green foliage and delicate flowers. The canes’ arching habit softens hard edges, and their winter skeleton adds architectural interest.
Just prune annually to keep them tidy and productive. Works as a living fence, a flower bed accent, or even a container specimen in dwarf varieties. Here’s how to design with them without sacrificing beauty or berries.
📚 In This Guide
- What you need
- Instructions
- Tips and common mistakes
- Wrapping up and next steps
What you need
- ● Raspberry plants: 3–5 healthy bare-root or potted raspberry bushes (everbearing or summer-bearing varieties). Look for disease-resistant types like Heritage or Boyne.
- ● Soil amendments: 5–10 lbs of compost or well-rotted manure per plant
- ● 1–2 lbs of balanced fertilizer (10-10-10 or organic options like fish emulsion)
- ● 1 lb of lime (if your soil is acidic; test first!)
- ● Mulch: 2–3 inches of wood chips or straw to retain moisture and suppress weeds.
- ● Support system: T-posts or stakes (6–8 ft tall, 1 per 3–4 bushes)
- ● Garden twine or raspberry trellis wire (16–18 gauge, 6–8 ft long)
- ● Shovel or trowel
- ● Garden gloves
- ● Pruners (sterilized)
- ● Measuring tape
- ● Wheelbarrow (for hauling soil/amendments)
- ● Garden hose or watering can
- ● Sunlight: 6–10 hours of full sun daily (partial shade works for hotter climates).
- ● Well-draining soil: Raspberry bushes hate soggy roots! Amend clay soil with sand or peat moss if needed.
- ● Spacing: Plant bushes 2–3 ft apart in rows 6–8 ft apart (for trellising).
- ● Water access: Deep watering 1–2 times per week (more in extreme heat).
- ○ Optional (but helpful!): Drip irrigation kit for consistent moisture
- ● Bird netting to protect berries from pests
- ● Soil pH test kit (ideal range: 5.5–6.5)
Step-by-step guide to designing a stunning raspberry bush landscape
Here’s how to create a thriving, visually dynamic raspberry landscape that delivers beauty through all four seasons.
🌱 Step 1: Select and Prepare the Planting Site
Raspberry bushes thrive in full sun to partial shade (at least 6 hours of direct sunlight daily), so choose a location with well-draining soil and protection from strong winds. I always test the soil pH—raspberries prefer slightly acidic to neutral (5.5–7.0). If your soil is heavy clay, amend it with 2–3 inches of compost mixed into the top 12 inches of soil to improve drainage and fertility.
Dig a hole twice as wide as the root ball but only as deep as the container’s base. This encourages roots to spread horizontally rather than settling too deep. Space 4 bushes 4–6 feet apart in a square pattern for optimal airflow and sunlight penetration. Here’s the thing—raspberries grow aggressively, so plan for their mature size early.
☀️ Step 2: Plant and Mulch for Year-Round Health
Remove the raspberry bush from its container and gently loosen the roots if they’re circling. Place the plant in the hole so the root crown sits just above soil level—burying it too deep causes rot, while leaving it exposed risks drying out. Backfill with native soil mixed with 1 cup of balanced fertilizer (10-10-10) per bush to kickstart growth.
Water deeply right after planting to settle the soil, then apply a 3-inch layer of organic mulch (like wood chips or straw) around the base, keeping it 6 inches away from the stem. Mulch conserves moisture, suppresses weeds, and regulates soil temperature. I always reapply mulch annually in late winter—this keeps roots insulated during cold snaps and prevents erosion.
🌿 Step 3: Train Canes and Prune for Structure
In their first year, focus on establishing strong canes rather than harvesting. Remove any weak, damaged, or crossing canes at the base to reduce competition. By late winter (just before buds swell), prune old fruiting canes (those that bore fruit the previous year) down to the ground. Keep 2–3 of the strongest, most vigorous canes per plant—they’ll produce the best fruit next season.
As new canes emerge in spring, install trellis supports (like T-posts with wire or a sturdy frame) to train them vertically. This prevents disease spread, improves air circulation, and makes harvesting easier. Tie canes loosely to the trellis with soft plant ties every 12–18 inches—tightening too much strangles growth.
✂️ Step 4: Maintain Through the Growing Season
Water deeply once a week during dry spells, aiming for 1–1.5 inches of water per week. Raspberries are drought-tolerant once established, but consistent moisture prevents fruit from becoming tough or splitting. I always water in the early morning to reduce fungal risks—wet foliage at night invites disease.
Fertilize in early spring and mid-summer with a low-nitrogen, high-potassium fertilizer (5-10-10) to encourage fruiting. Avoid high-nitrogen feeds—they promote leafy growth at the expense of berries. Watch for yellowing leaves (often a sign of nitrogen deficiency) or stunted growth (possible phosphorus shortage). Adjust your fertilizer blend accordingly.
🍇 Step 5: Harvest and Prepare for Winter
Harvest raspberries when they’re fully red and plump, usually in late summer to early fall, depending on your climate. Pick them in the morning when sugar levels are highest. Gently twist the berries off the cane—don’t pull, or you’ll damage the fruit. I always leave a few berries on the plant to ensure next year’s canes develop properly.
After harvesting, prune out any diseased or dead canes and remove last year’s fruiting canes at the base. Apply a thick layer of mulch (4–6 inches) around the base to protect roots from freezing temperatures. In colder climates, wrap young bushes with burlap or frost cloth during hard freezes. This prep ensures your raspberries bounce back stronger each spring.
Tips & tricks for perfect raspberry bush landscaping
Creating a thriving raspberry landscape takes more than just planting—these pro tips ensure your bushes flourish year after year.
Site Selection Secrets: While the instructions mention full sun to partial shade, I’ve found raspberries actually perform best with at least 8 hours of direct sunlight daily in warmer climates. Test your site in summer—if leaves show brown tips by midday, you’ll need to supplement with shade cloth during peak heat. The 6 hours guideline works for cooler regions, but southern exposures often need more sun for optimal fruiting.
Soil Prep Pro Tip: Don’t just amend clay soil—test it first! I use a simple pH kit to verify the 5.5-7.0 range before adding compost. For heavy clay, mix in 2 parts compost to 1 part sand to create the perfect balance. Pro tip: Spread a 1-inch layer of coarse sand at the bottom of the planting hole to create a drainage layer before adding amended soil.
Pruning Precision: When pruning old fruiting canes in late winter, cut them back to the ground using clean, sharp pruners. The key is timing—wait until just before buds swell, but don’t delay past early spring. I mark my calendar for February 15th in my climate zone as a safe target. For new canes, install trellises immediately after planting to avoid struggling with established canes later.
Winter Protection Upgrade: The 4-6 inch mulch layer recommended is excellent, but in Zone 5 and colder, I double that to 8 inches using a mix of straw and leaves. For young plants, mound soil around the base up to the first set of buds before winter—this creates natural insulation. In extreme cold, wrap the entire crown with burlap secured with twine for extra protection.
Pro Tips for Raspberry Bush Landscaping
- Creating a thriving raspberry landscape takes more than just planting—these pro tips ensure your bushes flourish year...
- Site Selection Secrets: While the instructions mention full sun to partial shade, I’ve found raspberries actually per...
- Soil Prep Pro Tip: Don’t just amend clay soil—test it first! I use a simple pH kit to verify the 5.5-7.0 range before...
Frequently asked questions
Got questions about transforming your yard with raspberry bushes? You’re not alone! Here are answers to the most common queries to help you plan like a pro.
When is the best time to plant raspberry bushes?
Plant raspberry bushes in early spring or fall when the soil is workable but not frozen. This gives roots time to establish before extreme heat or cold. Avoid planting in summer—high temps stress young plants. If you’re in a mild climate, fall planting (6-8 weeks before frost) often yields the best results!
How much space should I leave between raspberry bushes?
Space raspberry bushes 3 to 4 feet apart in rows spaced 6 to 8 feet apart. This allows airflow to prevent fungal diseases and makes harvesting easier. If you’re short on space, dwarf varieties (like ‘Heritage’) can thrive in tighter clusters (2-3 feet apart). Just be prepared for more pruning!
Why are my raspberry bushes not fruiting?
Lack of fruit can stem from immature plants (they need 1-2 years to establish), poor pollination (plant multiple varieties nearby), or over-pruning. Check for pests (like spider mites) or nutrient deficiencies (add compost or a balanced fertilizer in early spring). If your bushes are leggy, they may need more sunlight (6+ hours daily)!
Can I grow raspberries in containers?
Use a large container (at least 18 inches deep and wide) with drainage holes and well-draining potting mix. Dwarf varieties like ‘Boyne’ or ‘Caroline’ thrive in pots. Place containers in full sun and water consistently—containers dry out faster. Just remember: container-grown raspberries may produce smaller yields than in-ground plants.
Do raspberry bushes attract pests or wildlife?
Raspberries are generally low-maintenance but may draw birds (who love the fruit!) or pests like Japanese beetles. Use row covers during harvest to deter birds, and handpick beetles early in the season. Deer usually avoid raspberries, but young plants might get nibbled—consider a temporary fence if they’re a problem in your area.
Pro Tip:
For year-round interest, pair raspberry bushes with evergreen shrubs (like boxwood) or ornamental grasses (such as fountain grass). The berries add summer color, while the foliage and winter stems provide texture in off-seasons. Bonus: Prune old canes in late winter to encourage new growth and improve airflow!
Wrapping up and next steps
Transforming your outdoor space with raspberry bush landscaping is a rewarding way to add beauty, functionality, and year-round interest to your yard. Whether you’re drawn to their vibrant foliage, delicious fruit, or wildlife-friendly appeal, these versatile plants are a win-win for any climate.
Start small—plant a single bush or go bold with a thriving berry hedge—and watch your landscape flourish! 🌿
Ready to get started? Sketch a simple plan for your raspberry patch today—choose your variety, mark your planting spots, and dig in! Your future self (and hungry birds!) will thank you.