
How To
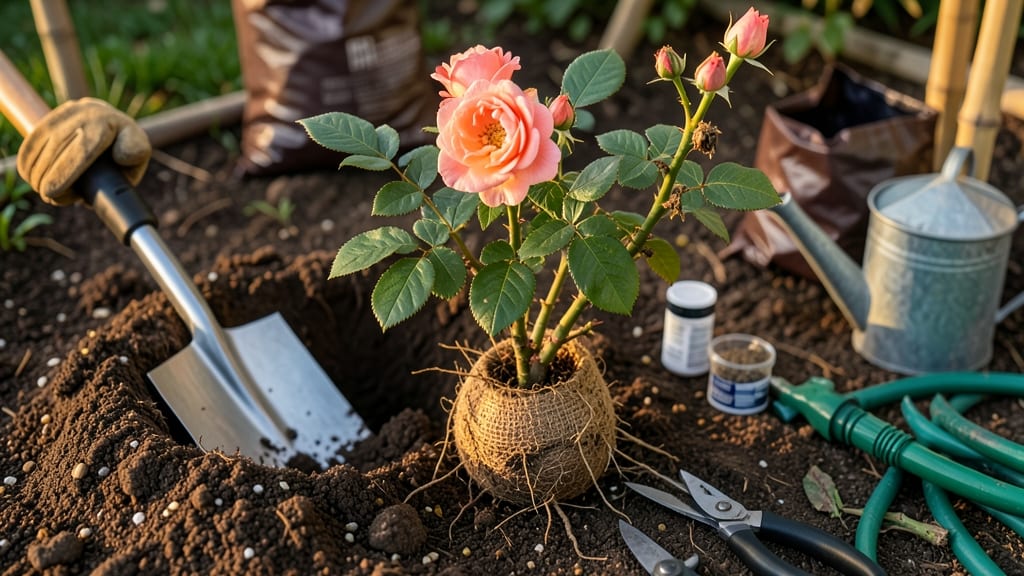
Transplanting a rose bush doesn't have to be a gamble with your plant's future. 🌹 The secret to success lies in timing, preparation, and a little patience—three things that turn a risky move into a stress-free relocation that keeps your roses blooming beautifully for years.
I've moved roses in both spring and fall, and the difference in survival rates is night and day. The best time is late winter or early spring, just as buds begin to swell but before new growth starts.
Water the plant deeply the day before moving to reduce shock, and dig a hole twice as wide as the root ball but no deeper. Amend the soil with compost for better drainage, and avoid transplanting on a windy day—your rose will thank you.
Once planted, keep the soil moist but not soggy for the first 4-6 weeks, and mulch around the base to retain moisture and regulate temperature. Prune back any damaged roots during transplanting, but hold off on heavy pruning until new growth appears.
With this approach, you'll see your rose bush recover faster, establish stronger roots, and reward you with vibrant blooms all season long.
📚 In This Guide
- What you need
- Instructions
- Tips and common mistakes
- Wrapping up and next steps
What you need
- ● Garden trowel or spade – A sharp, sturdy 6- to 8-inch trowel for digging around roots without damaging them.
- ● Pruning shears or loppers – To trim dead, damaged, or overly long canes before transplanting.
- ● Garden hose or watering can – For deep watering before and after transplanting (aim for 1-2 gallons per bush).
- ● Compost or well-aged manure – 5-10 pounds to enrich the new planting hole and boost root growth.
- ● Mulch (pine bark, straw, or shredded leaves) – 2-3 inches to retain moisture and regulate soil temperature.
- ○ Burlap or landscape fabric – Optional, but helpful for wrapping roots if transplanting during extreme heat or wind.
- ● Garden gloves – To protect your hands from thorns and rough soil.
- ● Wheelbarrow or bucket – For transporting the rose bush and soil.
- ● Choose the right time: Transplant on a cool, cloudy day (spring or early fall) to minimize stress.
- ● New location prep: Ensure the spot gets 6+ hours of sunlight and has well-draining soil (amend with sand if needed).
- ● Water access: Have a water source nearby for post-transplant hydration.
- ● Support system: If your rose is tall, have a stake or trellis ready for stability.
Step-by-Step instructions for transplanting a rose bush
Here's the gentle method I swear by—less shock, more blooms in no time.
🪴 Step 1: Prepare the New Home First
Choose a spot with 6+ hours of sunlight and room to grow—roses need space. Dig a hole twice as wide as the root ball but only as deep as the top of the roots. Amend the soil with 2-3 inches of compost mixed into the bottom of the hole. This prevents root shock by giving the roots instant nutrients.
I like to loosen the native soil around the edges of the hole with a garden fork. This breaks up compaction so roots can spread easily. If your soil drains poorly, add a 2-inch layer of gravel at the bottom—roses hate soggy roots. Water the hole deeply before planting to settle the soil.
✂️ Step 2: Prune the Rose Bush for Easier Relocation
Trim back any damaged or crossing branches to reduce stress. Focus on cutting back one-third of the oldest canes to encourage new growth. This might seem harsh, but it actually helps the plant focus energy on establishing roots instead of supporting old wood.
Prune at a 45-degree angle just above an outward-facing bud. Avoid cutting into old, woody stems—they won't regrow. Water the rose lightly before digging to keep roots moist. I always do this step in the morning when temperatures are cooler, which minimizes transplant shock.
🌱 Step 3: Dig Up the Rose Carefully
Use a spade to dig a circle around the bush, 12-18 inches from the stem, cutting straight down. Gently rock the bush back and forth to loosen the root ball. Lift it out while keeping as much soil attached as possible—this protects delicate roots. If the roots are tangled, tease them apart gently with your hands.
Don't let the roots dry out. If you can't replant immediately, wrap the root ball in a damp towel and place it in a shaded spot. I've learned the hard way that even a few hours of exposure can kill a rose bush. Keep the root ball moist until you're ready to transplant.
💧 Step 4: Plant the Rose in Its New Location
Place the rose in the prepared hole, ensuring the graft union (the bulge near the base) sits 2-3 inches above soil level. This prevents it from being buried too deep, which can cause rot. Fill the hole with soil, tamping down gently to remove air pockets. Water deeply to settle the soil around the roots.
Mulch the base with 2-3 inches of organic mulch, keeping it 6 inches away from the stem to prevent rot. This helps retain moisture and regulates soil temperature. Stake the rose if needed—young or leggy bushes benefit from support during their first season in the new spot.
☀️ Step 5: Care for the Rose After Transplanting
Water the rose deeply every 2-3 days for the first 2 weeks, then taper to once a week once new growth appears. Avoid overhead watering—it spreads disease. I use a soaker hose to deliver water directly to the roots without wetting the foliage.
Fertilize lightly with a balanced rose fertilizer after 4-6 weeks to support new growth. Watch for signs of stress like yellowing leaves—this is normal for the first few weeks. If you see wilting, water immediately and check for proper drainage. With patience, your rose will bloom beautifully in its new home.
Tips & tricks for transplanting a rose bush
Here's what nobody tells you about moving roses without losing those gorgeous blooms.
Timing is Everything: The best time to transplant roses is in early spring or early fall when temperatures are mild—this gives the roots plenty of time to establish before extreme weather hits. I've transplanted in summer before, but you'll need to water twice daily for the first two weeks to prevent shock. Avoid transplanting during extreme heat or cold, as these conditions stress the plant further.
Root Ball Preservation: When you dig up the rose bush in Step 3, aim to keep as much of the original soil attached to the roots as possible. This natural soil acts like a protective blanket, shielding delicate roots from damage. If you notice roots circling tightly around the root ball, gently tease them apart with your fingers—this helps them spread out more naturally in the new hole. Keeping the root ball moist during this process is absolutely critical.
Soil Prep Matters: The 2-3 inches of compost you add to the bottom of the hole in Step 1 isn't just for show—it's the foundation for healthy growth. I like to mix in a handful of bone meal or slow-release fertilizer at this stage too (optional but helpful). This gives the roots an immediate nutrient boost without overwhelming the plant. If your soil is particularly heavy clay, consider adding some sand to improve drainage—roses absolutely hate soggy roots.
Post-Transplant Care: After planting, the deep watering schedule in Step 5 is non-negotiable. I've seen roses wilt dramatically after transplanting, only to recover beautifully with consistent watering. The key is to keep the soil evenly moist—not soggy, not dry. You'll know you're doing it right when you see new growth within 4-6 weeks, which is when you can introduce that balanced rose fertilizer mentioned in the instructions.
Pro Tips for Transplant Rose Bush
- Here's what nobody tells you about moving roses without losing those gorgeous blooms.
- Timing is Everything: The best time to transplant roses is in early spring or early fall when temperatures are mild—t...
- Root Ball Preservation: When you dig up the rose bush in Step 3, aim to keep as much of the original soil attached to...
Frequently asked questions
Got questions about transplanting your rose bush? You’re not alone! Here are some of the most common concerns—and their answers—to help you tackle the job with confidence.
When is the best time to transplant a rose bush?
The ideal times are early spring (before new growth starts) or early fall (6 weeks before frost). Avoid transplanting during extreme heat, cold, or while the rose is blooming. Pro tip: Morning or overcast days reduce stress on the plant.
How long does it take for a transplanted rose bush to recover?
Recovery time varies, but most roses show signs of new growth within 4–6 weeks if transplanted correctly. Expect full vigor in 1–2 seasons, especially if you prune lightly after transplanting and keep soil moist.
Can I transplant a rose bush in full sun or shade?
Roses thrive in full sun (6+ hours/day), but if your new spot has partial shade, choose a disease-resistant variety like ‘Knock Out’ or ‘Dr. Huey.’ Avoid deep shade—it weakens growth and blooms. Adjust pruning to balance stress if moving to a shadier location.
What if my rose bush loses leaves after transplanting?
Don’t panic! Leaf drop is normal due to stress, but yellowing leaves or wilting may signal root damage or shock. Fix it: Water deeply, avoid fertilizing for 4–6 weeks, and mulch to retain moisture. New leaves should emerge in 2–4 weeks if roots are healthy.
Can I transplant a rose bush in winter?
Transplanting in winter (below freezing) is risky—roots can freeze or suffocate under snow. If you must move it, do so in late fall (before hard frost) and protect with mulch or a burlap wrap. Spring or fall are always safer!
Bonus Tip:
Label your roses!
After transplanting, mark the variety and planting date with a biodegradable stake to track growth and blooms. It’s a game-changer for long-term care.
Wrapping up and next steps
Transplanting a rose bush doesn’t have to be stressful—with the right timing, tools, and care, you’ll help your blooms thrive in their new home! 🌹 Remember to choose the perfect season, prepare the soil and site, and handle the roots with gentleness.
A little patience and attention to detail will reward you with lush, vibrant roses for years to come.
Now that you’re ready to take action, pick a sunny day and get your hands dirty! Start small if you’re a beginner, and soon you’ll be a pro at giving your roses the fresh start they deserve. Happy gardening! 🌱