
Shrubs
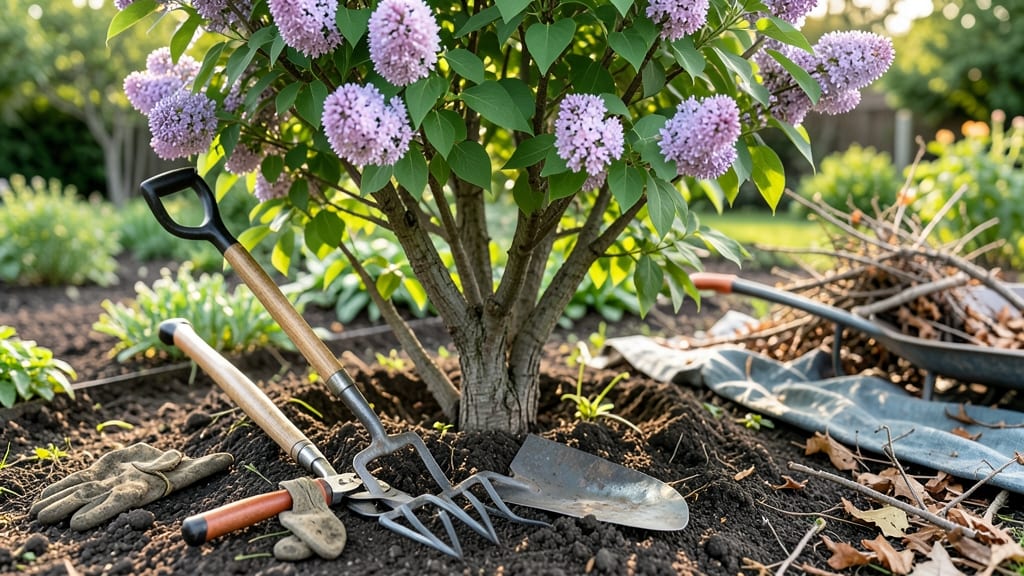
Removing lilac bushes completely isn't just about cutting the stems—it's about starving those stubborn roots. 🌿 I've learned the hard way that chopping at the base leaves behind a root system that sprouts back like weeds, so I'm sharing the foolproof method that actually works.
The secret is a combination of timing, tools, and persistence. Start in early spring before new growth begins, and use a sharp shovel to dig out as much root as possible.
For the roots you can't reach, apply a vinegar-based herbicide directly to the stump—it kills what's left without harming surrounding plants. By the end of the process, you'll have a clean space ready for new plantings, with no lilac regrowth to deal with next spring.
The key is patience and thoroughness; those roots don't give up easily, but neither should you. Works for any lilac variety, whether it's the fragrant common lilac or the showy dwarf types. Let's get those bushes out for good!
📚 In This Guide
- What you need
- Instructions
- Tips and common mistakes
- Wrapping up and next steps
What you need
- ● Pruning shears or loppers – Sharp, heavy-duty shears for cutting thick branches (look for bypass-style blades for cleaner cuts).
- ● Handsaw or pruning saw – For larger, woody stems that shears can’t handle.
- ● Shovel or digging spade – A sturdy, round-point shovel (16–18 inches wide) works best for deep excavation.
- ● Garden fork or mattock – Helps loosen stubborn roots and compacted soil.
- ● Heavy-duty gloves – Garden-grade, cut-resistant gloves (e.g., Mechanix or similar) to protect your hands.
- ● Wheelbarrow or large tarp – For hauling away debris (aim for a 3–4 cubic foot capacity).
- ● Garden hose or bucket of water – To keep soil moist and reduce dust while digging.
- ○ Rake (optional but helpful) – A bow rake for leveling the soil after removal.
- ● Glyphosate-based herbicide (e.g., Roundup) – Apply 2–4 weeks before digging to kill roots. Follow label instructions for concentration.
- ○ Vinegar (optional, for small patches) – Mix 1 gallon white vinegar + 1 cup dish soap + 1 cup salt for a natural (but less effective) alternative.
- ● Workwear – Long sleeves, pants, and closed-toe shoes to avoid scratches or thorns.
- ● Safety goggles – Protects eyes from debris and dust.
- ● Sun protection – Hat, sunscreen, and water bottle for outdoor work.
- ● Check local regulations – Some areas restrict herbicide use; verify before applying chemicals.
Instructions for removing lilac bushes completely
Here’s the straightforward method I’ve used to dig out stubborn lilacs without leaving a trace.
✂️ Step 1: Prune the Bush Back to the Ground
Start by cutting the lilac bush back to the ground using sharp loppers or pruning shears. This makes the job easier and reduces the chance of spreading roots during removal. I like to cut everything down in early spring before new growth begins—it’s less messy and prevents regrowth from dormant buds.
Remove all branches and debris from the area. You’ll see the bush’s main structure clearly once the foliage is gone. This step also helps expose any hidden roots that might otherwise complicate removal. Wear gloves—lilac branches can be abrasive, and sap might irritate your skin.
🪴 Step 2: Dig Around the Base to Expose Roots
Using a sharp spade or digging fork, cut a circle around the bush about 12-18 inches from the trunk. This distance allows you to sever the main roots cleanly. Dig down at least 12 inches deep—lilac roots can spread far and deep, so shallow digging leaves remnants that sprout back.
Leverage the spade gently to loosen the soil and roots. You’ll feel resistance as you hit the larger roots—this is normal. If the bush is mature, you might need to work in sections, cutting roots as you go. I find it helpful to rock the bush slightly while digging to break up stubborn root clusters.
💧 Step 3: Pull or Lever the Bush Out
Once the roots are exposed, grab the bush at the base and pull upward with steady force. If it doesn’t budge, use a digging fork to pry underneath and lift. Lilacs are tough, so don’t be surprised if this takes effort—especially if the bush has been established for years. A helper makes this step much easier.
Check the hole for any remaining root fragments. Even small pieces can regrow, so remove everything you can. If you’re struggling to pull out stubborn roots, use the fork to cut them into smaller sections and remove those separately. I like to rinse the roots off afterward to inspect for missed pieces.
🌱 Step 4: Treat the Soil to Prevent Regrowth
After removal, fill the hole with 6-8 inches of fresh topsoil or compost. This helps smother any hidden roots and encourages new plants to grow in its place. Water the area deeply to settle the soil and promote root decomposition of any lingering fragments.
For extra insurance, apply a 2-3 inch layer of mulch (like wood chips or gravel) over the area. This blocks sunlight, which lilac roots need to regenerate. I’ve found that planting a fast-growing ground cover, like clover or creeping thyme, in the spot helps prevent regrowth entirely.
⏰ Step 5: Monitor and Repeat if Necessary
Keep an eye on the area for 3-4 months—this gives any missed roots time to show signs of regrowth. If you spot new shoots, dig them out immediately before they establish. Lilacs are persistent, so early intervention is key.
If you’re dealing with a particularly stubborn lilac, consider applying a vinegar-based herbicide (like a 20% acetic acid solution) directly to the stump and surrounding soil. This kills any remaining root tissue. Just be cautious—vinegar can harm nearby plants, so use it sparingly and avoid windy days.
Tips & tricks for swift lilac removal
Here's what I've learned after tackling these stubborn bushes—these tricks make all the difference between a quick cleanup and a never-ending battle.
Timing is Everything: Early spring is your best window for removal, right before new growth begins. The dormant buds haven't awakened yet, so you're not fighting regrowth from the top down. If you must remove in other seasons, late fall works too, but avoid summer when lilacs are most vigorous. The key is catching them when they're least resilient.
Equipment Upgrade: Rent a digging bar or root saw if your lilac is particularly stubborn. These tools make short work of thick roots that would otherwise require hours of backbreaking labor. I've found that a sharp spade is essential—dull tools make the job harder and can damage nearby plants. For mature bushes, consider a small pickaxe to break up compacted soil around the roots.
Root Inspection Strategy: After removal, spread out the roots on a tarp and examine them carefully. Even small root fragments can regrow, so don't skip this step. I like to rinse them with water first—this makes it easier to spot any missed pieces. For particularly persistent lilacs, consider soaking the roots in a bucket of water for 10 minutes before disposal to help break them down.
Post-Removal Prevention: The 6-8 inches of fresh topsoil and 2-3 inch mulch layer are your first line of defense, but don't stop there. I've had the most success when I combine these with a 6-inch layer of cardboard or landscape fabric over the area before adding mulch. This creates a complete barrier that blocks both sunlight and moisture—two things lilac roots desperately need to regenerate. Water thoroughly after to settle everything in place.
Pro Tips for Remove Lilac Bushes
- Here's what I've learned after tackling these stubborn bushes—these tricks make all the difference between a quick cl...
- Timing is Everything: Early spring is your best window for removal, right before new growth begins. The dormant buds ...
- Equipment Upgrade: Rent a digging bar or root saw if your lilac is particularly stubborn. These tools make short work...
Frequently asked questions
Got questions about removing lilac bushes? You’re not alone—this task can feel tricky! Below are answers to the most common concerns, from timing to troubleshooting, so you can tackle the job with confidence.
When is the best time of year to remove lilac bushes?
Late winter or early spring (before new growth appears) is ideal. This minimizes stress on the plant and makes it easier to dig out roots. Avoid removing lilacs in fall, as regrowth can complicate the process.
What if I only cut the lilac bush down but leave the roots?
Leaving roots behind often leads to regrowth—sometimes even stronger! Lilacs are aggressive resprouters. For a clean removal, dig out the roots (at least 6–12 inches deep) or use a stump grinder if cutting alone.
Do I need special tools to remove lilac roots?
Basic tools like a shovel, pruners, and gloves work for small bushes. For stubborn roots, rent a stump grinder or borrow a mattox (a digging tool) from a local hardware store. A wheelbarrow helps haul debris away.
Can I replant something in the same spot after removing lilacs?
Lilacs deplete soil nutrients, so amend the area with compost before replanting. Wait at least 6 months to allow the soil to recover. Avoid planting other shrubs in the same spot—opt for perennials or grasses instead.
What if the lilac keeps coming back after removal?
Persistent regrowth usually means roots or root fragments remain. Re-dig the area, apply vinegar or herbicide to exposed roots, or cover the spot with cardboard and mulch to smother new shoots. Patience is key!
Wrapping up and next steps
Removing lilac bushes doesn’t have to be a daunting task—with the right tools, patience, and persistence, you can reclaim your space cleanly and efficiently. Whether you opt for digging, smothering, or chemical methods, the key is eliminating those stubborn roots to prevent regrowth.
Now that you’re armed with the know-how, grab your gloves, roll up your sleeves, and transform that overgrown patch into your dream garden spot!
🌱 Next step: Pick a sunny day, gather your supplies, and start fresh—your future landscaping project awaits! 🚀