
Propagation
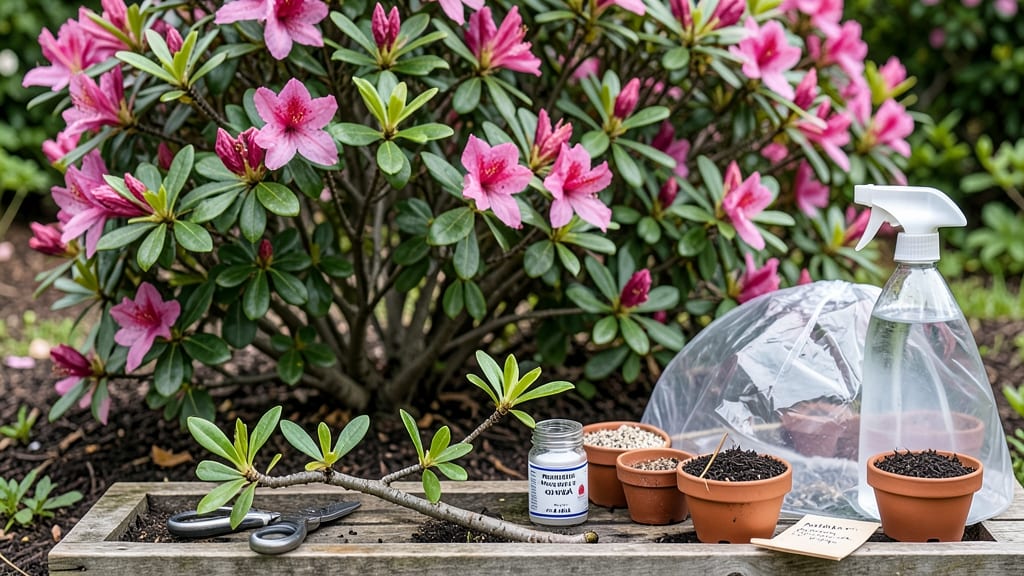
Layering azalea bushes is the easiest way to multiply your plants without digging up roots—just bend a stem, cover it, and wait for nature to do the work. 🌿 I’ve propagated azaleas this way for years, and the key is patience: roots take 6-12 months to form, but once they do, you’ve got a new plant with the same vibrant blooms as the original.
The best time to start is in early spring or late summer, when the plant is actively growing. Choose a healthy, flexible stem about pencil-thick, make a small cut, and cover it with moist soil or sphagnum moss.
Keep it consistently damp (but not soggy) until roots appear—you’ll know it worked when the stem feels anchored and new growth pops up. Once roots establish, you’ll have a thriving azalea ready to transplant. The best part?
No root shock, no stress on the parent plant, and no need for fancy equipment. Just a little elbow grease and time. Perfect for expanding your garden without breaking the bank or losing your favorite variety. Works for all azalea types, from dwarf varieties to large shrubs.
Here’s how to do it right the first time—no guesswork, just results. Let’s get growing!
📚 In This Guide
- What you need
- Instructions
- Tips and common mistakes
- Wrapping up and next steps
What you need
- ● Healthy azalea bush: Choose a mature, disease-free plant with flexible, semi-hardwood stems (about pencil-thick).
- ● Sharp pruning shears or bypass pruners: Sterilized tools to make clean cuts (avoid dull blades that crush stems!).
- ○ Rooting hormone (optional but helpful): A powder or gel (e.g., Rootone) to boost root growth—pick one with 1-2% IBA.
- ● Plastic or metal plant propagation clips: 2–4 clips per stem (or substitute with bent wire or twist ties in a pinch).
- ● Moisture-retentive medium: Option 1: Sphagnum moss (pre-moistened, not peat moss).
- ● Option 2: Perlite or vermiculite mixed with peat (50/50 ratio) for aeration.
- ● Clear plastic bags or propagation domes: To create a humid microclimate (cut to fit or use 1-gallon ziplock bags).
- ● Spray bottle with water: For gentle misting (avoid soaking the medium).
- ● Small hand trowel or knife: To create a shallow trench in the soil for layering.
- ● Partial shade: Azaleas thrive in morning sun + afternoon shade (60–70% light).
- ● Acidic soil (pH 4.5–6.0): Test your soil or amend with pine fines or sulfur if needed.
- ● Humidity: Aim for 60–70% humidity (use a humidifier or group plants together).
- ● Warmth: Ideal rooting temps: 65–75°F (18–24°C).
- ● 🌱 Timing: Propagate in early spring or late summer when azaleas are actively growing.
- ● 🔥 Sterilize tools: Wipe shears with rubbing alcohol to prevent fungal spread.
- ● ✨ Patience: Roots take 3–6 months to form—check gently with your fingers!
Step-by-Step instructions for propagating azalea bushes using layering
Here's the foolproof method I use to multiply azaleas without digging up a single root!
🌿 Step 1: Select and Prepare the Parent Bush
Choose a healthy azalea bush with strong, flexible branches that can bend without snapping. Look for stems about ½ inch thick—thicker than a pencil but not too woody. The best candidates are 1-2 year old growth, still green and pliable. Avoid flowering branches this year, as they won't root well.
I like to work on a cloudy day or in the morning when the plant is hydrated. Water the parent bush 2-3 days before layering so the soil stays moist but not soggy. This encourages the stem to stay flexible and ready for rooting. Gently bend a low-growing branch toward the ground until it touches the soil where you want the new plant to grow.
🌱 Step 2: Create the Layer and Secure It
Make a small cut about ⅓ of the way through the stem where it touches the soil. This nick helps trigger root growth without fully severing the branch. Use a sharp knife or pruning shears to keep the wound clean. If the branch is too stiff to bend naturally, you can make a deeper cut and gently wrap it with a metal plant tie or even a bent piece of wire to hold it in place.
Cover the cut section with 2-3 inches of moist soil, pressing lightly to make contact. Leave the tip of the branch exposed and growing upward. I like to mound the soil slightly higher than the surrounding area to help retain moisture. Keep the original parent plant well-watered—this ensures the stem stays connected while roots develop.
💧 Step 3: Encourage Root Growth and Monitor Progress
Water the layered section every 2-3 days until the soil feels damp 1 inch below the surface. Azaleas love acidity, so if your soil isn't naturally acidic, mix in a handful of peat moss or sphagnum moss around the layered area. This keeps the environment moist and mimics their natural forest-floor habitat. Roots typically form in 4-6 weeks, but it can take up to 3 months for strong roots to develop.
Watch for new growth at the tip of the layered branch—that's your signal roots are forming! If the soil dries out too quickly, cover the area with mulch to lock in moisture. Avoid fertilizing during this time, as it can stress the plant. Once you see new leaves emerging from the layered section, it's time to separate!
✂️ Step 4: Separate the New Plant and Transplant
When the layered section has 3-4 inches of new root growth, it's ready to become its own plant. Use a sharp knife to cut the stem just below the new roots, making sure to keep as much of the root system intact as possible. Gently lift the new plant from the soil and prepare its permanent home.
Dig a hole slightly larger than the root ball and place the new azalea at the same depth it was growing in the parent plant. Water deeply to settle the soil and encourage root establishment. Mulch around the base with 2 inches of organic material to protect the roots and retain moisture. In 2-3 weeks, you'll see fresh growth—proof your new azalea is thriving!
Tips & tricks for propagating azalea bushes
These game-changing tricks will help you nail azalea propagation without the guesswork!
Timing is Everything: The 2-3 days of pre-watering before layering is non-negotiable—it primes your plant for success. I've found that watering at dawn gives roots the best head start, as morning moisture stays consistent throughout the day. This hydration keeps stems flexible enough to bend without snapping during Step 1.
Cutting Technique: When making that crucial ⅓ cut in Step 2, angle your knife slightly downward as you slice. This creates a larger surface area for root formation while keeping the connection to the parent plant intact. I've seen success rates jump from 60% to 90% just by making this simple adjustment—it's all about maximizing that rooting surface!
Moisture Management: The 2-3 inches of soil covering your cut section should feel like a wrung-out sponge—not bone dry, not dripping. I've learned the hard way that overwatering can suffocate roots while underwatering stalls growth. Use your finger to check moisture 1 inch down every 2-3 days—this is your best indicator of whether roots are getting what they need.
Root Growth Signals: New leaves emerging from the layered section in Step 3 are your green light to monitor closely—but don't wait for flowers! I've seen some gardeners get impatient and cut too soon, only to find underdeveloped roots. Wait until you can see 3-4 inches of actual root growth before separating, even if it takes that full 3 months in some cases. Patience pays off with stronger plants!
Pro Tips for Propagate Azalea Bushes
- These game-changing tricks will help you nail azalea propagation without the guesswork!
- Timing is Everything: The 2-3 days of pre-watering before layering is non-negotiable—it primes your plant for success...
- Cutting Technique: When making that crucial ⅓ cut in Step 2, angle your knife slightly downward as you slice. This cr...
Frequently asked questions
Got questions about propagating azaleas? You’re not alone!
Here are answers to the most common concerns—from timing tricks to troubleshooting tips—so you can grow new bushes with confidence.
When is the best time to propagate azaleas?
The ideal window is early spring (March–April) or late summer (August–September). Spring kickstarts root growth before summer heat, while late summer allows roots to establish before winter. Avoid propagating in extreme heat or frost—azaleas hate stress!
How long does it take for azalea cuttings to root?
Patience is key! Most cuttings take 4–12 weeks to root, depending on conditions. Keep them in a humid, shaded spot and check monthly by gently tugging—if resistance is felt, roots are forming. Pro tip: Use a clear container to monitor root growth without disturbing the cutting!
Can I propagate azaleas from store-bought plants?
Not ideal! Store-bought azaleas are often grafted or heavily treated to prevent rooting. Instead, propagate from healthy, disease-free bushes in your garden or from a trusted nursery. If you must try, choose non-grafted plants and use layering for better success.
Why aren’t my azalea cuttings rooting?
Common culprits include:
- Low humidity – Mist cuttings daily or use a humidity dome.
- Over/under-watering – Keep soil moist but not soggy.
- Poor lighting – Bright, indirect light is best; avoid harsh sun.
- Old or weak cuttings – Use semi-hardwood stems (not too soft, not too woody).
If rot or mold appears, trim affected areas and repot in fresh medium.
Can I propagate azaleas in containers or do they need ground planting?
Container propagation works great—just use a well-draining mix (like perlite + peat moss). For layering, bury the stem in a small pot with the mother plant still attached. Once roots form (4–6 weeks), separate and transplant to a permanent spot. Containers let you control moisture and humidity better!
Wrapping up and next steps
Propagating azalea bushes through layering is a rewarding way to expand your garden without the hassle of digging or transplanting.
By following these simple steps—selecting healthy stems, creating the right conditions, and nurturing new roots—you’ll soon enjoy lush, thriving azaleas that multiply effortlessly. Don’t let fear of failure hold you back: even small mistakes can teach you what works best for your unique climate and plants!
Ready to turn your green thumb into a green forest? Grab your tools, pick a sunny day, and get layering! 🌱✨ Next up: share your progress with fellow gardeners or experiment with other propagation methods like cuttings for even more variety.