
Propagation
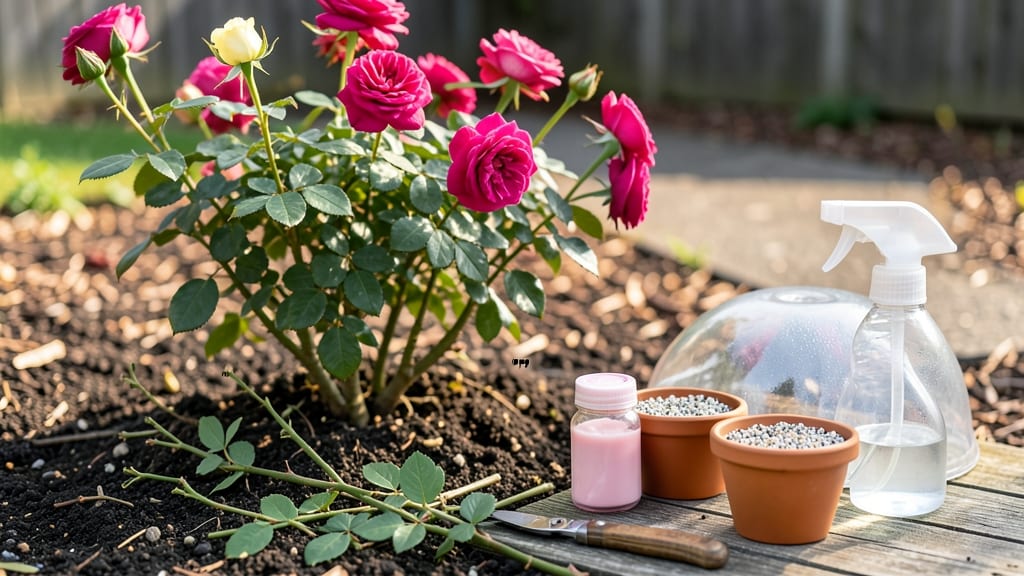
Propagating a rosebush through layering means multiplying your favorite blooms without buying new plants—and the best part? You don’t need fancy tools or greenhouse skills. 🌹 I’ve doubled my garden’s roses using this method, and the secret lies in bending a stem to the ground while it’s still attached to the mother plant, then encouraging roots to form before cutting it free.
This technique works best in late spring or early summer when new growth is vigorous but not yet hardened off. You’ll need sharp pruners, rooting hormone (optional but helpful), and a little patience—about 6-8 weeks until roots form.
The magic happens when you gently scratch the stem where it touches the soil, then secure it with a bent wire or U-shaped pin. Once roots take hold, you’ll see new shoots emerging from the layered stem.
Snip it cleanly from the parent plant in the fall, and you’ve got a ready-to-plant rosebush—no transplant shock, just instant growth. The best part? These new plants bloom just like the original, often even more prolifically.
Layering is foolproof for beginners, works for hybrid teas and shrub roses alike, and lets you keep your garden’s character consistent. Here’s how to do it without stress or guesswork—no green thumb required!
📚 In This Guide
- What you need
- Instructions
- Tips and common mistakes
- Wrapping up and next steps
What you need
- ● Healthy rosebush: Choose a mature, disease-free plant with flexible canes (at least pencil-thick).
- ● Sharp pruning shears or bypass pruners: Sterilized to avoid bacterial spread (1 pair).
- ○ Rooting hormone (optional but recommended): Powder or gel (e.g., Clonex or Dip ‘N Grow) to boost root growth.
- ● Plastic or metal wire: 18-20 gauge, 6–12 inches long (for securing layers).
- ● Mulch or moist sphagnum moss: To cover the layered stem (1–2 inches thick).
- ● Garden soil or potting mix: Well-draining, sterile mix (avoid compost-heavy soil).
- ● Spray bottle with water: For keeping the area damp (16 oz or larger).
- ● Gloves: Heavy-duty to protect from thorns (1 pair).
- ○ Plastic wrap or clear plastic bag: To create a humid microclimate (optional but helpful).
- ● Rubbing alcohol or bleach: For sterilizing tools (70% isopropyl alcohol or 10% bleach solution).
- ● Labeling tags: To mark new plants (waterproof if outdoors).
- ○ Hose with gentle spray nozzle: For larger rosebushes (optional).
- ● Timing: Late spring or early summer (when new growth is vigorous).
- ● Weather: Mild temps (60–75°F) and partial shade (avoid direct sun during propagation).
- ● Moisture: Keep soil consistently damp (not soggy) for 4–6 weeks.
Step-by-step instructions for propagating a rosebush using layering
Here's the foolproof method I've used to multiply my favorite roses—no fancy tools, just patience and a little know-how.
🌱 Step 1: Choose and Prepare the Right Stem
Pick a healthy, flexible stem from last year's growth—it should be about ½ inch thick and at least 12-18 inches long. Look for a section with a leaf node (the bump where leaves attach) and a few leaves still attached. This is where roots will form. Remove any flowers or buds from the stem you're working with—they'll drain energy from root development.
Make a small, clean cut about ¼ inch deep just below a leaf node. This cut signals the plant to start producing roots at that spot. I like to use sharp pruning shears dipped in rubbing alcohol to sterilize between cuts. If your stem has thorns, wear gloves—those suckers are sharper than they look!
🌿 Step 2: Create the Layering Pocket
Gently bend the stem downward until the cut node touches the soil. Dig a shallow trench about 2 inches deep along the stem's path, keeping the cut node buried. If the stem won't bend naturally, you can make a small slit in the bark to loosen it—just enough to create a hinge without damaging the stem. This ensures the node stays in contact with the soil.
Secure the stem in place with a U-shaped bent wire or a small rock. You want the node buried but the rest of the stem exposed to light and air. The exposed part should still photosynthesize while the buried node focuses on root growth. Water the area lightly to settle the soil around the cut—this helps maintain contact between the node and the earth.
💧 Step 3: Encourage Root Growth with Moisture and Patience
Keep the soil consistently moist but not soggy around the buried node—think of it like wringing out a damp sponge. Overwatering can rot the stem before roots form, while dry soil will stall the process. I check moisture by sticking my finger 1 inch deep into the soil; if it feels dry, it's time to water. A 1-gallon watering can with a gentle spray nozzle works best for this.
It takes about 4-8 weeks for roots to form, depending on your climate and the rose variety. You'll know it's working when you see new leaves sprouting from the buried node or feel slight resistance when you gently tug on the stem. This is your cue that roots are anchoring the new plant. Real talk: if nothing happens after 8 weeks, try again with a different stem—some roses just take longer.
✂️ Step 4: Separate the New Plant When Roots Form
Once roots have established, carefully dig around the buried section to expose them. You'll see a network of white or cream-colored roots about 2-3 inches long. If the roots are shorter than 1 inch, give it another 2-4 weeks—they won't survive on their own yet. Use a small trowel to separate the new plant from the mother bush, keeping as much of the root system intact as possible.
Transplant the new rose into its own pot filled with a mix of potting soil and compost. Water it thoroughly to help settle the roots, and place it in a spot with bright, indirect light for a week or two. This gives the roots time to adjust before you expose them to full sun. I've found that new layers often wilt slightly at first—that's normal, and they'll perk up within a few days.
☀️ Step 5: Acclimate and Plant Outdoors
After about 2-3 weeks in the pot, your new rose should look strong and healthy. Harden it off by placing it outside in a shaded area for 1-2 hours daily, gradually increasing exposure over 7-10 days. Watch for signs of stress like wilting or yellowing leaves—this means it's not ready for full sun yet. Once it's thriving outdoors, choose a permanent spot with 6+ hours of sun and well-draining soil.
Plant the rose at the same depth it was growing in the pot, and water deeply right after planting. Mulch around the base with 2-3 inches of organic mulch to retain moisture and protect the roots. Within a year, your propagated rose will be just as robust as the mother plant—and you'll have a beautiful new addition to your garden without spending a dime!
Tips & tricks for perfect rosebush propagation
Here's what nobody tells you about layering roses that'll make all the difference between success and frustration.
Stem Selection is Everything: Look for stems that are ½ inch thick and have a slight greenish tint—this means they're still active and capable of rooting. Avoid stems that are woody or have dark, dried-out spots. I've found that stems from last year's growth (not current season's) work best because they've already had a chance to mature. Confession: I skipped this step for years and wondered why my roses kept failing.
The Cut Matters More Than You Think: When making that ¼ inch deep cut below the leaf node, angle it slightly downward. This creates a larger surface area for root growth. Use sharp, sterilized pruning shears every time—dull blades crush the stem and prevent proper healing. I learned this the hard way after ruining three batches with contaminated tools.
Moisture Management is Critical: The 1 inch deep moisture check is your best friend. Use a spray bottle instead of a watering can for the first few weeks—it gives you more control over how much water reaches just the buried node. Too much water creates anaerobic conditions that rot stems, while too little stalls root development. I've seen roses fail because of both extremes!
Patience Pays Off: Those 4-8 weeks can feel like forever, but trust me on this—rushing the process leads to weak roots that won't support the new plant. Set a reminder to gently tug on your layered stems every week. If you feel resistance, you're on the right track. If not, don't give up—some varieties take the full 8 weeks, especially in cooler climates.
Pro Tips for Propagate A Rosebush
- Here's what nobody tells you about layering roses that'll make all the difference between success and frustration.
- Stem Selection is Everything: Look for stems that are ½ inch thick and have a slight greenish tint—this means they're...
- The Cut Matters More Than You Think: When making that ¼ inch deep cut below the leaf node, angle it slightly downward...
Frequently asked questions
Got questions about propagating your rosebush? You’re not alone—here are answers to the most common ones!
When is the best time to layer a rosebush?
The ideal time is late spring or early summer when the plant is actively growing. This gives new roots enough time to establish before winter. Avoid layering in extreme heat or cold—aim for mild, moist conditions for best success!
How long does it take for roots to form?
Root formation typically takes 4–8 weeks, depending on moisture, soil, and temperature. Check for roots by gently digging near the layered stem—if you feel resistance, roots are likely growing! Keep the soil consistently moist but not soggy during this time.
What if my layered stem dies or turns black?
Don’t panic! Blackened or wilted stems often signal overwatering or fungal issues. Trim the dead part, reduce watering, and ensure good airflow. If the base is still firm, new growth may still emerge. If not, try layering a fresh stem.
Can I propagate roses from cuttings instead of layering?
Yes! Softwood cuttings (from new growth) or hardwood cuttings (from dormant stems) work well. Dip the cut end in rooting hormone, plant in moist soil, and cover with a plastic bag to retain humidity. Layering is easier for beginners, but cuttings give you more flexibility!
Do I need to protect my layered rose in winter?
If you live in a cold climate, mulch heavily around the base or cover the layered stem with straw or burlap. Once roots form, the new plant will be hardier. In mild winters, minimal protection (like a light frost blanket) may suffice—just monitor for freezing temps!
Still stumped? Drop your question in the comments—we’re happy to help your roses thrive!
Wrapping up and next steps
Propagating a rosebush through layering is a rewarding way to expand your garden without breaking the bank or risking stress on the plant. With patience, the right tools, and a little know-how, you’ll soon have thriving new roses ready to bloom.
Now that you’ve mastered the technique, why not share your success? Try gifting a rooted cutting to a fellow gardening enthusiast—or experiment with other propagation methods like grafting or cuttings to diversify your floral collection! 🌹✨