
Container Gardens
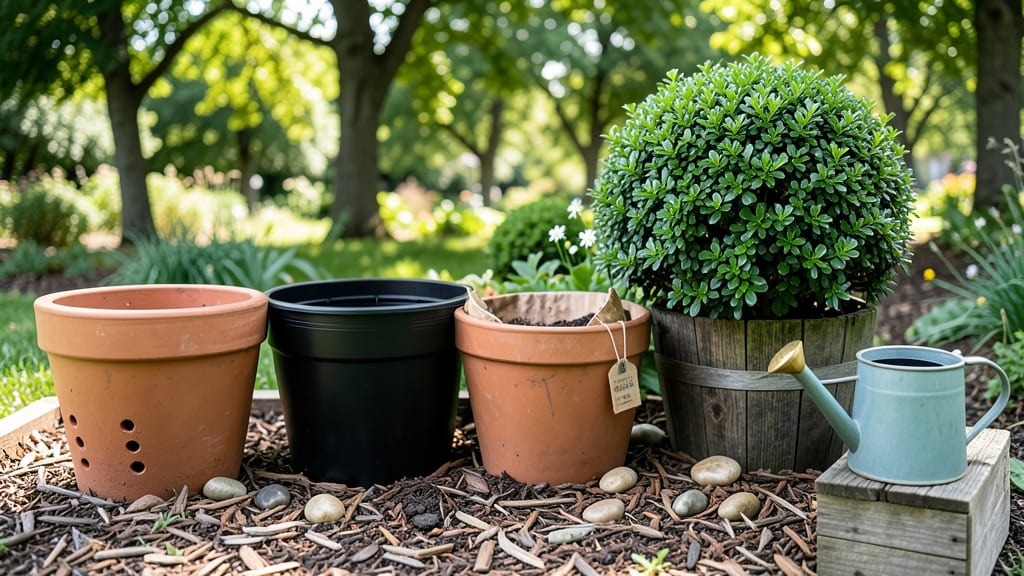
Growing bushes in containers lets you create a lush, fragrant mini-landscape on your balcony—no yard required. 🌿 I’ve turned my tiny city space into a thriving garden by choosing the right compact varieties, like dwarf lilacs, boxwoods, or compact hydrangeas, that stay manageable in pots.
The secret is matching the bush to its container: a 15-gallon pot works for most small bushes, with drainage holes to prevent soggy roots. Use a well-draining potting mix (never garden soil) and water when the top inch feels dry—overwatering is the #1 killer of container bushes.
You’ll end up with bushes that bloom just as beautifully as their in-ground cousins, but without the weeds, pests, or digging. The best part? You can move them to follow the sun or protect them from harsh winds. Perfect for renters, small spaces, or anyone who wants instant curb appeal.
Here’s how to pick the right plants and keep them happy all season long.
📚 In This Guide
- What you need
- Instructions
- Tips and common mistakes
- Wrapping up and next steps
What you need
- ● Containers: At least 1-2 large pots per bush (minimum 12–18 inches in diameter and 12+ inches deep for dwarf varieties; larger for standard bushes). Choose pots with drainage holes and consider lightweight materials like fabric grow bags, ceramic, or high-quality plastic.
- ● Potting Mix: High-quality, well-draining container mix (avoid garden soil—it compacts!). A 50/50 blend of potting soil and perlite or orchid bark works well for most bushes.
- ● Drainage Layer: Small rocks, gravel, or broken pottery shards (1–2 inches thick) to prevent root rot.
- ● Bushes: Choose container-friendly varieties like dwarf boxwood, abelia, or compact hydrangeas. Check tags for mature size—stick to 3–5 feet max for balconies!
- ● Fertilizer: Slow-release granules or liquid fertilizer (look for a balanced 10-10-10 or 20-20-20 NPK ratio). Organic options like fish emulsion or compost tea are great too!
- ● Tools: Trowel or small shovel
- ● Gloves (to protect your hands from thorns or rough bark)
- ● Watering can or hose with a gentle spray nozzle
- ● Pruning shears (for shaping and maintenance)
- ● Self-watering system: Drip irrigation or a moisture meter to keep roots happy without overwatering.
- ● Mulch: Organic mulch (like bark chips) to retain moisture and regulate soil temperature.
- ● Support structures: Stakes or cages for bushes that need extra stability (e.g., dwarf lilacs or compact roses).
- ● Container saucers or trays: To catch runoff and protect your balcony from water stains.
Step-by-Step instructions for growing bushes in containers
Here's how to transform your balcony into a thriving mini-garden with the right plants and care.
🪴 Step 1: Choose the Right Containers and Drainage
Start with containers that are at least 12-18 inches deep—shallow pots stunt root growth and limit nutrient access. I like using lightweight ceramic or fabric grow bags because they prevent soil compaction and allow excess water to evaporate through the walls. Make sure each pot has multiple drainage holes to prevent soggy roots, which quickly lead to rot.
If your chosen pots lack drainage, drill holes in the bottom yourself. Place a layer of ½-inch gravel or broken pottery shards over the holes before adding soil—this keeps roots from clogging the drainage while allowing water to escape freely. I always test drainage by filling the pot with water and watching it drain completely within 5-10 minutes.
🌱 Step 2: Select Space-Saving Bush Varieties
Not all bushes thrive in containers, but dwarf varieties like compact hydrangeas, patio boxwoods, or miniature lilacs grow beautifully in 5-15 gallon pots. Check the plant tag for mature size—anything labeled "dwarf" or "compact" is a safe bet. I avoid fast-growing bushes like willows or privet because they outgrow containers within a season.
For your 4 plants, pick varieties with similar water and sun needs. For example, group dwarf hydrangeas (which prefer partial shade) with compact boxwoods (which tolerate morning sun). This makes maintenance easier since you can water and fertilize all plants at once. Always choose healthy, disease-free starts from a reputable nursery.
☀️ Step 3: Prepare Soil and Plant Correctly
Fill each container with a mix of high-quality potting soil and 20% perlite or orchid bark to improve drainage. I avoid garden soil because it compacts in containers and blocks root growth. Fill the pot to within 2 inches of the rim, leaving room for mulch and watering. Press the soil down lightly to remove air pockets but don't pack it tightly.
Remove the plant from its nursery pot and gently loosen the roots if they're circling. Place the bush in the center of the container, then backfill with soil until the plant sits at the same depth it was in its original pot. Water deeply until moisture runs out the drainage holes—this helps settle the soil and eliminates air gaps around the roots.
💧 Step 4: Water and Fertilize for Container Success
Containers dry out faster than in-ground beds, so check moisture daily during hot weather. Stick your finger 1-2 inches into the soil—if it feels dry, water thoroughly until water flows from the drainage holes. I use a watering can with a narrow spout to direct water to the soil surface, avoiding the leaves to prevent fungal diseases.
Feed your container bushes with a balanced, slow-release fertilizer (like 10-10-10) at planting time, then switch to a liquid fertilizer every 4-6 weeks during the growing season. Over-fertilizing burns roots in containers, so always follow package instructions. Mulch the soil surface with 1 inch of bark or straw to retain moisture and regulate temperature.
✂️ Step 5: Prune and Maintain Year-Round
Prune container bushes in early spring to shape them and remove dead or crossing branches. I use clean, sharp pruners to make cuts just above a leaf node or bud. For flowering bushes like hydrangeas, prune right after blooming to encourage next year's flowers. Never prune more than ⅓ of the plant's foliage at once—this stresses container plants more than in-ground ones.
Move containers indoors or to a sheltered spot before temperatures drop below 40°F—most container bushes won't survive winter frost. Reduce watering in fall as growth slows, but keep the soil slightly moist. In spring, repot every 2-3 years if roots are circling the container or growth slows, upgrading to a pot just 2 inches larger in diameter.
Tips & tricks for perfect container-grown bushes
Here's what nobody tells you about keeping container plants thriving for years—not just months.
Drainage is Non-Negotiable: That 5-10 minute drainage test in Step 1 isn't just about preventing rot—it's your early warning system. If water pools after 10 minutes, your gravel layer isn't working. I've seen roots grow right through drainage holes when pots sit in saucers with standing water. Always empty saucers immediately after watering to prevent this silent killer.
Root Loosening Matters: When you transplant those nursery plants in Step 3, take an extra 30 seconds to gently tease apart any circling roots with your fingers. I learned this the hard way after watching a compact boxwood struggle for months because its roots were bound like a pretzel. This simple step gives roots room to spread into your potting mix instead of circling helplessly.
Fertilizer Timing Secrets: Those 4-6 week intervals for liquid fertilizer in Step 4 can be tricky—especially in summer heat. I've found that container plants actually need more frequent feeding when temperatures climb above 80°F. Split your 4-6 week dose into two applications: half at planting, then half again after just 2 weeks. This prevents root burn while keeping up with the plants' accelerated growth rate.
Winter Prep That Saves Lives: The 40°F threshold in Step 5 isn't just about frost—it's about preventing cold shock. Before moving pots indoors, I wrap the bottoms with bubble wrap or old towels. This insulates roots from temperature swings when you move them between balcony and shelter. Trust me on this: I've lost three container bushes because I ignored this simple step during sudden cold snaps.
Pro Tips for Growing Bushes In Containers
- Here's what nobody tells you about keeping container plants thriving for years—not just months.
- Drainage is Non-Negotiable: That 5-10 minute drainage test in Step 1 isn't just about preventing rot—it's your early warning system.
- Root Loosening Matters: When you transplant those nursery plants in Step 3, take an extra 30 seconds to gently tease apart any circling roots with your fingers.
Frequently asked questions
Got questions about growing bushes in containers? You’re not alone! Here are some of the most common concerns—and their solutions—to help you thrive with your balcony garden.
What are the best small bushes for beginners in containers?
Start with low-maintenance varieties like Dwarf Boxwood, Lantana, or Dwarf Fothergilla. These tolerate pruning, handle partial shade, and stay compact (under 3 feet tall). Avoid fast-growing vines or heavy shrubs like hydrangeas unless you’re prepared for frequent repotting!
How often should I water container-grown bushes?
Check soil moisture daily in summer—containers dry out fast. Water deeply when the top 1–2 inches feel dry, but avoid soggy soil (use pots with drainage holes!). Mulch helps retain moisture. Pro tip: Group containers together to create a microclimate that reduces evaporation.
Can I grow bushes in containers year-round, or do I need to overwinter them?
Most container bushes thrive outdoors in summer but need protection in winter. Move tender varieties (like Abelia) to a garage or wrap pots in bubble wrap. Hardy shrubs (e.g., Dwarf Lilac) can stay outside with extra mulch. Warning: Frost cracks pots—elevate them off cold surfaces!
How do I prune container bushes without ruining their shape?
Prune in early spring (before new growth) to shape and encourage bushiness. Use clean shears to cut just above a leaf node at a 45° angle. For flowering bushes, trim after blooms fade. Quick fix: If overgrown, cut back by ⅓ to refresh—most shrubs bounce back!
What if my container bush isn’t growing? Troubleshooting tips.
Yellow leaves?
Overwatering or poor drainage—let soil dry slightly between waterings.
Leggy or sparse?
Needs more light—move to sunnier spot or supplement with grow lights.
No flowers?
Could be lack of nutrients—fertilize with slow-release granules in spring.
Root-bound roots?
Repot into a slightly larger container (1–2 inches wider).
Remember: Patience is key—some bushes take 2–3 years to mature!Wrapping up and next steps
Growing bushes in containers is a fantastic way to bring greenery to small spaces without sacrificing beauty or functionality! 🌿 Whether you’re working with a cozy balcony, a tiny patio, or even a sunlit windowsill, the right space-saving varieties and a little care can transform your outdoor (or indoor) area into a lush, thriving garden.
Remember, the key is choosing the right plants, containers, and drainage—plus a dash of patience and love.
Ready to dive in? Start by picking one or two of the bushes featured here, gather your supplies, and get planting! Watch your green thumb grow as you nurture your container garden into a vibrant, low-maintenance oasis. Happy gardening! 🌱