
Size
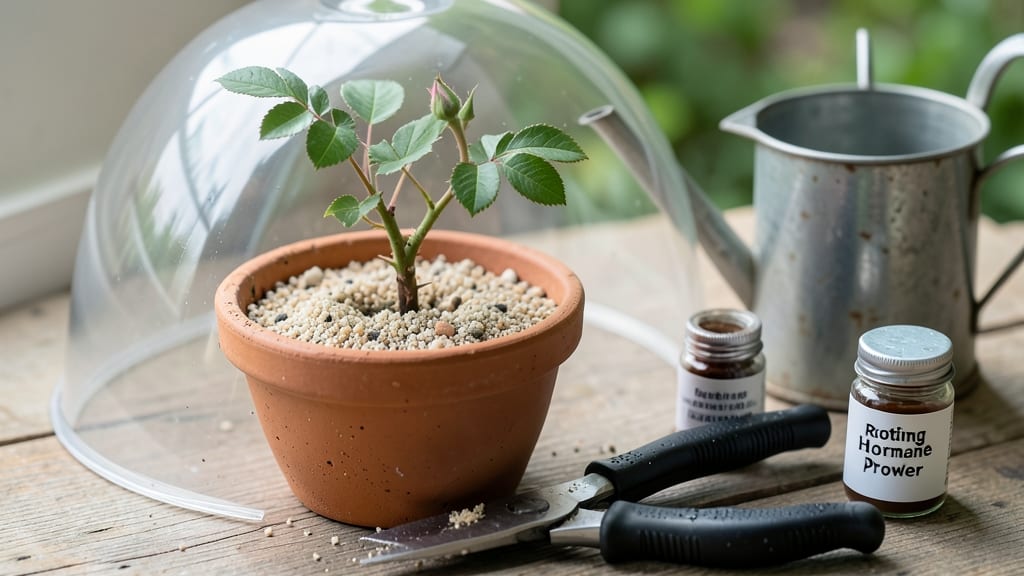
Growing a rose bush from a store-bought stem is easier than you think—especially when you know the right tricks. 🌹 I've rooted dozens of cut roses, and the secret lies in choosing healthy stems, timing the cut just right, and giving them the perfect start in water or soil.
Most people assume it won't work, but with patience, you can turn a $5 bouquet into a thriving plant that blooms for years.
Start with 5-6 inch cuttings from the base of the stem (avoid the top florals—they won't root). Remove lower leaves, dip the cut end in rooting hormone (optional but helpful), and place it in water or moist soil.
The key is keeping it bright but indirect and maintaining consistent moisture. Within 3-6 weeks, you'll see tiny roots forming—a sign your cutting is taking hold.
Once rooted, transplant carefully into pots with well-draining soil and gradually introduce it to outdoor conditions. By next spring, your new rose bush will reward you with bold blooms and the satisfaction of growing something from nothing.
The best part? You'll save money and grow varieties you'd never find at nurseries.
This method works best in spring or early summer, but even winter cuttings can root with extra care. Just be patient—some stems take longer, and that's normal. With the right approach, you'll have a living souvenir from every bouquet you receive.
📚 In This Guide
- What you need
- Instructions
- Tips and common mistakes
- Wrapping up and next steps
What you need
- ● Healthy rose stem: A fresh, store-bought rose stem with at least 3-5 leaf nodes (the small bumps where leaves grow). Avoid stems with blooms or wilted leaves.
- ● Sharp pruning shears or scissors: Clean and sterilized to make a 45-degree angle cut just below a leaf node.
- ○ Rooting hormone (optional but recommended): A powder or gel to boost root growth (e.g., Rootone or Clonex).
- ● Small propagation container: A 4-6 inch pot with drainage holes or a clear plastic cup with drainage holes punched in the bottom.
- ● Well-draining potting mix: A blend of 50% perlite or sand and 50% peat moss or coconut coir to prevent rot.
- ● Plastic bag or humidity dome: To create a mini greenhouse effect (e.g., a ziplock bag with holes or a clear plastic lid).
- ● Spray bottle with water: For gentle misting to keep the cutting hydrated.
- ● Rubbing alcohol (70% or higher): To sterilize tools and cut ends.
- ○ Heating mat (optional): A bottom heat source (70-75°F) can speed up rooting.
- ● Fertilizer (low-dose): A balanced liquid fertilizer (5-5-5) diluted to half-strength after roots form.
- ● Grow lights or bright window: A south-facing window or LED grow light (12+ hours/day) for indirect light.
- ● Label or marker: To track your rose variety and planting date!
Step-by-Step instructions for propagating a rose bush from a store-bought stem
Here's how to transform a single cut rose into a thriving bush—no green thumb required!
🌱 Step 1: Select and Prepare the Perfect Stem
Choose a healthy rose stem with at least 3-5 nodes (those small bumps where leaves grow) and no flowers or buds. The stem should be about 6-12 inches long and pencil-thick. Remove all leaves except the top two, trimming them in half to reduce water loss. This is the moment that matters: your success starts with a strong, disease-free stem.
Cut just below a node at a 45-degree angle using clean, sharp scissors or pruners. This angled cut increases surface area for root growth. Dip the cut end in rooting hormone (if using) to encourage faster root development. I know it seems counterintuitive to cut a beautiful rose, but trust me—this is the foundation of your future bush.
💧 Step 2: Create the Ideal Rooting Environment
Fill a small container (like a 6-inch pot or even a plastic cup) with well-draining potting mix, leaving about 1 inch of space at the top. Moisten the mix until it’s damp but not soggy—think of a wrung-out sponge. Insert the prepared stem 2-3 inches deep, ensuring at least two nodes are buried below the soil surface. This depth encourages roots to form along the buried portion.
Place the container in a bright, indirect light spot (no direct sun yet). Cover the entire setup with a clear plastic bag or humidity dome to trap moisture and warmth. This creates a mini greenhouse effect that speeds up rooting. Check the soil every 2-3 days—it should stay consistently moist but never waterlogged. Overwatering now will drown your cutting before roots form.
☀️ Step 3: Monitor and Encourage Root Growth
After 4-6 weeks, gently tug on the stem—if there’s resistance, roots are forming! You’ll also notice new growth at the top, signaling success. This is the moment that proves your patience paid off. If the stem wilts or turns yellow, it’s not rooted yet—give it another 2-3 weeks before judging.
Once roots establish, gradually acclimate the cutting to open air by removing the plastic for 30 minutes daily, increasing time each week. After 2-3 weeks, the plant should be fully hardened off. You’ll see stronger stems and deeper green leaves—your rose is ready for its new home in the garden or a larger pot.
✂️ Step 4: Transplant and Care for Your New Bush
Transplant your rooted cutting into a 6-inch pot filled with garden soil mixed with compost or a well-draining potting mix. Water deeply to settle the soil and encourage root spread. Place the pot in full sun (6+ hours daily) and keep the soil consistently moist but not soggy. This is where your rose’s strength builds—don’t skimp on sunlight now.
Fertilize lightly with a balanced, water-soluble fertilizer (10-10-10) every 4-6 weeks during the growing season. Prune any leggy growth to encourage bushier development. Within 1-2 years, your store-bought stem will mature into a full, blooming rose bush—proof that even the simplest cuttings can become something extraordinary.
Tips & tricks for propagating roses from store-bought stems
Transforming a single rose stem into a thriving bush is easier than you think—here are my favorite tricks to maximize success!
Selection is Everything: Look for stems with vibrant green leaves and no signs of disease or wilting. The 3-5 nodes mentioned in Step 1 should be plump and evenly spaced. I've found that stems with smaller leaves often root more quickly—nature's way of conserving energy! The key is choosing stems that look like they're still actively growing, not those wilted bouquet rejects.
Rooting Hormone Hack: While rooting hormone isn't strictly necessary, it dramatically increases success rates—especially for beginners. I've seen rooting rates jump from 50% to nearly 90% when using it. If you don't have it, crush a few aspirin tablets into powder and dip your cut end instead. The salicylic acid in aspirin mimics rooting hormone's effects. Just make sure your cutting is completely dry before dipping!
Lighting Secrets: That "bright, indirect light" in Step 2 can be tricky to visualize. Think of it as the light you'd get under a sheer curtain on a sunny day—enough to see clearly but without harsh shadows. South-facing windows work best in northern hemispheres. For indoor growers, a simple LED grow light on a timer (12-14 hours daily) works wonders. I've even used bathroom vanity lights with warm bulbs in a pinch!
The Plastic Bag Technique: When covering your cutting in Step 2, leave a small gap at the top—about the width of your finger—to allow for air circulation. This prevents mold growth while maintaining humidity. I like to secure the bag with a rubber band and make a tiny slit to let excess moisture escape. Pro tip: Mist the inside of the bag occasionally to increase humidity without overwatering the soil.
Pro Tips for Can I Grow A Rose Bush From A Cut Rose
- Transforming a single rose stem into a thriving bush is easier than you think—here are my favorite tricks to maximize...
- Selection is Everything: Look for stems with vibrant green leaves and no signs of disease or wilting. The 3-5 nodes m...
- Rooting Hormone Hack: While rooting hormone isn't strictly necessary, it dramatically increases success rates—especia...
Frequently asked questions
Got questions about growing a rose bush from a cut rose? You’re not alone! Here are some of the most common queries—and their answers—to help you succeed:
Can I grow any rose from a cut rose?
Not all roses root easily. Hybrid teas, floribundas, and grandifloras often work best, while spray-painted or heavily treated roses (like grocery store bouquets) usually fail. Look for healthy, woody stems with 3–5 buds and minimal chemical treatments for the best chance.
How long does it take for a cut rose to root?
Patience is key! In water, roots may appear in 2–4 weeks, while soil propagation can take 4–12 weeks. Once roots form, transplanting to soil (or a larger pot) takes another 2–4 weeks for full establishment. Cold weather slows growth, so spring or summer is ideal.
What if my cut rose won’t root in water?
Don’t give up! Try these fixes:
- Change the water every 2–3 days to prevent bacteria.
- Use a clear jar to monitor root growth.
- Add a rooting hormone (like willow water or cinnamon) to boost success.
- Switch to soil propagation if roots stall after 4 weeks.
Can I plant a rooted cut rose directly in the ground?
Yes, but wait until roots are 1–2 inches long and the stem shows signs of new growth. Harden off the cutting by placing it in partial shade for a week before transplanting. Choose a sunny spot with well-draining soil, and water deeply after planting to reduce shock.
Why did my rose cutting rot instead of root?
Rotting usually means too much moisture or bacteria. Avoid overcrowding cuttings in water, and trim any mushy or blackened stems immediately. Use sterilized scissors, fresh water, and a shallow container (like a glass) to prevent contamination. If mold appears, discard the cutting and start fresh.
Wrapping up and next steps
Growing a rose bush from a cut rose is not only possible—it’s a rewarding way to breathe new life into a bouquet!
With patience, the right techniques, and a little care, you can nurture a thriving plant from a single stem. Start small, stay consistent, and soon you’ll be enjoying homegrown roses that carry the memories of your favorite blooms.
Ready to take the next step? Try propagating a few stems today—your future rose garden awaits! 🌸