
Pruning
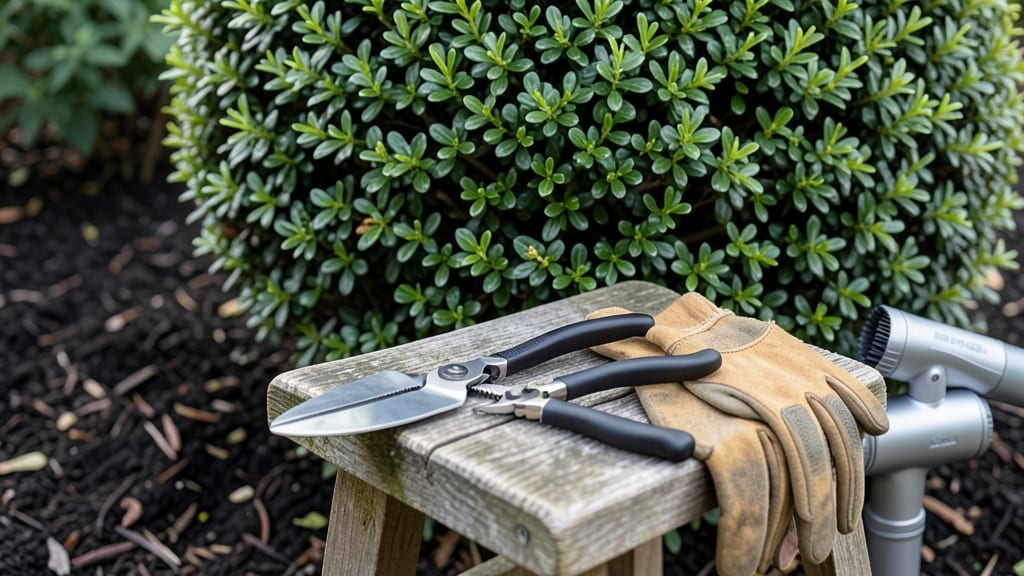
Trimming boxwood bushes at the best time ensures they stay thick, healthy, and full all season long—here’s the exact window you’ve been missing.
Struggling to keep your boxwood bushes lush and full? Timing your trims perfectly can make the difference between healthy growth and stunted shrubs—here’s the science-backed secret most gardeners miss.
Late winter or early spring, just before new growth appears, is the ideal window for trimming. This timing encourages fuller bushes and avoids damage from harsh winter conditions or summer stress.
In this guide, you’ll discover the precise seasonal timing tailored to your climate zone, the right tools to use, and step-by-step techniques to promote thicker, more vibrant boxwood growth year after year.
Why late winter is the optimal time to trim boxwood bushes
If you’ve ever wondered why your boxwood bushes look thin or leggy, the answer likely lies in when (and when not) you trim them.
Most gardeners make the mistake of pruning at the wrong time, often in late summer or early fall, which can leave boxwoods vulnerable to winter dieback and sunburn damage. The secret to lush, full boxwoods? Late winter trimming—here’s why it works so well.
Boxwoods enter dormancy in late fall, a natural state where growth slows to conserve energy. This dormancy period is crucial because it allows the plant to recover quickly from pruning once temperatures rise.
Trimming in late winter (just before new growth begins) removes dead or damaged branches while stimulating fresh, vibrant shoots. Think of it as giving your boxwoods a fresh start before the growing season kicks in.
Here’s the biological magic behind late winter trimming: when you prune during dormancy, you’re encouraging new growth from buds that are already formed but dormant. This results in denser foliage and a neater shape without the stress of summer heat or winter cold.
Plus, it prevents the sunburn risk that comes from exposing fresh cuts to harsh winter sun.
Another critical reason is avoiding winter dieback. If you trim boxwoods in late summer or fall, the fresh cuts won’t have time to harden off before winter. This leaves them susceptible to freeze damage and fungal infections, which can weaken or even kill the plant.
Late winter trimming ensures cuts heal properly before the growing season.
| Timing | Benefits | Risks |
|---|---|---|
| Late Winter (Feb-March) | Stimulates new growth, avoids sunburn, promotes density | Minimal risk if done before buds swell |
| Early Spring (April) | Encourages rapid growth, good for shaping | New growth may be damaged by late frosts |
| Summer (June-August) | Minor touch-ups possible | High risk of sunburn, stress, and fungal issues |
| Fall (Sept-Nov) | Avoid unless necessary | Cuts won’t heal before winter, risk of dieback |
Late winter also aligns perfectly with USDA hardiness zones. In colder regions (zones 3-6), trimming in February or early March gives boxwoods enough time to recover before the last frost.
In warmer zones (zones 7-10), you can extend this to late March or early April, but always wait until after the coldest period has passed.
One of the biggest misconceptions is that boxwoods need heavy pruning to stay full. In reality, they respond best to light, strategic trims that remove no more than 1/3 of the foliage at a time.
Late winter is ideal because it lets you shape the bush while the structure is still visible, making it easier to see where cuts should go. This precision leads to neater, fuller growth without the shock of aggressive pruning.
If you’ve ever seen boxwoods with brown, crispy edges after winter, that’s a clear sign of sunburn from improper trimming. When you prune in late winter, you’re avoiding this issue entirely.
The plant’s dormant state means it’s not actively photosynthesizing, so cuts won’t be exposed to harsh sunlight until the bush is ready to recover and regrow.
For best results, pair late winter trimming with a light fertilization in early spring. This combo ensures your boxwoods have the energy to bounce back from pruning and grow thicker and healthier than ever. Just avoid heavy fertilizers—stick to a balanced 10-10-10 formula to prevent burning the roots.
So next time you’re tempted to grab your shears in summer or fall, remember: late winter is the golden window for boxwood trimming. It’s the science-backed way to keep your bushes lush, full, and resilient year after year.
Your boxwoods will thank you with vibrant green foliage and a neat, manicured look that’s the envy of the neighborhood.
Step-by-step guide to trimming boxwoods for maximum growth
Trimming boxwoods at the right time transforms them from scraggly shrubs into dense, lush hedges. The key? Precision timing and technique. Late winter—just before new growth begins—is your golden window, but regional climates shift this timeline.
For USDA Zones 5-7, aim for February to early March, while warmer zones (8-10) can trim as late as January. This timing prevents winter dieback and encourages vigorous spring regrowth.
Before grabbing your shears, gather the right tools: sharp bypass pruners for clean cuts, hand pruners for small branches, and a hedge trimmer for uniform shapes. Avoid dull tools—they crush stems, inviting disease.
Wear gloves to protect against boxwood’s spiny edges and sanitize blades with rubbing alcohol to prevent spreading fungal spores. Pro tip: Trim on a dry, overcast day to reduce stress on the plant.
🌿 Step-by-Step Trimming Guide
-
Step 1: Mark Your Calendar
Trim 6-8 weeks before your last frost date (e.g., late February in Zone 6). Adjust 1-2 weeks earlier in colder zones (3-4) to avoid frost damage. -
Step 2: Inspect for Damage
Remove dead or diseased branches first—cut 1/4 inch above a healthy bud or lateral branch. Look for brown, mushy stems (signs of volutella blight). -
Step 3: Shape with Purpose
For formal hedges, trim 1/3 of the new growth to maintain shape. For natural shapes, remove only overgrown branches to open the center. Never trim more than 1/3 of the plant at once. -
Step 4: Thin for Airflow
Prune interior branches to improve air circulation, reducing humidity that fuels fungal diseases. Aim to remove 20-30% of dense growth in the center. -
Step 5: Clean Up
Rake up clippings to prevent soil-borne diseases. Dispose of diseased branches in the trash (not compost). Mulch the base with 2-3 inches of shredded bark to retain moisture.
After trimming, boxwoods reward you with thicker foliage by summer. The secret? You’re encouraging multiple buds to grow where you cut.
For dwarf varieties, like 'Green Velvet', trim just the tips to maintain compact size. Standard varieties, like 'American Holly', can handle heavier pruning but still thrive with annual shaping.
Avoid trimming in fall—new growth won’t harden off before frost, leaving them vulnerable to winter burn.
For regional adjustments, Southern gardeners (Zones 8-10) can trim year-round with minimal risk, but stick to dormant season for best results. In Zone 4 or colder, delay until mid-April to avoid late frosts.
Always observe your boxwood’s growth patterns: If buds swell by March 1, it’s time to trim. Patience here pays off—over-trimming stresses the plant, while under-trimming leads to leggy, sparse growth.
Protect your investment with post-pruning care. Water deeply once a week for the first month after trimming to support recovery. Apply a balanced fertilizer (10-10-10) in early spring to fuel new growth. Monitor for pests like boxwood leafminers—if you spot tunneling larvae, treat with neem oil promptly.
With the right timing and technique, your boxwoods will reward you with year-round greenery and a manicured look that turns heads.